 158 29
Auto-assignments are directly connected to rules in the Automations section.
To balance team workloads more effectively, you can set up specific auto-assignment settings for individual agents. This includes activating auto-assignment when agents are available and deactivating it on their days off.
By configuring these settings, you can ensure that tasks are assigned only to those who are present and capable of handling them, preventing any unnecessary delays or bottlenecks.
Main examples of using auto-assignments
1. Exclude agents from auto-assignment in a team
Specific agents can be excluded from the auto-assignment process within a team. This is useful for managers or roles that should not be overloaded with tickets.
2. Permanently deactivate auto-assignment for a user
Auto-assignment can be completely turned off for an individual user, ideal for scenarios like holidays. This way, they receive no new tickets and can fully disconnect.
Also, auto-assignment settings can be adjusted for each team individually.
Note that an agent’s profile setting will always override team settings, so if an agent deactivates auto-assignment in their profile, they won’t be assigned tickets.
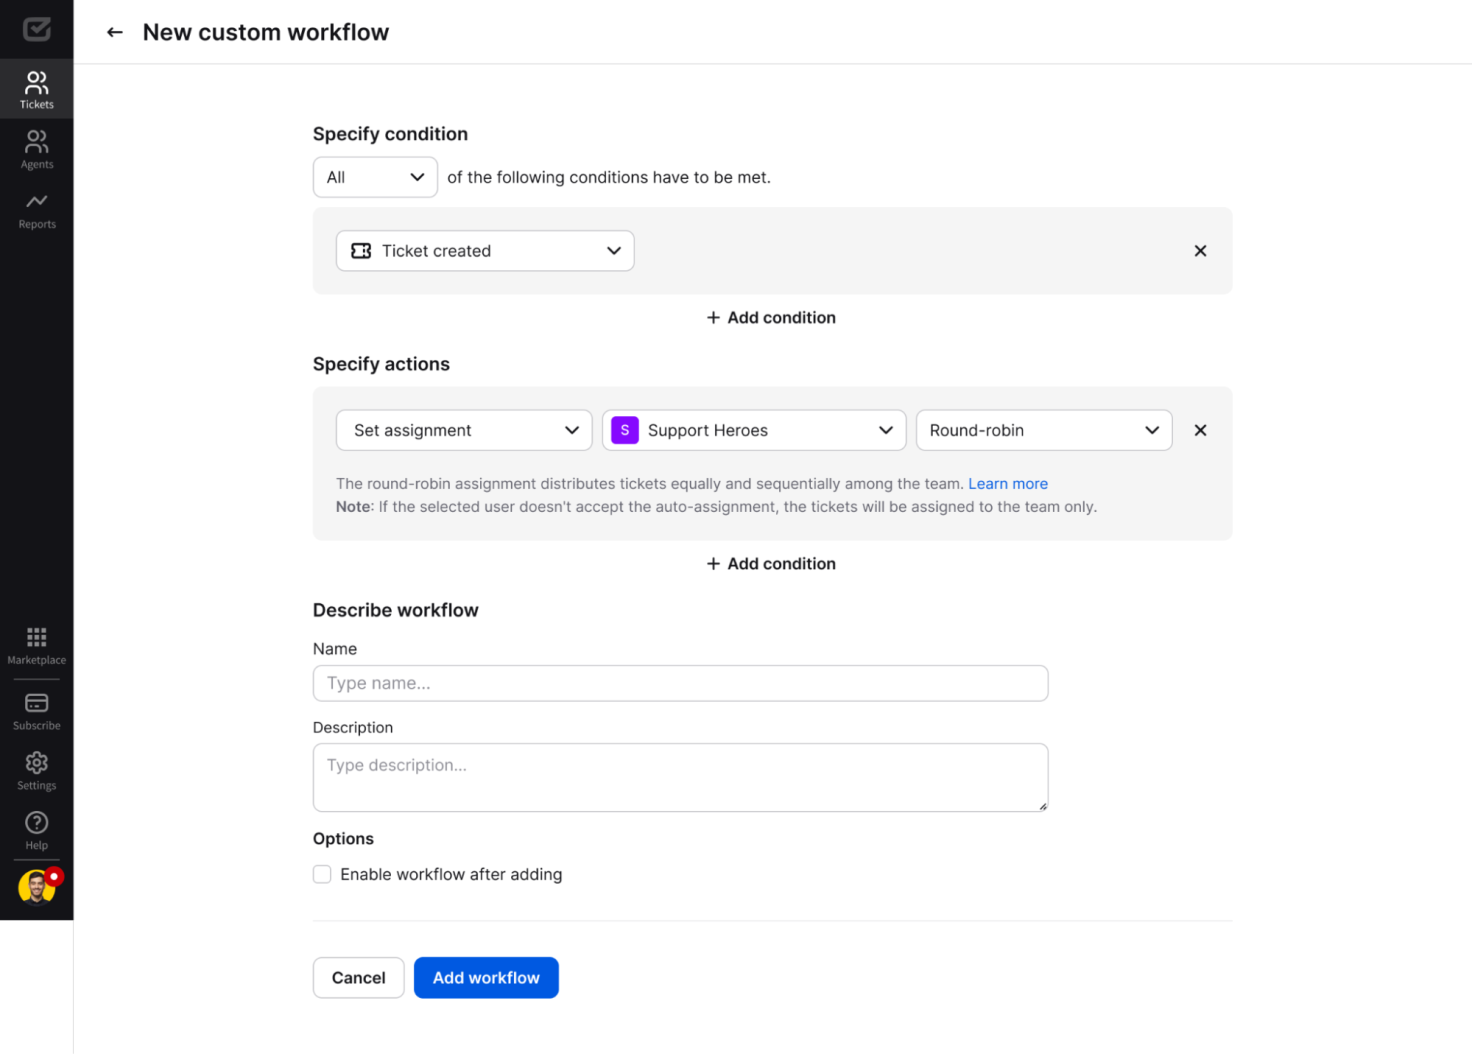
3. Assign using the round-robin option
The round-robin option can be implemented in rules to distribute the workload evenly among agents. Each new ticket is assigned to the next agent in the sequence, preventing any single agent from being overloaded.
How to set up auto-assignments
There are three types of auto-assignments that you can select directly from the list of actions within the rules:
-
Round-robin
-
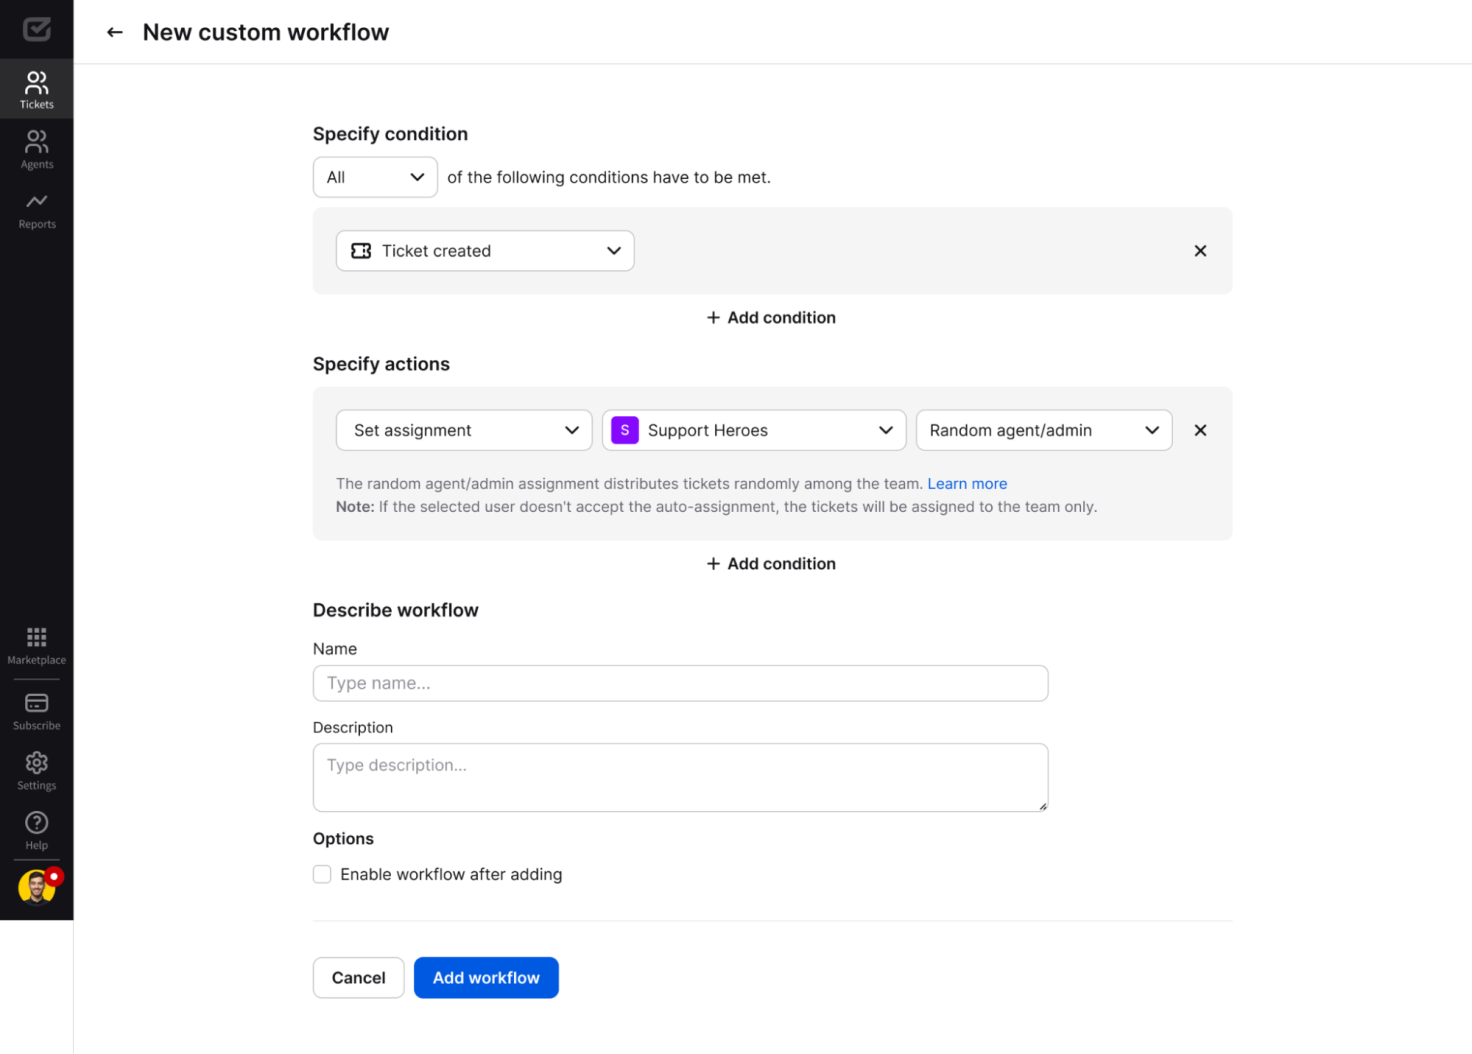
Random agent/admin
-
Specific agent
Round-robin
The round-robin assignment distributes tickets equally and sequentially among the team
Random agent/admin
The random agent/admin assignment distributes tickets randomly among the team.
Specific user
The specific agent/admin selected from the list will be assigned to the ticket.

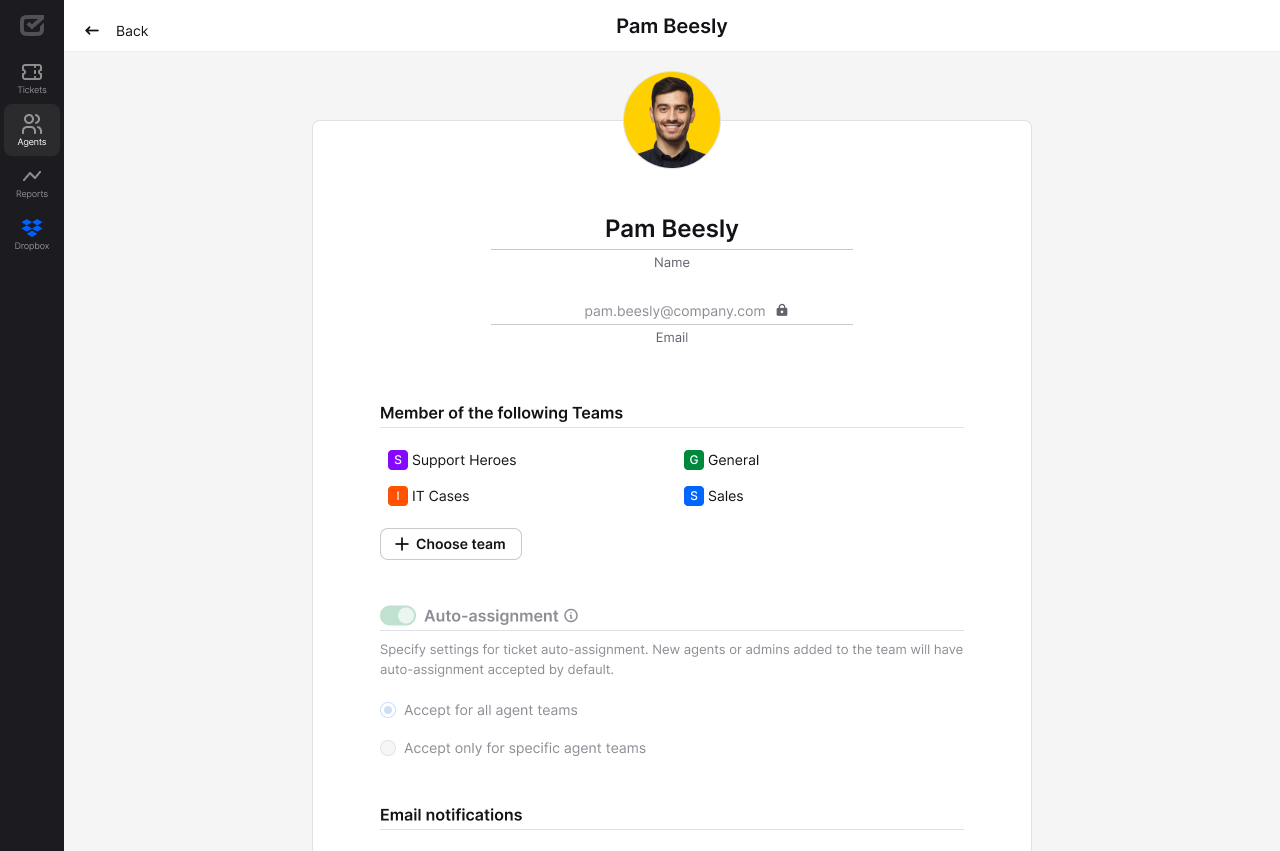
Set up auto-assignment in the user profile settings
The auto-assignment settings in the user profile settings serve as the master control.
The admin can change these settings for other admins and agents.
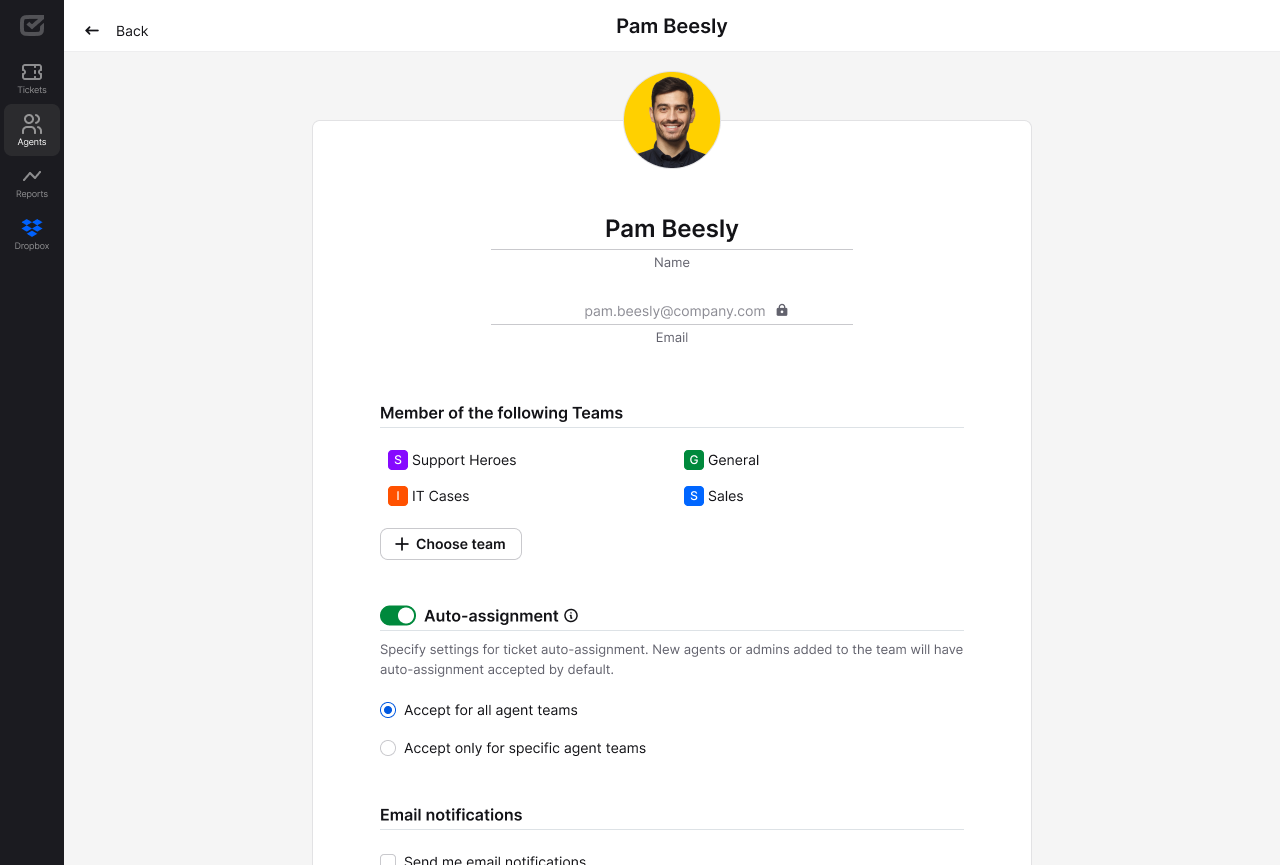
Auto-assignment activated in the user profile settings – accept for all agent teams
Tickets won’t be automatically assigned to an agent unless they activate the master setting for auto-assignment in their profile.
When an agent activates auto-assignment in their profile settings, tickets will be assigned to them according to the team auto-assignment rules.
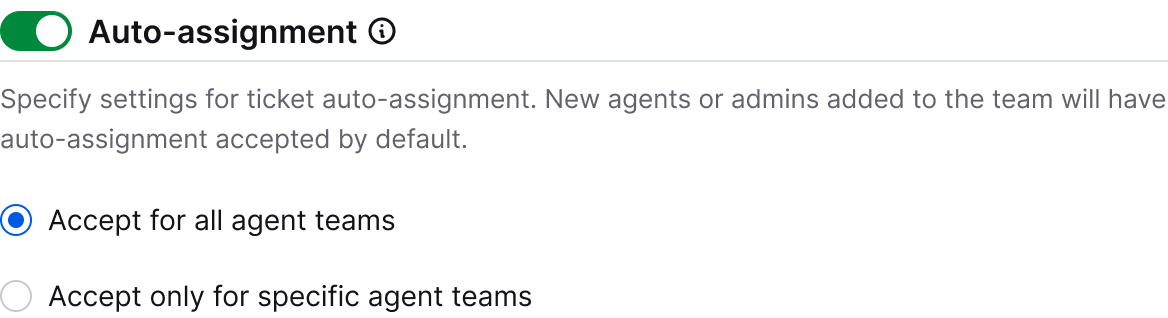
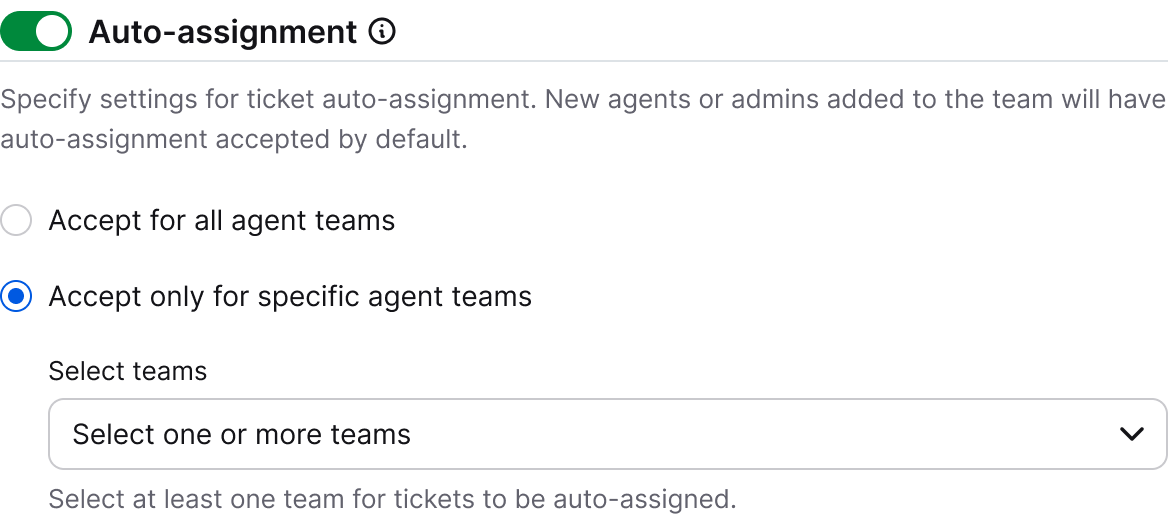
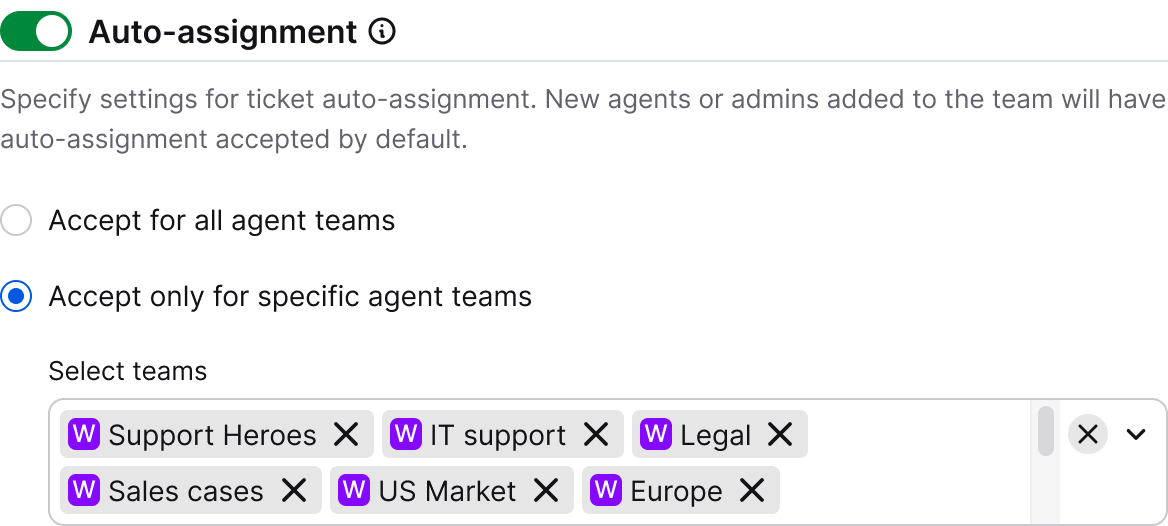
Auto-assignment activated in the user profile settings – accept only for specific agent teams
Select one or more teams within which the agent will be assigned tickets. The list will only show teams the agent is a member of.
Auto-assignment deactivated in the user profile settings
With auto-assignment deactivated, the agent won’t be assigned to any tickets through rules.

Auto-assignments and a viewer role
Viewers can’t be auto-assigned to tickets, which is why auto-assignment settings are deactivated.
When a user’s role changes from viewer to agent/admin, the auto-assignment setting will be “Accept for all agent teams.”
Set up auto-assignment in the team settings
The auto-assignment settings in the team settings automatically assign tickets as part of your active rules.
Only admins can change the settings for each user on the list.
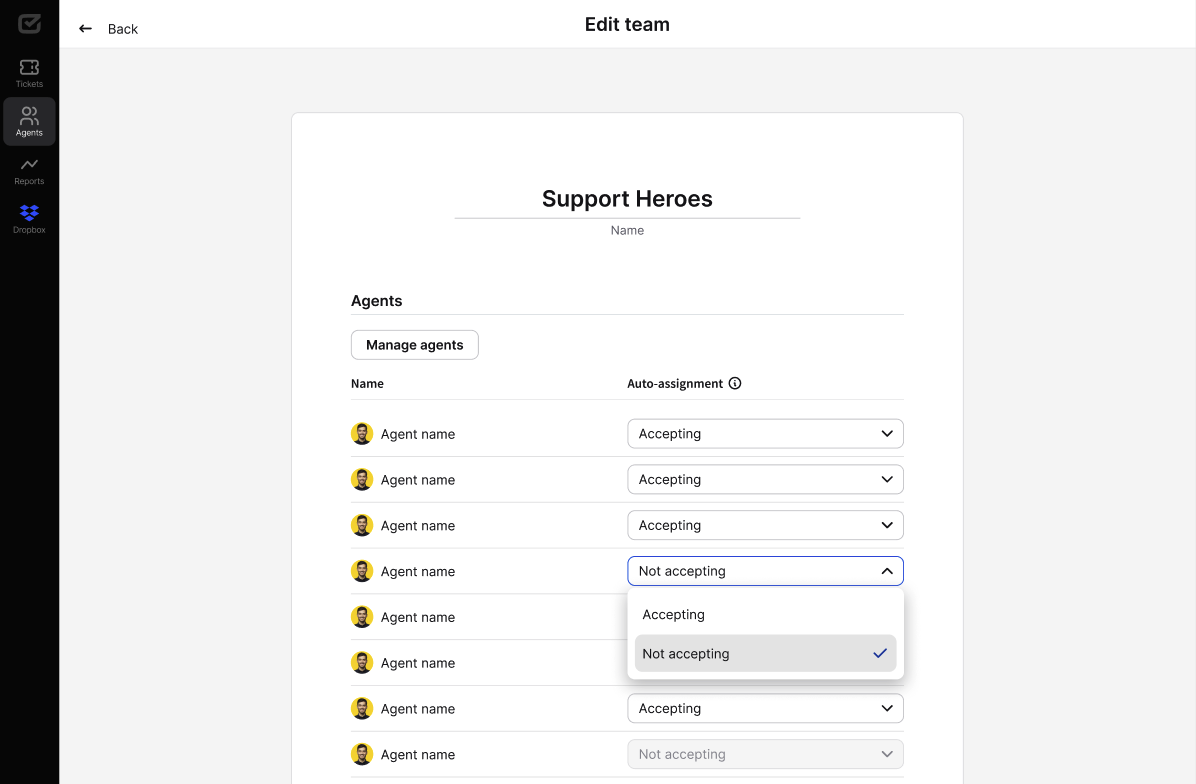
If an agent has an auto-assignment status of “Auto-assignment is deactivated in the agent profile, this means that the agent has deactivated the auto-assignment setting in their profile. When they activate this setting, they’ll start accepting auto-assignment tickets right away, as shown in the setting in the graphic.


