Discover HelpDesk.com from every angle and bring all customer tickets to a successful end.
Let's get startedThis is the very start of your journey with HelpDesk.com. You don't have to look around and dig into the app yourself to get started. Let's make it quick and smooth, what do you say?
We gathered together all our hints, techniques, and best practices into one handbook. After reading it, you'll be ready to move on to the real action. We'll cover topics like:

Connecting communication channels

Setting up the HelpDesk.com
account

Managing everyday ticketing work

Enhancing teamwork and task
management

Speeding up work and automation

Reporting and tracking performance

Tips to improve customer satisfaction
HelpDesk.com is ticketing software that's part of our product suite, right next to LiveChat, ChatBot.com, and KnowledgeBase.
HelpDesk.com can help you manage asynchronous and synchronous customer conversations in one place.
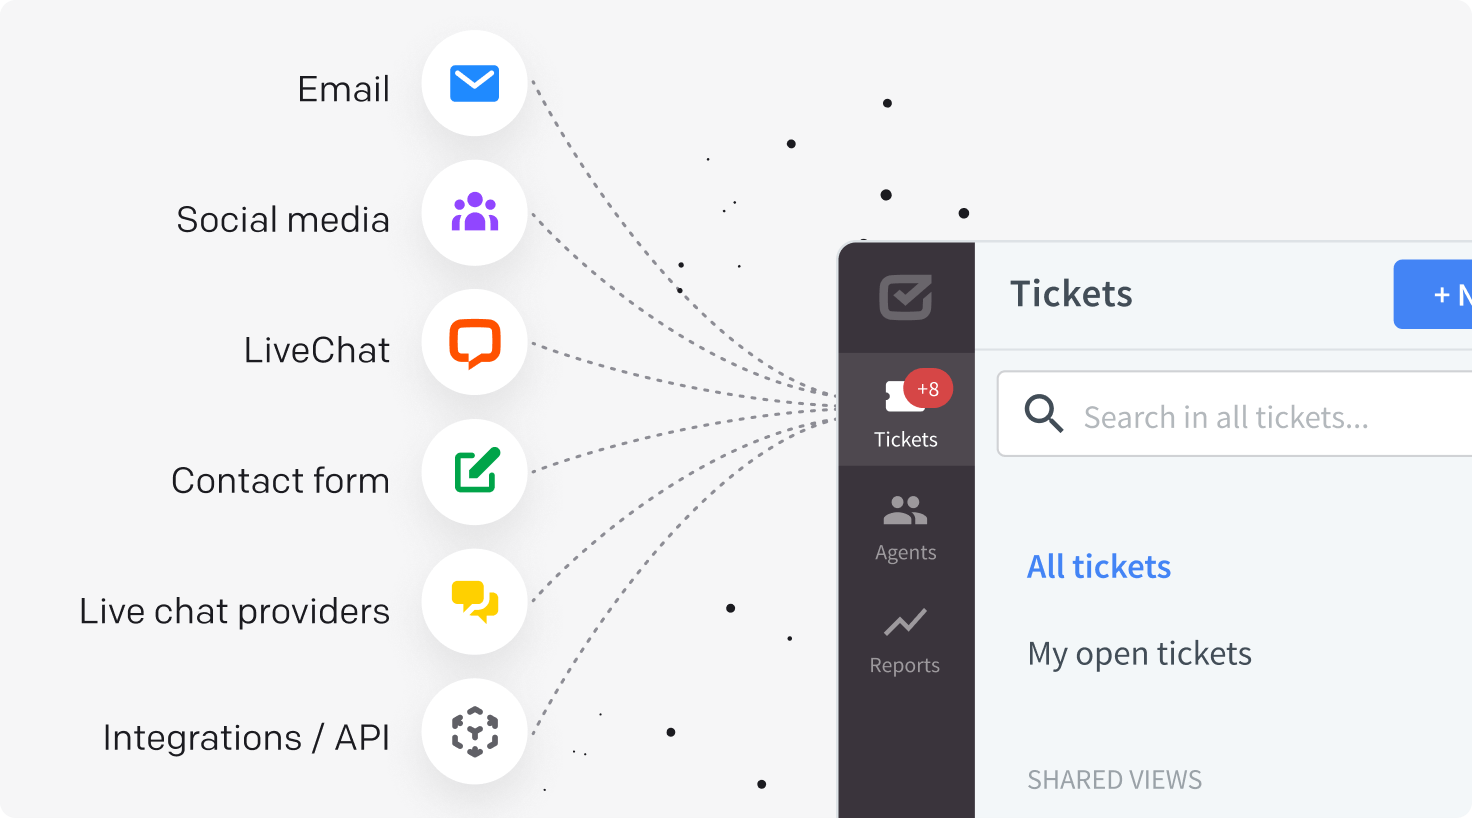
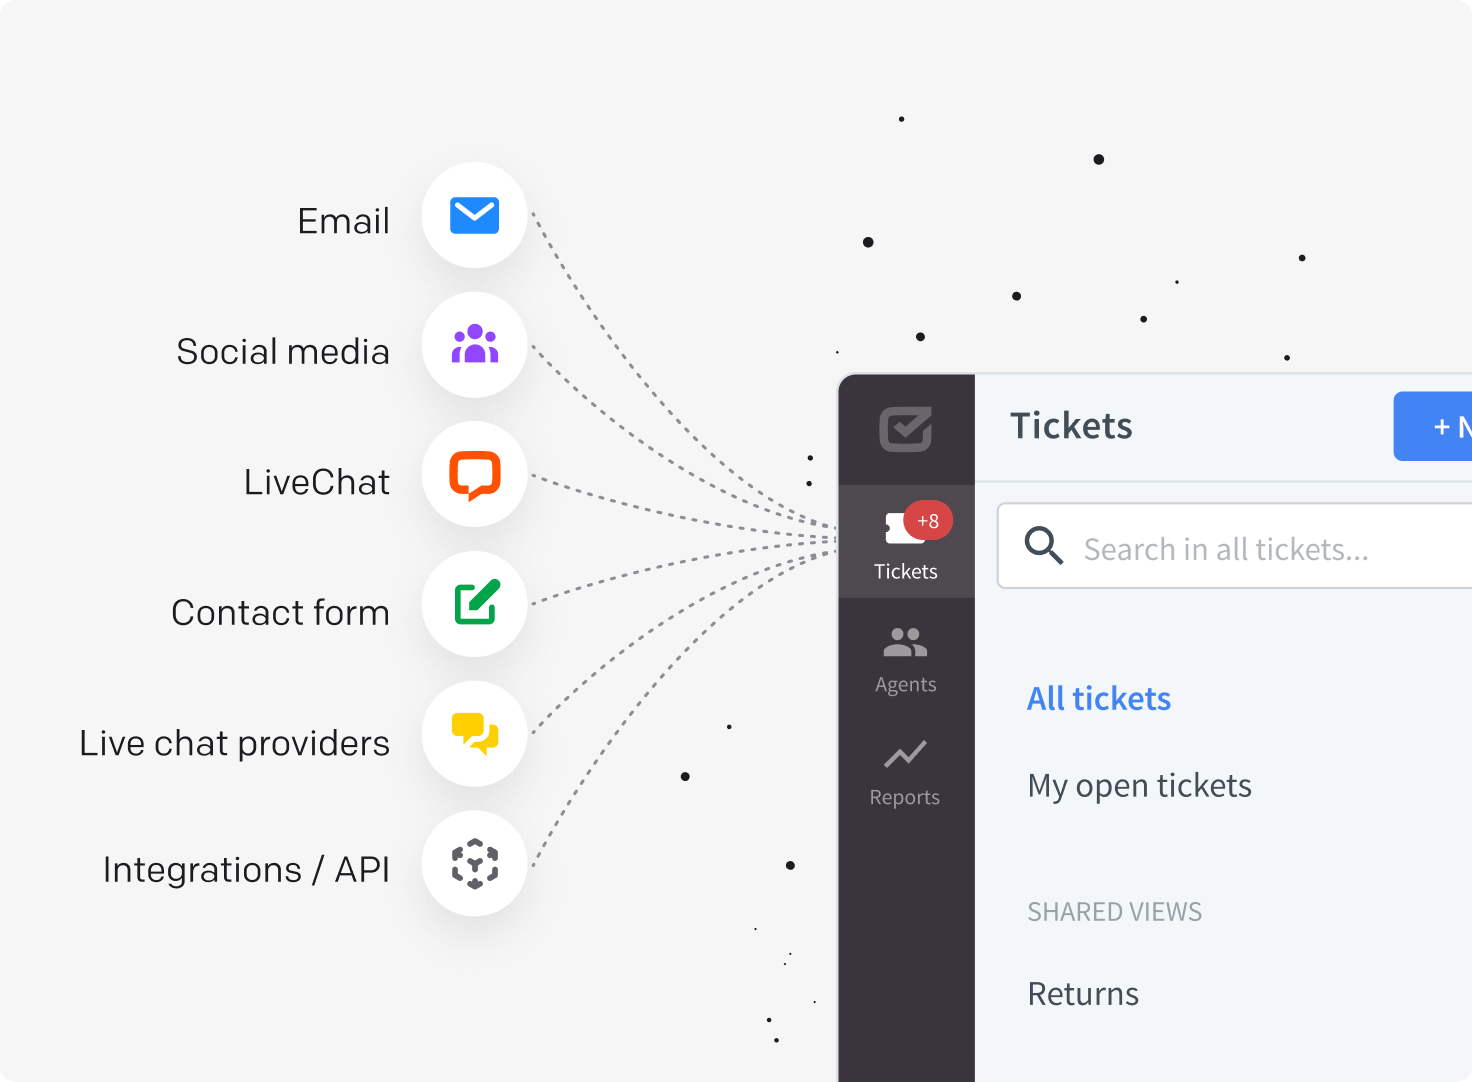
Connect HelpDesk.com to your customer's communication channels, such as email, live chat, social media, contact forms, and other custom contact points.
The main idea behind HelpDesk.com is to make your customer service actions transparent and organized with a single dashboard, where all customer messages drop in the form of tickets.
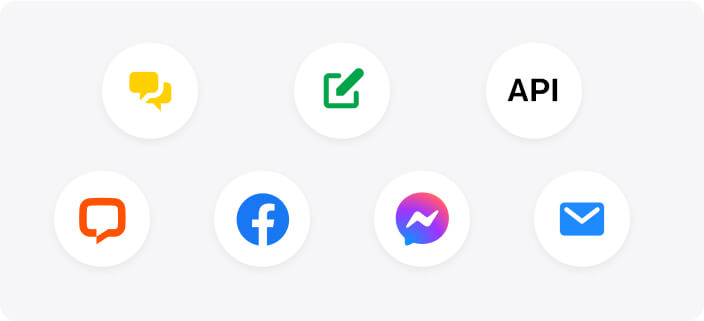
Communication channels are options that customers can use to contact you, make a request, or ask for support on an issue. We also call them ticket sources because all messages are converted into manageable tickets regardless of the channel.
After entering our app, you should first connect all your communication channels to HelpDesk.com. This will bring all messages into one interface, as expected. To get started, think about how your customers interact with you. You can also explore brief manuals for the communication channels that are most often connected to HelpDesk.com.
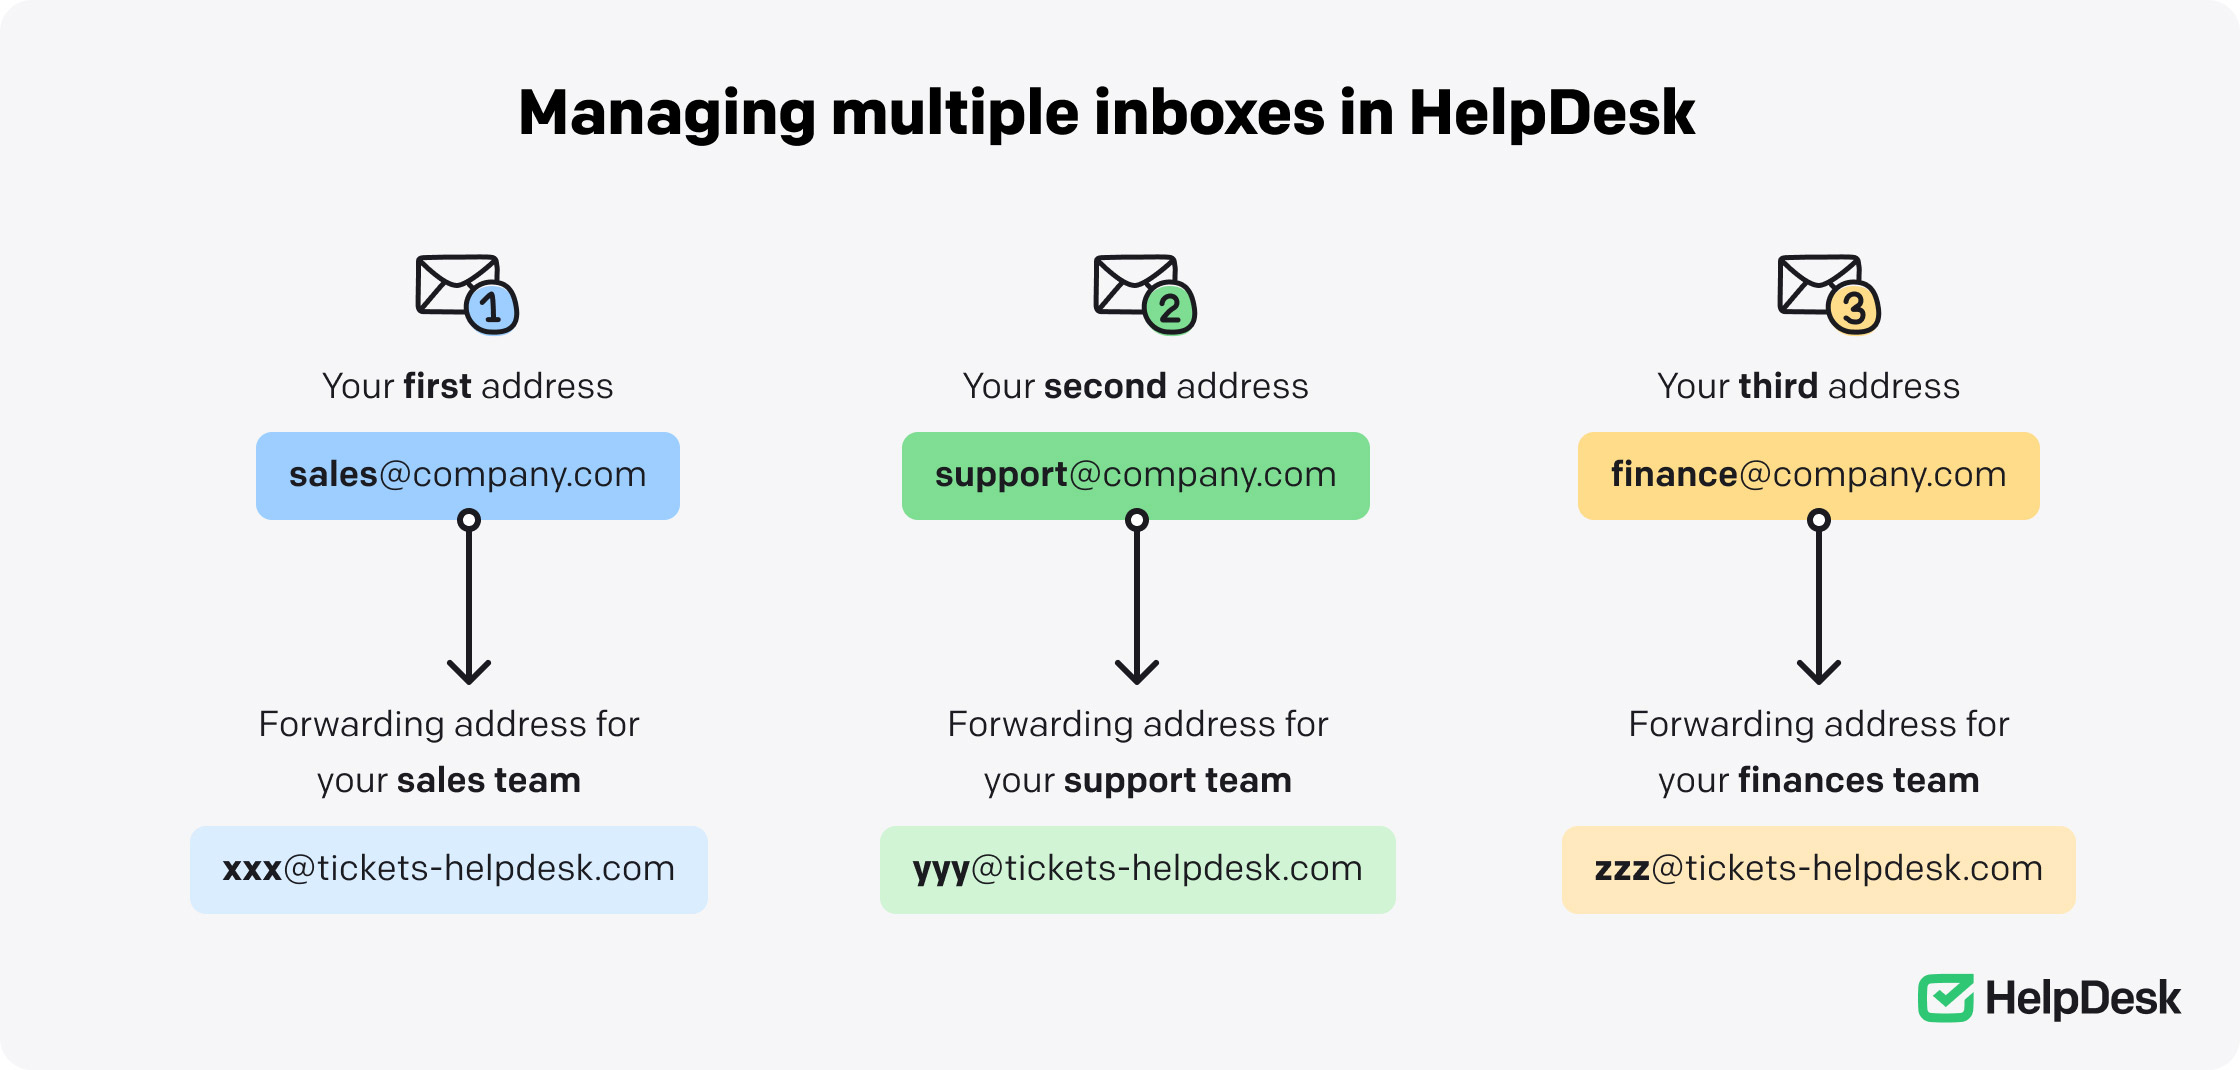
Set up forwarding so that copies of your customer messages sent to different business email addresses will go to one place. Best of all, HelpDesk.com is compatible with all of them.
Configuration
Select the inbox provider for forwarding and click the appropriate link to follow the instructions.

Handle multiple inboxes in one place
If you're going to manage communication from multiple email addresses, the best option is to create and use separate HelpDesk.com's forwarding addresses for each email address you handle. This way, different teams, such as sales or support, can use separate email addresses but still work in one app.

Integrate your LiveChat account with HelpDesk.com to easily turn real-time chats into manageable tickets that you can resolve when it's convenient for you.
Configuration
If you're already a LiveChat user, go to the LiveChat Marketplace to find and install HelpDesk.com from there. Then, you can import your data from LiveChat to HelpDesk.com and enjoy every customer conversation in one place.
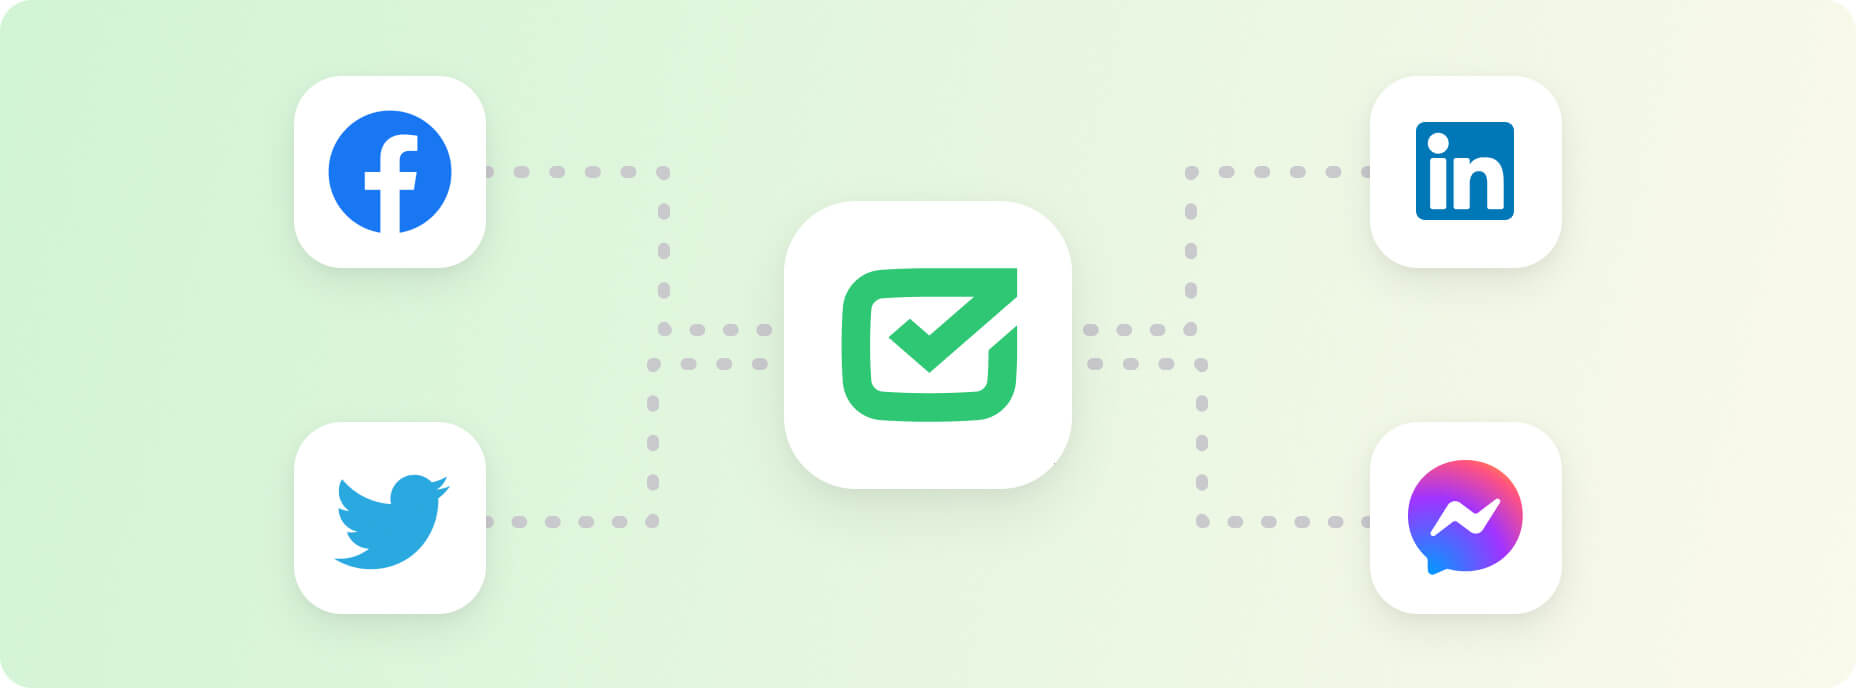
Organize daily conversations with your customers on social media channels in HelpDesk.com so you don't have to switch between profiles.
Configuration
Select social media channels to organize your communication in HelpDesk.com. Connect your social media profiles to HelpDesk.com using these three methods:
If you have a LiveChat account integrated with your HelpDesk.com, you can go to the Marketplace and easily find the social media integration you're interested in.
If you set up forwarding correctly correctly, you can edit your social media profiles by adding your email address in the relevant contact fields. That way, if a visitor to your social media profile writes you a message using that email address, it'll arrive at HelpDesk.com, where you can address it.
If you have a Zapier account, you can integrate it with your HelpDesk.com account and create Zaps dedicated to managing your social media communication.
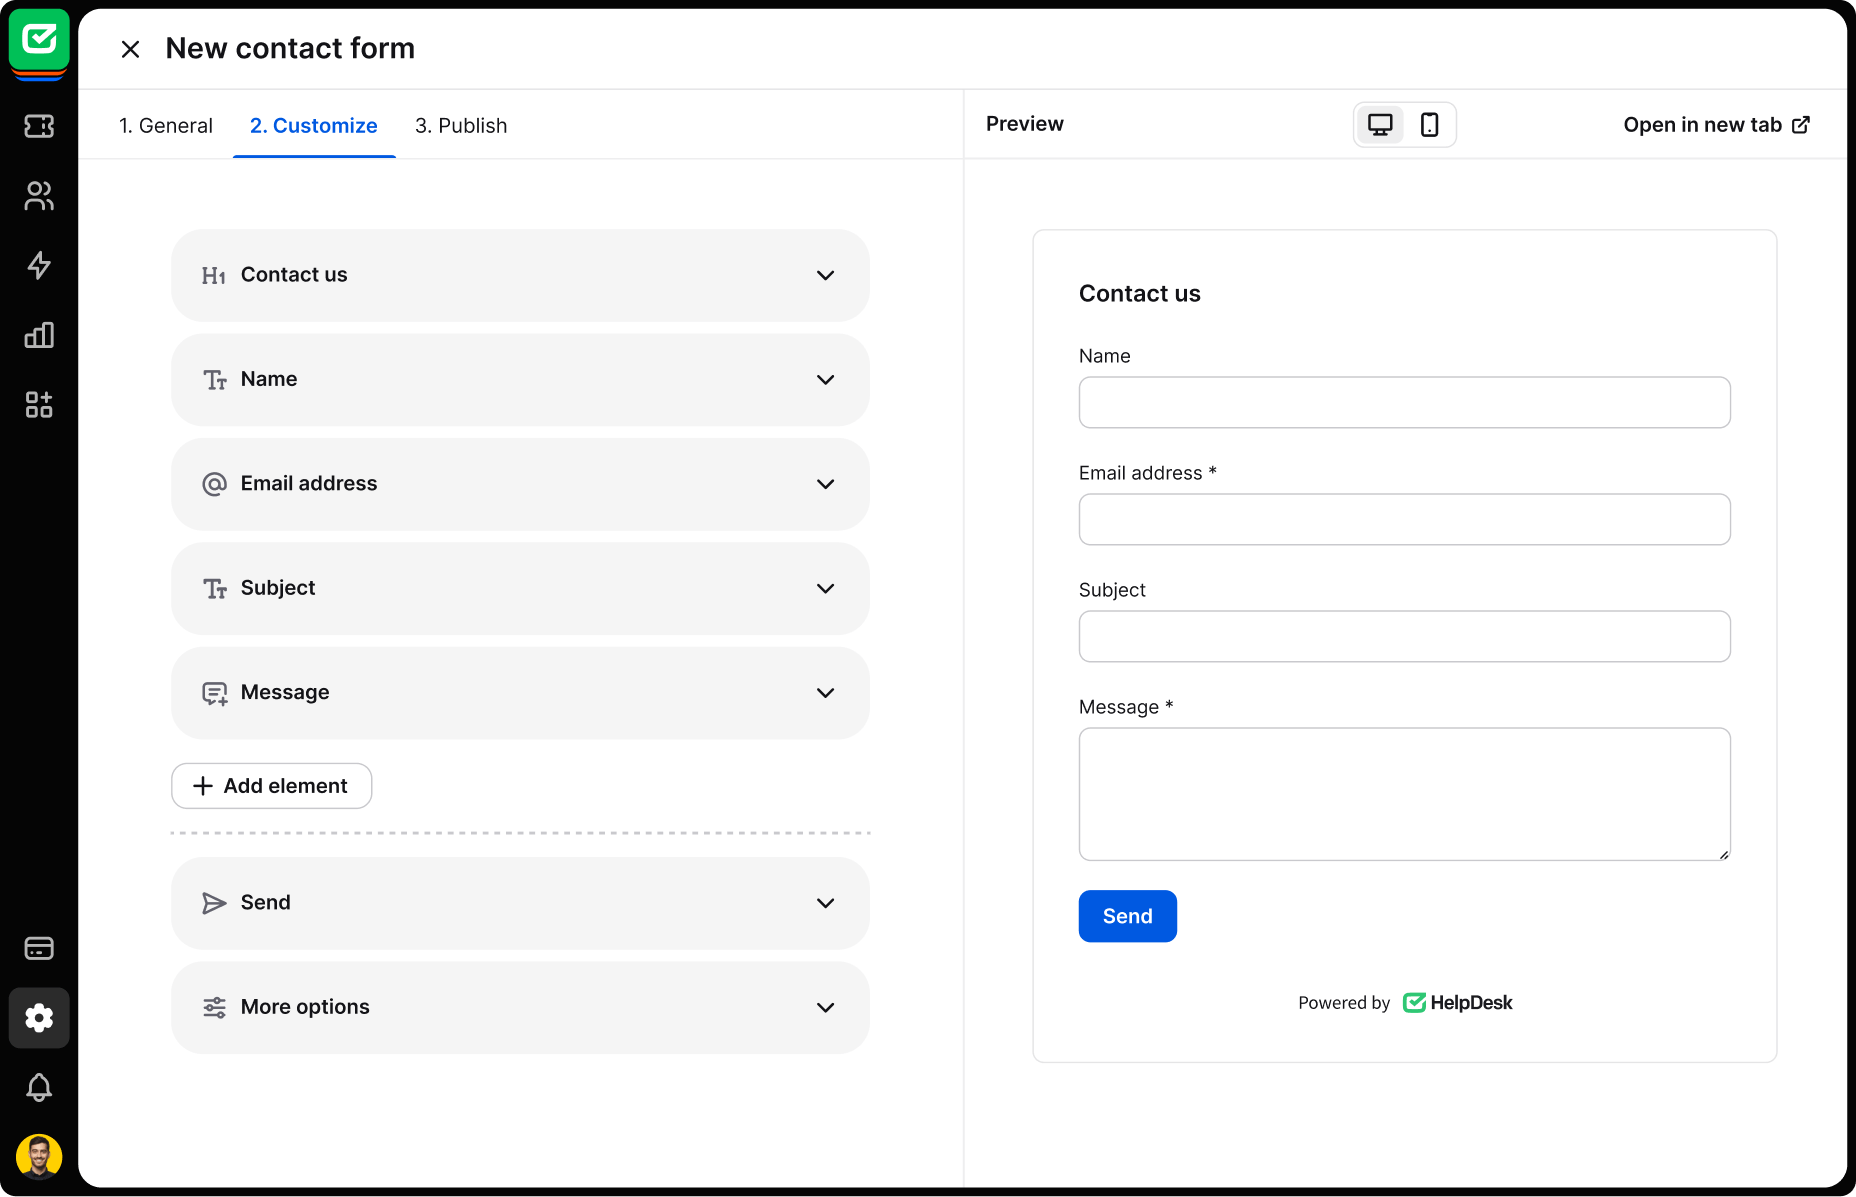
Website visitors can have questions about your offerings or business. Be approachable and give them an intuitive contact form provided by us that they can fill out in minutes.
First, create a contact form in HelpDesk.com and customize it to fit your brand and needs. Then, place it on your website and start collecting messages from your visitors.
Configuration
First, create a contact form in HelpDesk.com and customize it to fit your brand and needs. Then, place it on your website and start collecting messages from your visitors.
Enjoy the integration with HelpDesk.com even if you use a live chat provider other than LiveChat from our product suite.
Configuration
Browse the available API documentation to get the API token and acquire permanent API access for your HelpDesk.com account. Then, create webhooks and add events tailored to your needs.
If you have a Zapier account, you can integrate it with your HelpDesk.com account and create Zaps dedicated to managing your live chat conversations.

Connect with LiveChat
See how LiveChat and HelpDesk.com work together. Integrate them easily and enjoy the benefits of a powerful customer service platform.
Turn Webflow contact forms into a pipeline for customer inquiries. Send form submissions with names, emails, and messages directly to HelpDesk.com for smooth tracking.
Configuration
Connect your Webflow forms to HelpDesk.com to handle inquiries seamlessly.
Connect WordPress contact forms to HelpDesk.com and collect inquiries from your WordPress site. Use it to organize details like customer info and messages effortlessly.
Configuration
Install the HelpDesk.com contact form plugin.
Sync your Shopify store with HelpDesk.com to receive customer messages, complete with order details, all in one place.
Configuration
Connect your Shopify store with HelpDesk.com to manage shopper messages effortlessly.
Install a widget powered by OpenWidget on your website to let visitors drop off contact requests, suggestions, feedback, and bug reports using well-known forms. Customize it with your avatar, name, and welcome message.
Configuration
Go to settings and select OpenWidget from the list of channels to create a free account and install the widget linked to HelpDesk.com. Alternatively, you can visit the OpenWidget homepage, review the details, and then create an account.

Use HelpDesk.com's API to connect your favorite tools and customize your support workflow. Build a tech stack that works seamlessly with HelpDesk.com.
Configuration
Browse the available API documentation to get the API token and acquire permanent API access for your HelpDesk.com account. Then, create webhooks and add events tailored to your needs.
See all the recommended and available integrations that can streamline your workflow. If you need a custom integration, ask about its specifications on the chat.
The most challenging but crucial part is behind you. Now, it's time to configure the basic settings in your HelpDesk.com account to suit your preferences. In this section, you'll find out how to configure your profile, domain, reply address, and email template.
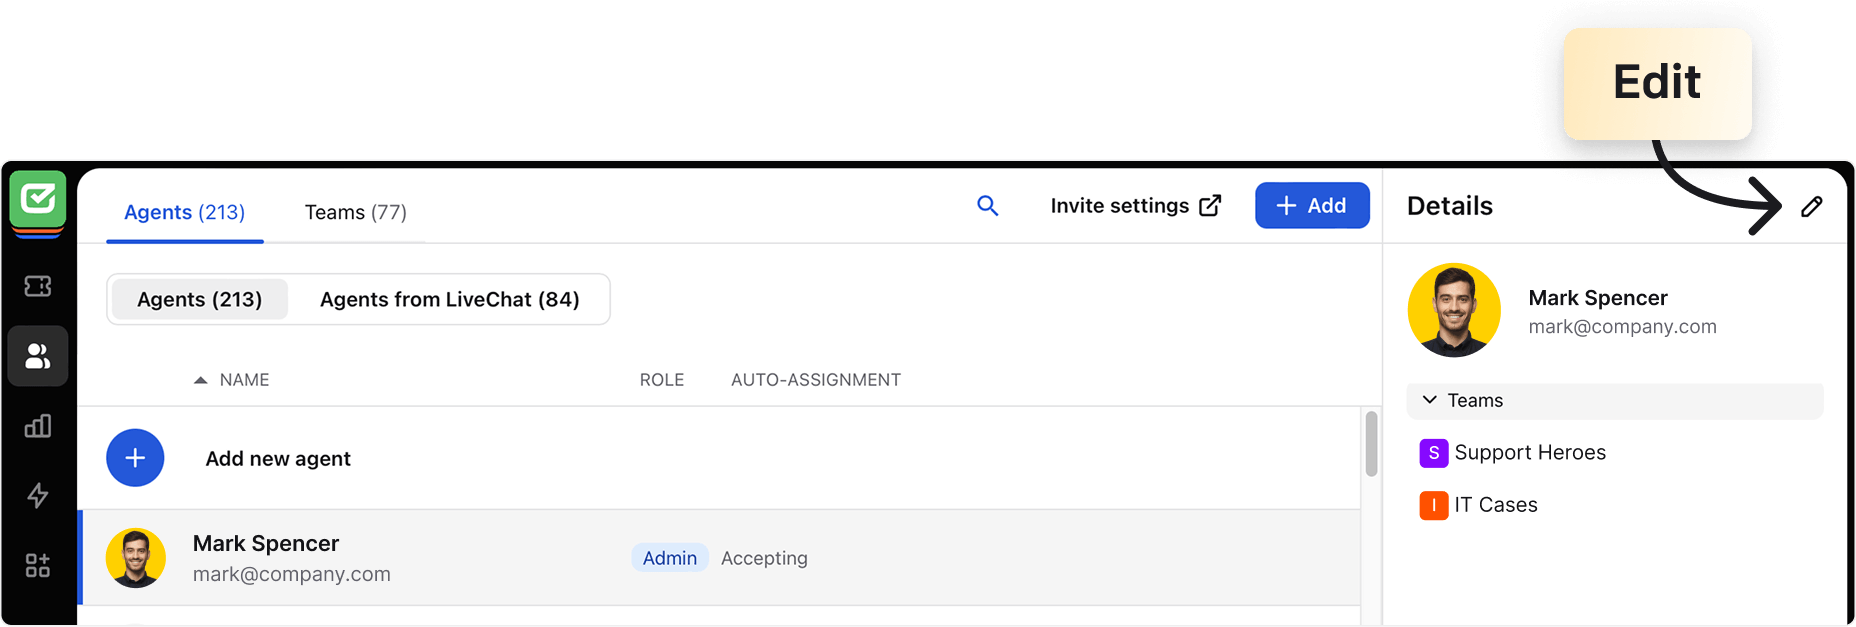
Access your profile to view and update your information and settings. Go to the "Agents" section in your HelpDesk.com and double click on yourself. You can also pick yourself from the list and then click on the pen icon in the upper right corner to edit.
Make sure your "Name" is what you want to be displayed to your recipients.


The email address you used to sign up to HelpDesk.com. Your email isn't visible to customers.


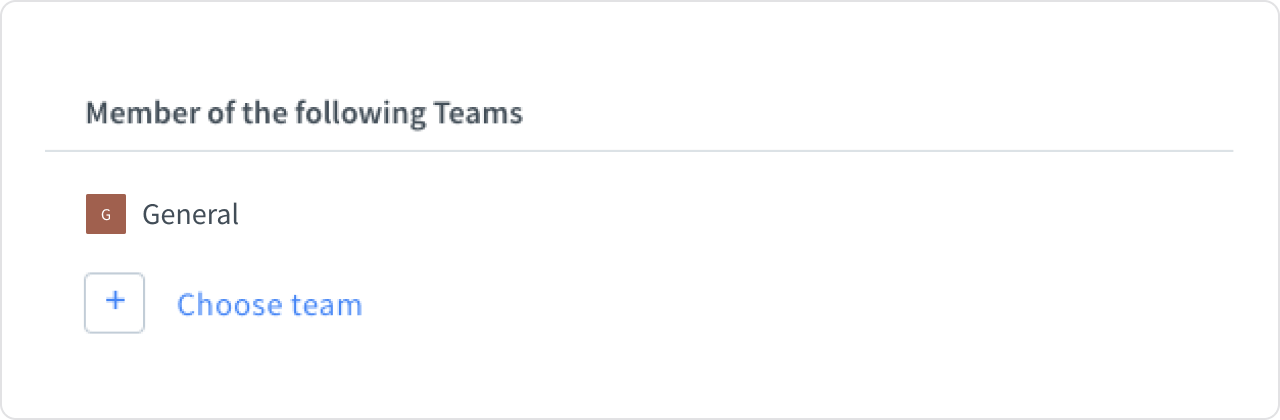
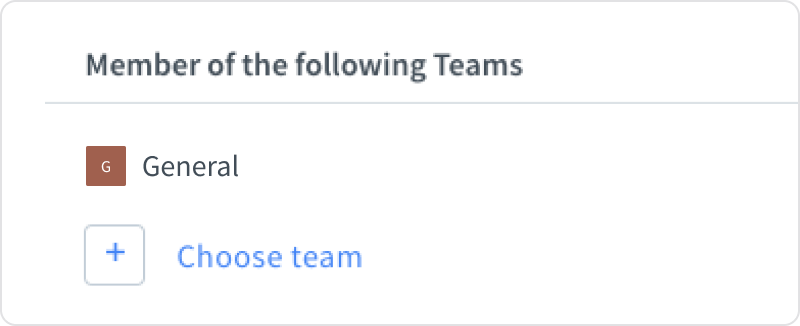
See which teams you currently belong to in the "Member of the following Teams" section. Click on the "Choose team" button to search for a team to join.
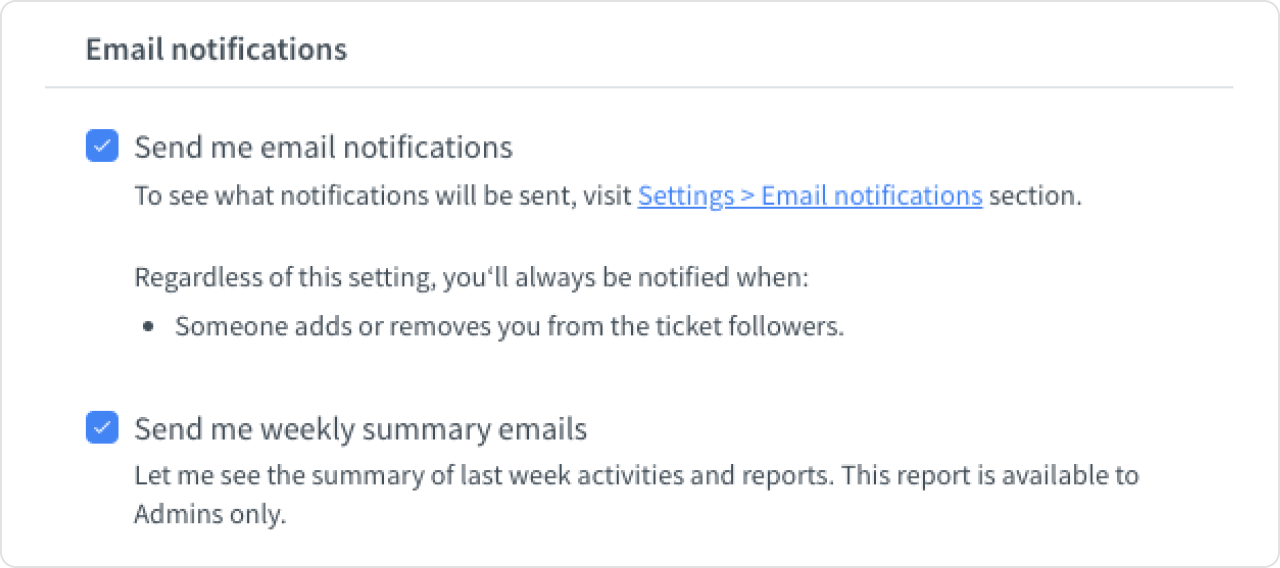
Define the notifications you'll receive by email.
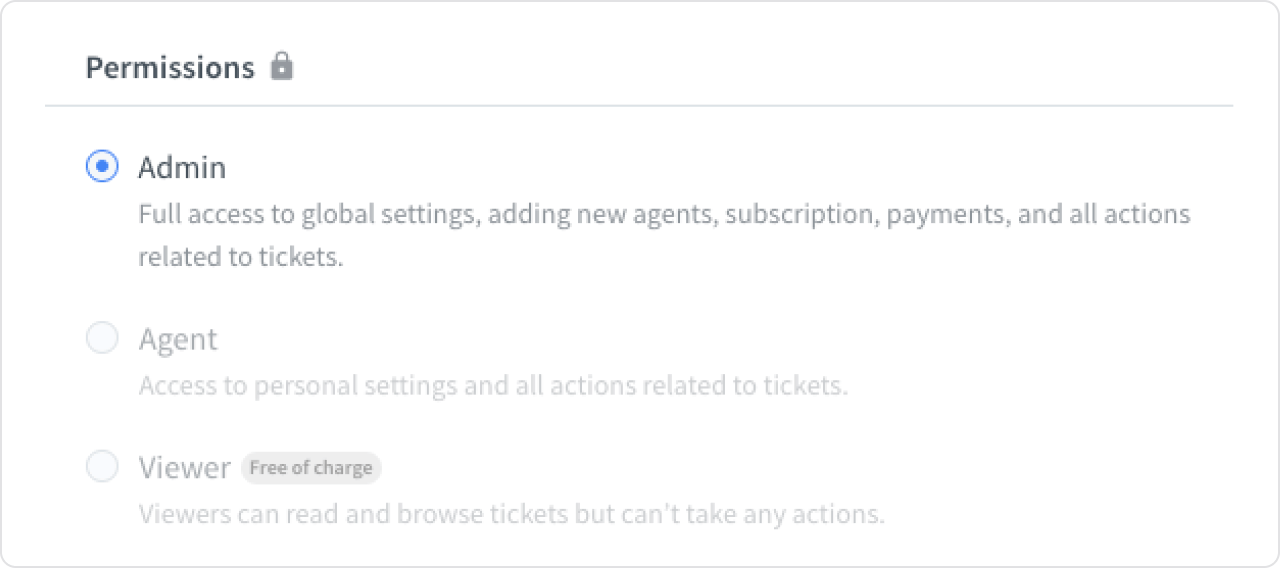
Find out what your role is in HelpDesk.com. If you need additional permissions, contact your admin.
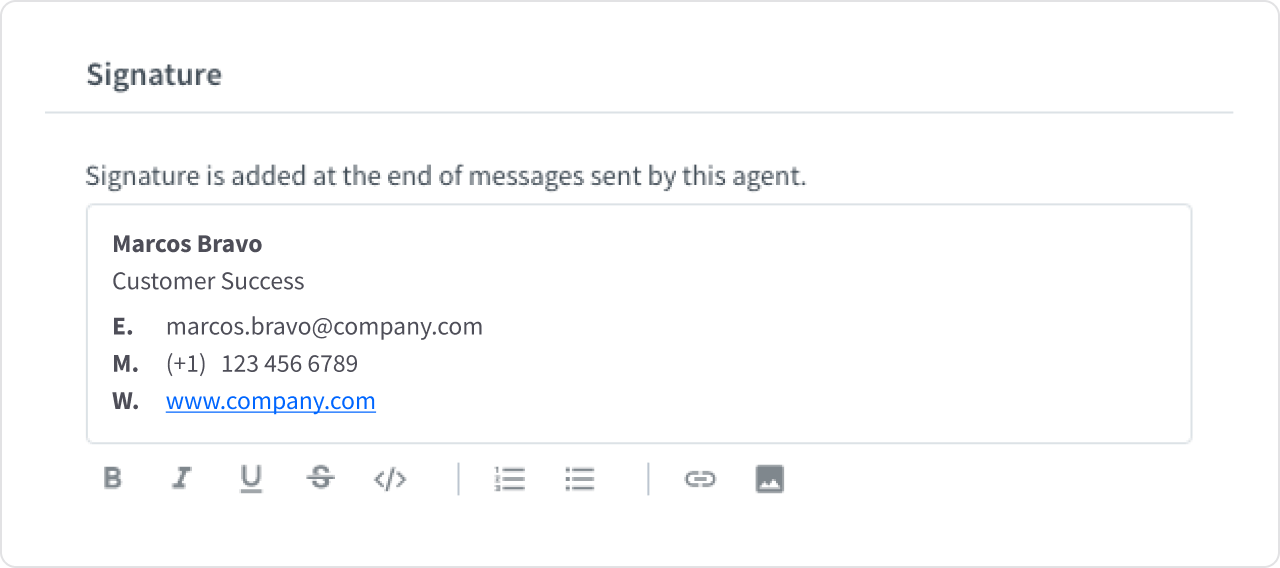
Customize your signature to make each of your messages professional and trusting. Your signature will be embedded in your email template and all outgoing communication.
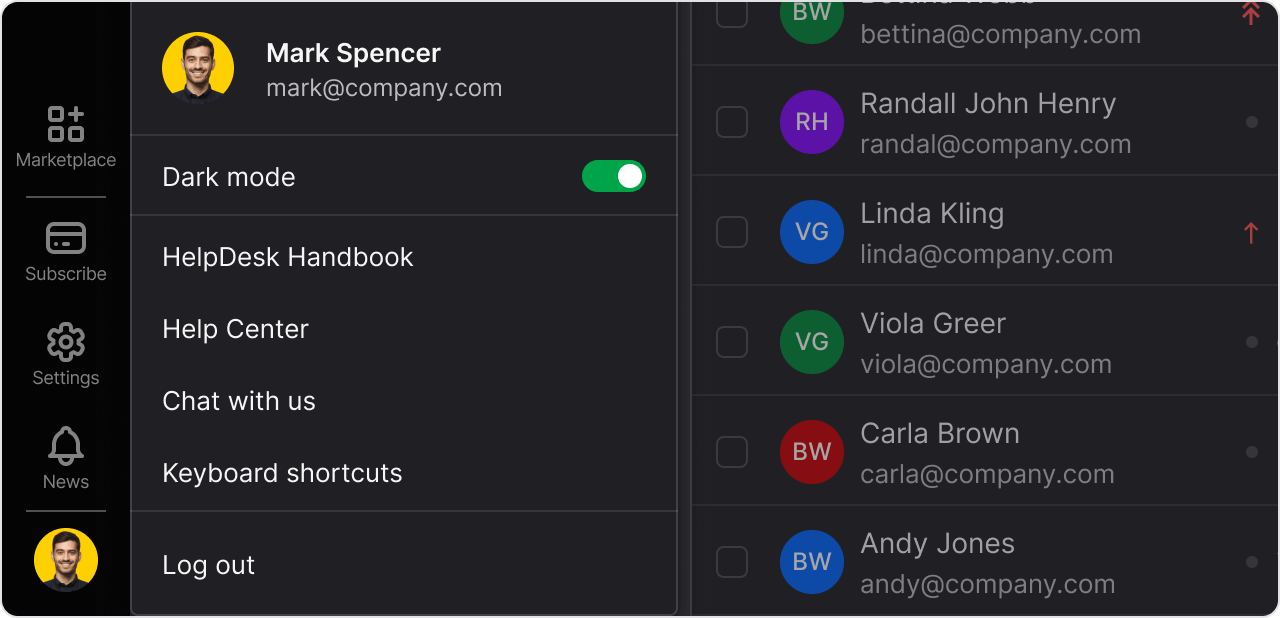
Experience a more comfortable viewing and ticketing experience with dark mode.
Add a domain provided by HelpDesk.com or add your own domain to increase the credibility of your messages.

You need to set up a custom domain if you want to:
Once you’ve added and verified the domain, you can use it in your reply address.
Set up a domainSet up the reply address to manage outgoing messages. The idea is to set the display name and email address that the customer will see when you reply to their ticket.
Set up a reply address
Set up the email template so that every email sent to a customer will feature your branding. Make it colorful and eye-catching! Also, you can add multiple email templates for each team in HelpDesk.com.
Set up an email template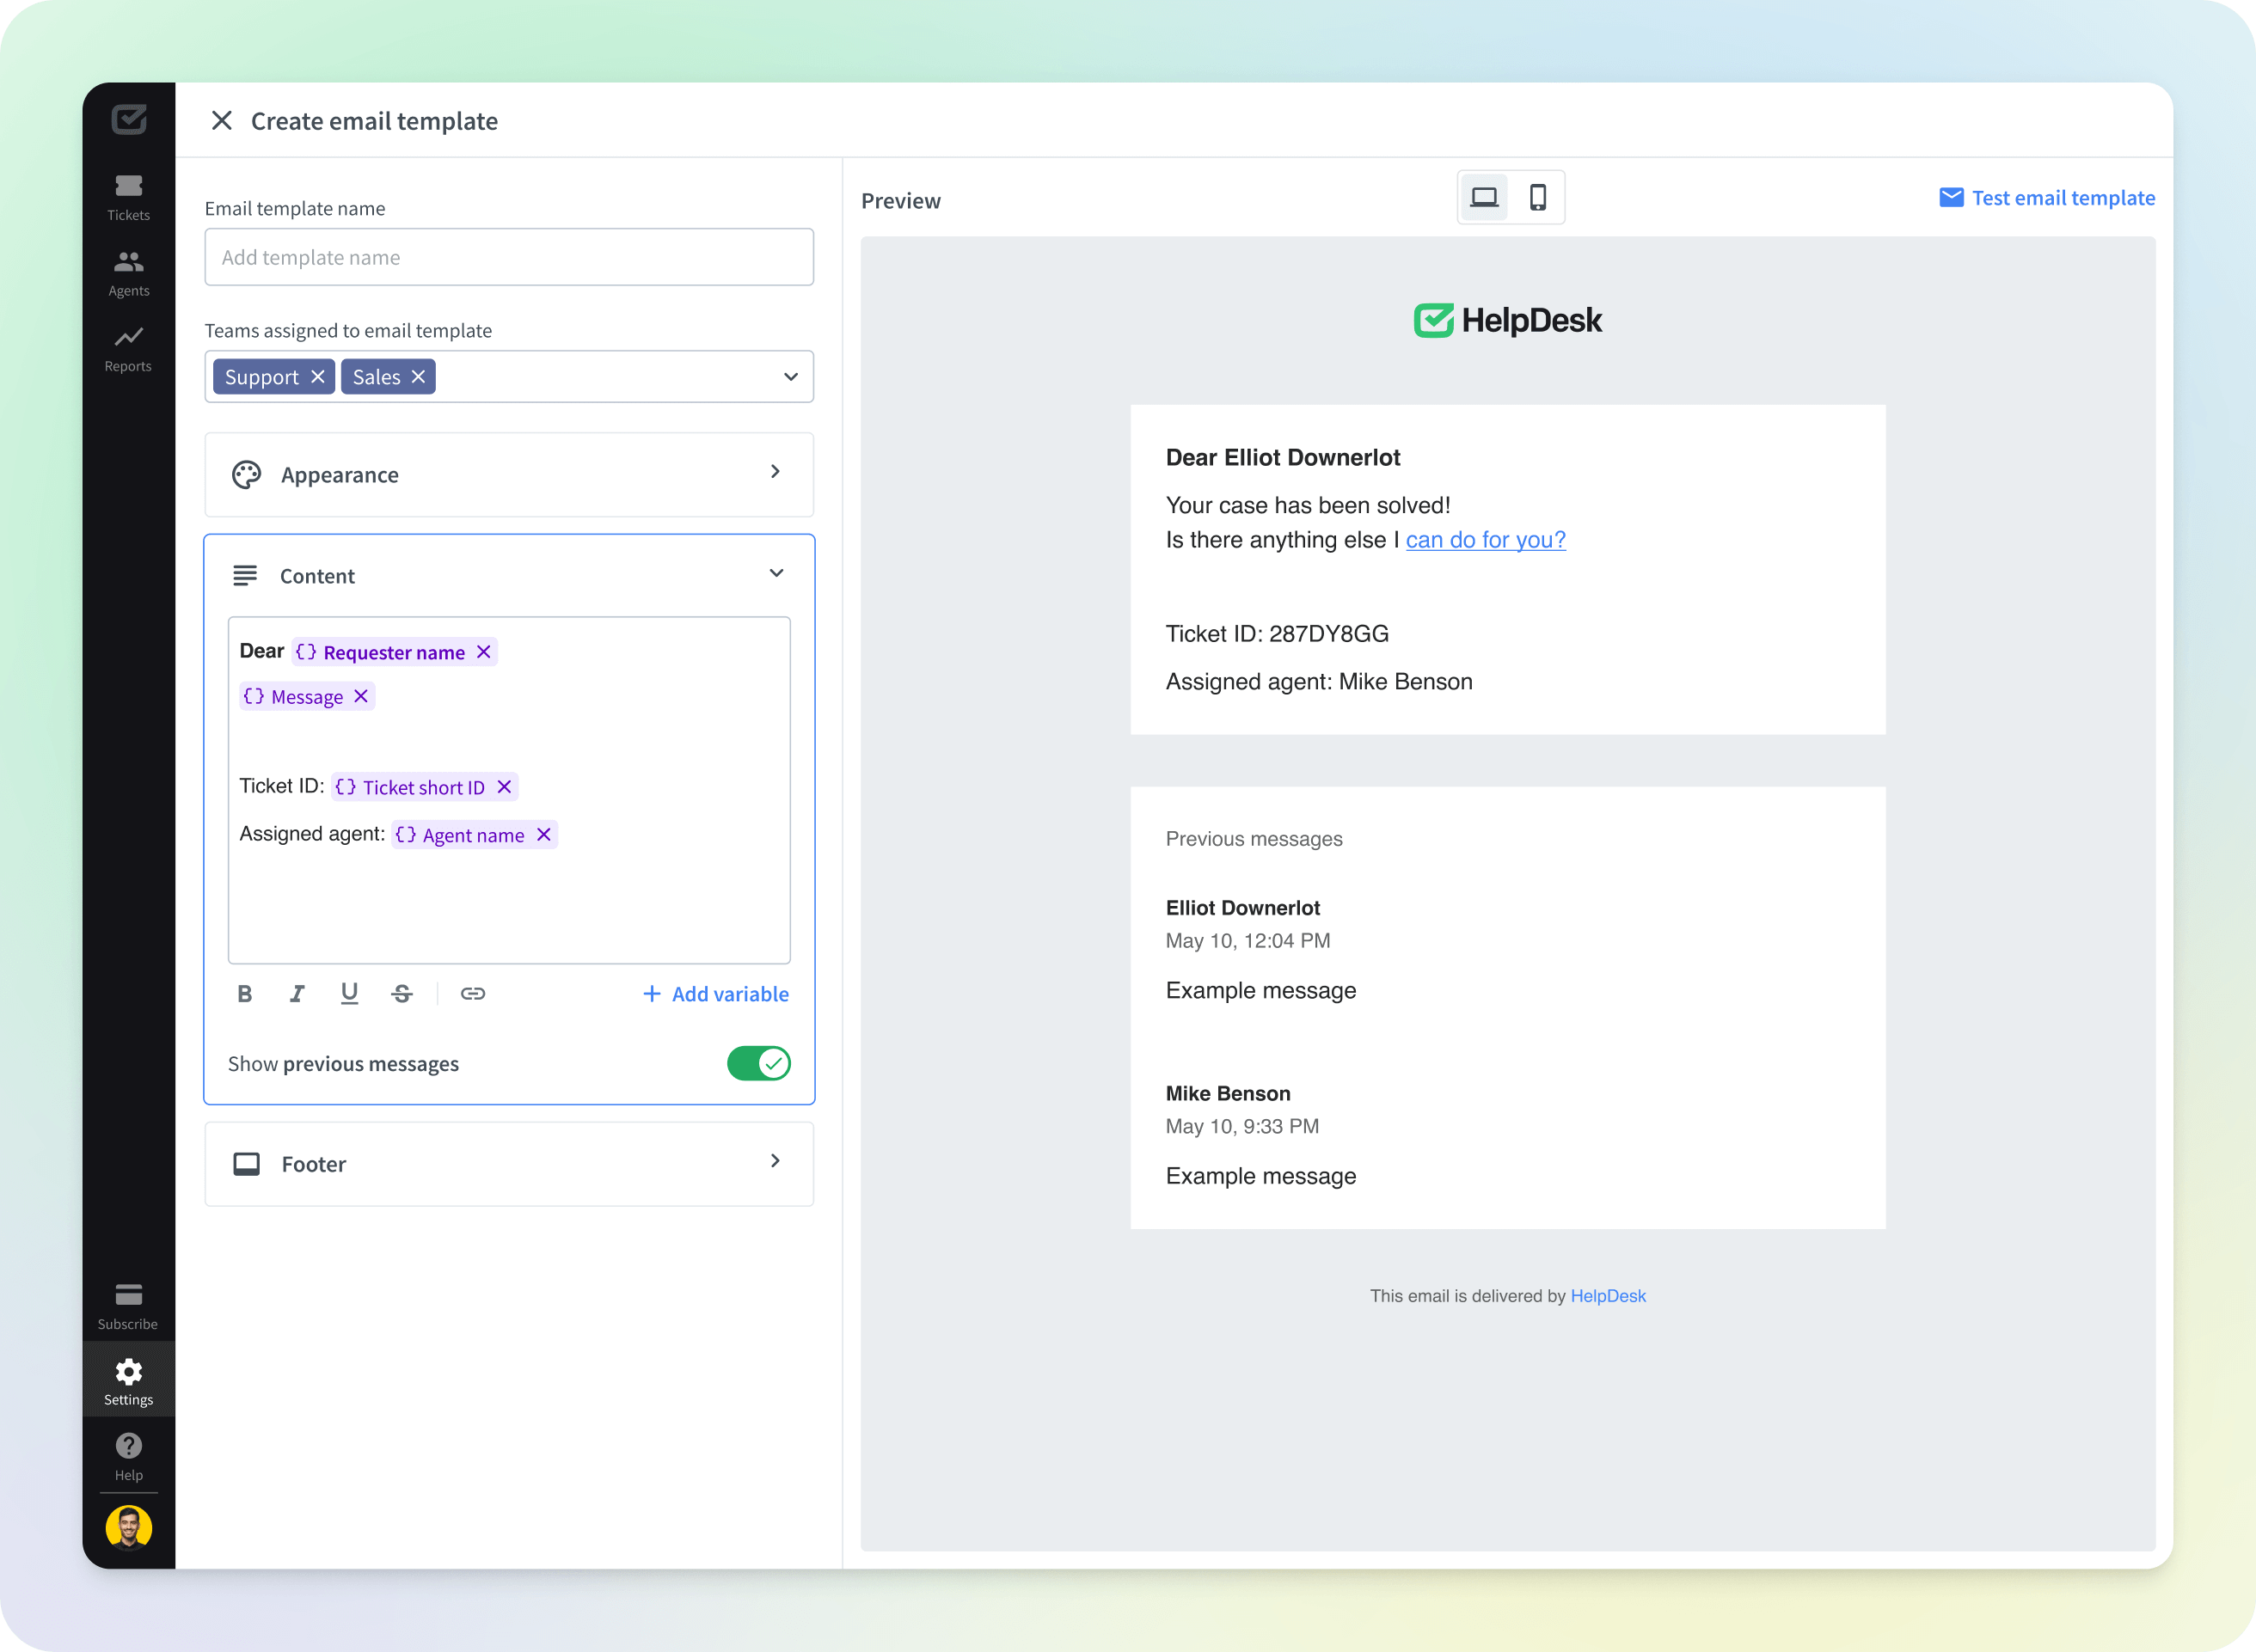
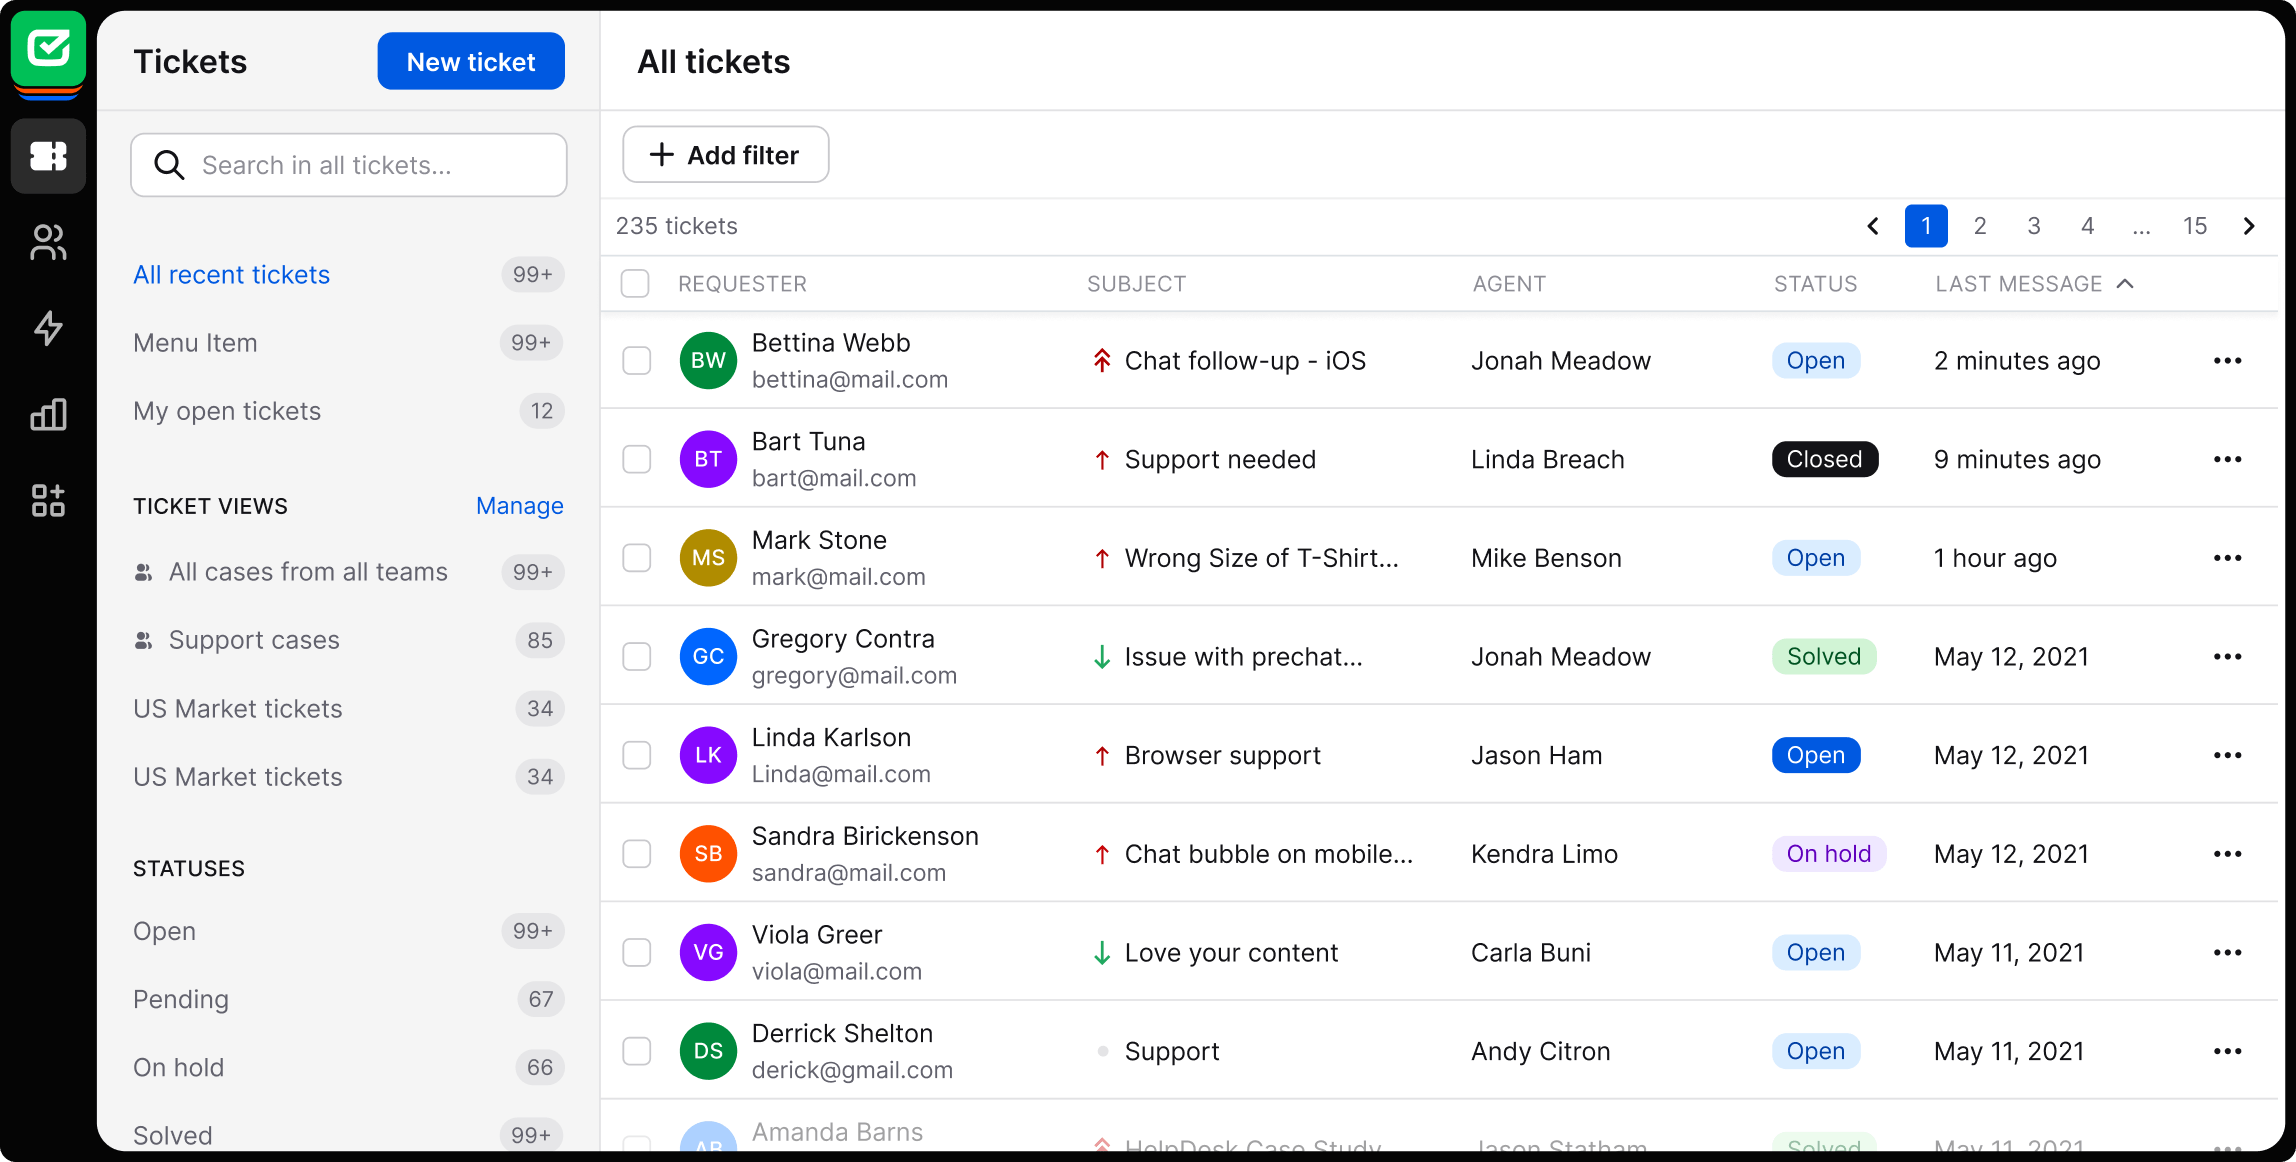
Your customer can use email, a contact form, live chat, or a social media message to contact you. Every new conversation with your customer will turn into a manageable HelpDesk.com ticket if you've connected your communication channels correctly. Then, when all the tickets are in one place, agents can click on the ticket to respond to the customer's query.

Know the backstory
When a ticket is created from a live chat with an agent or chatbot conversation, it'll include a transcript so that you know the whole story.
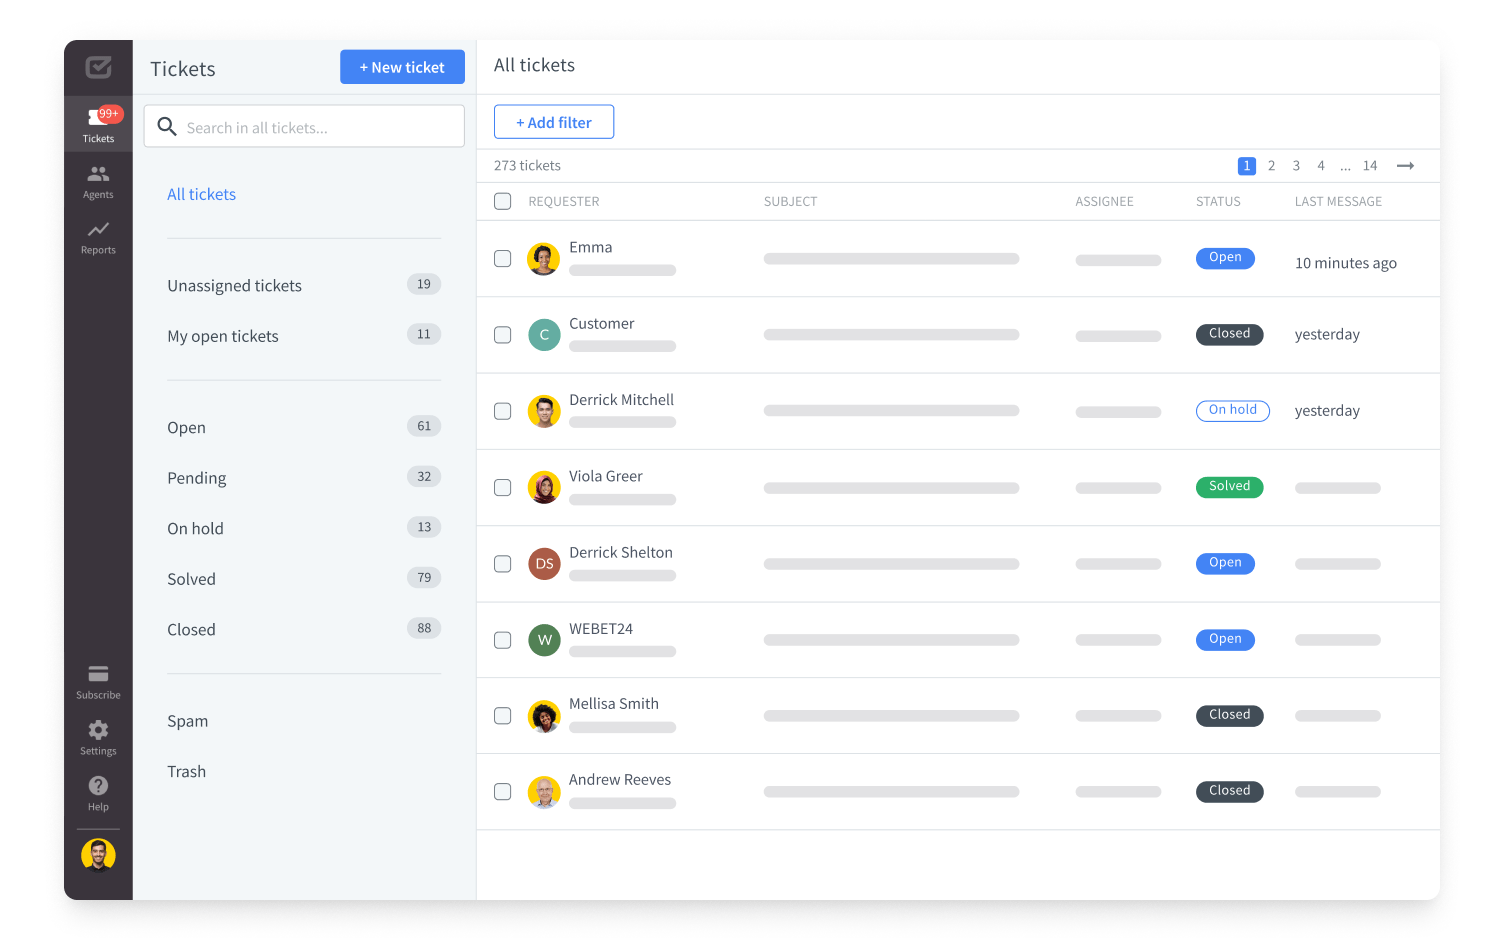
Your tickets are available on the main dashboard, which consists of two sections:
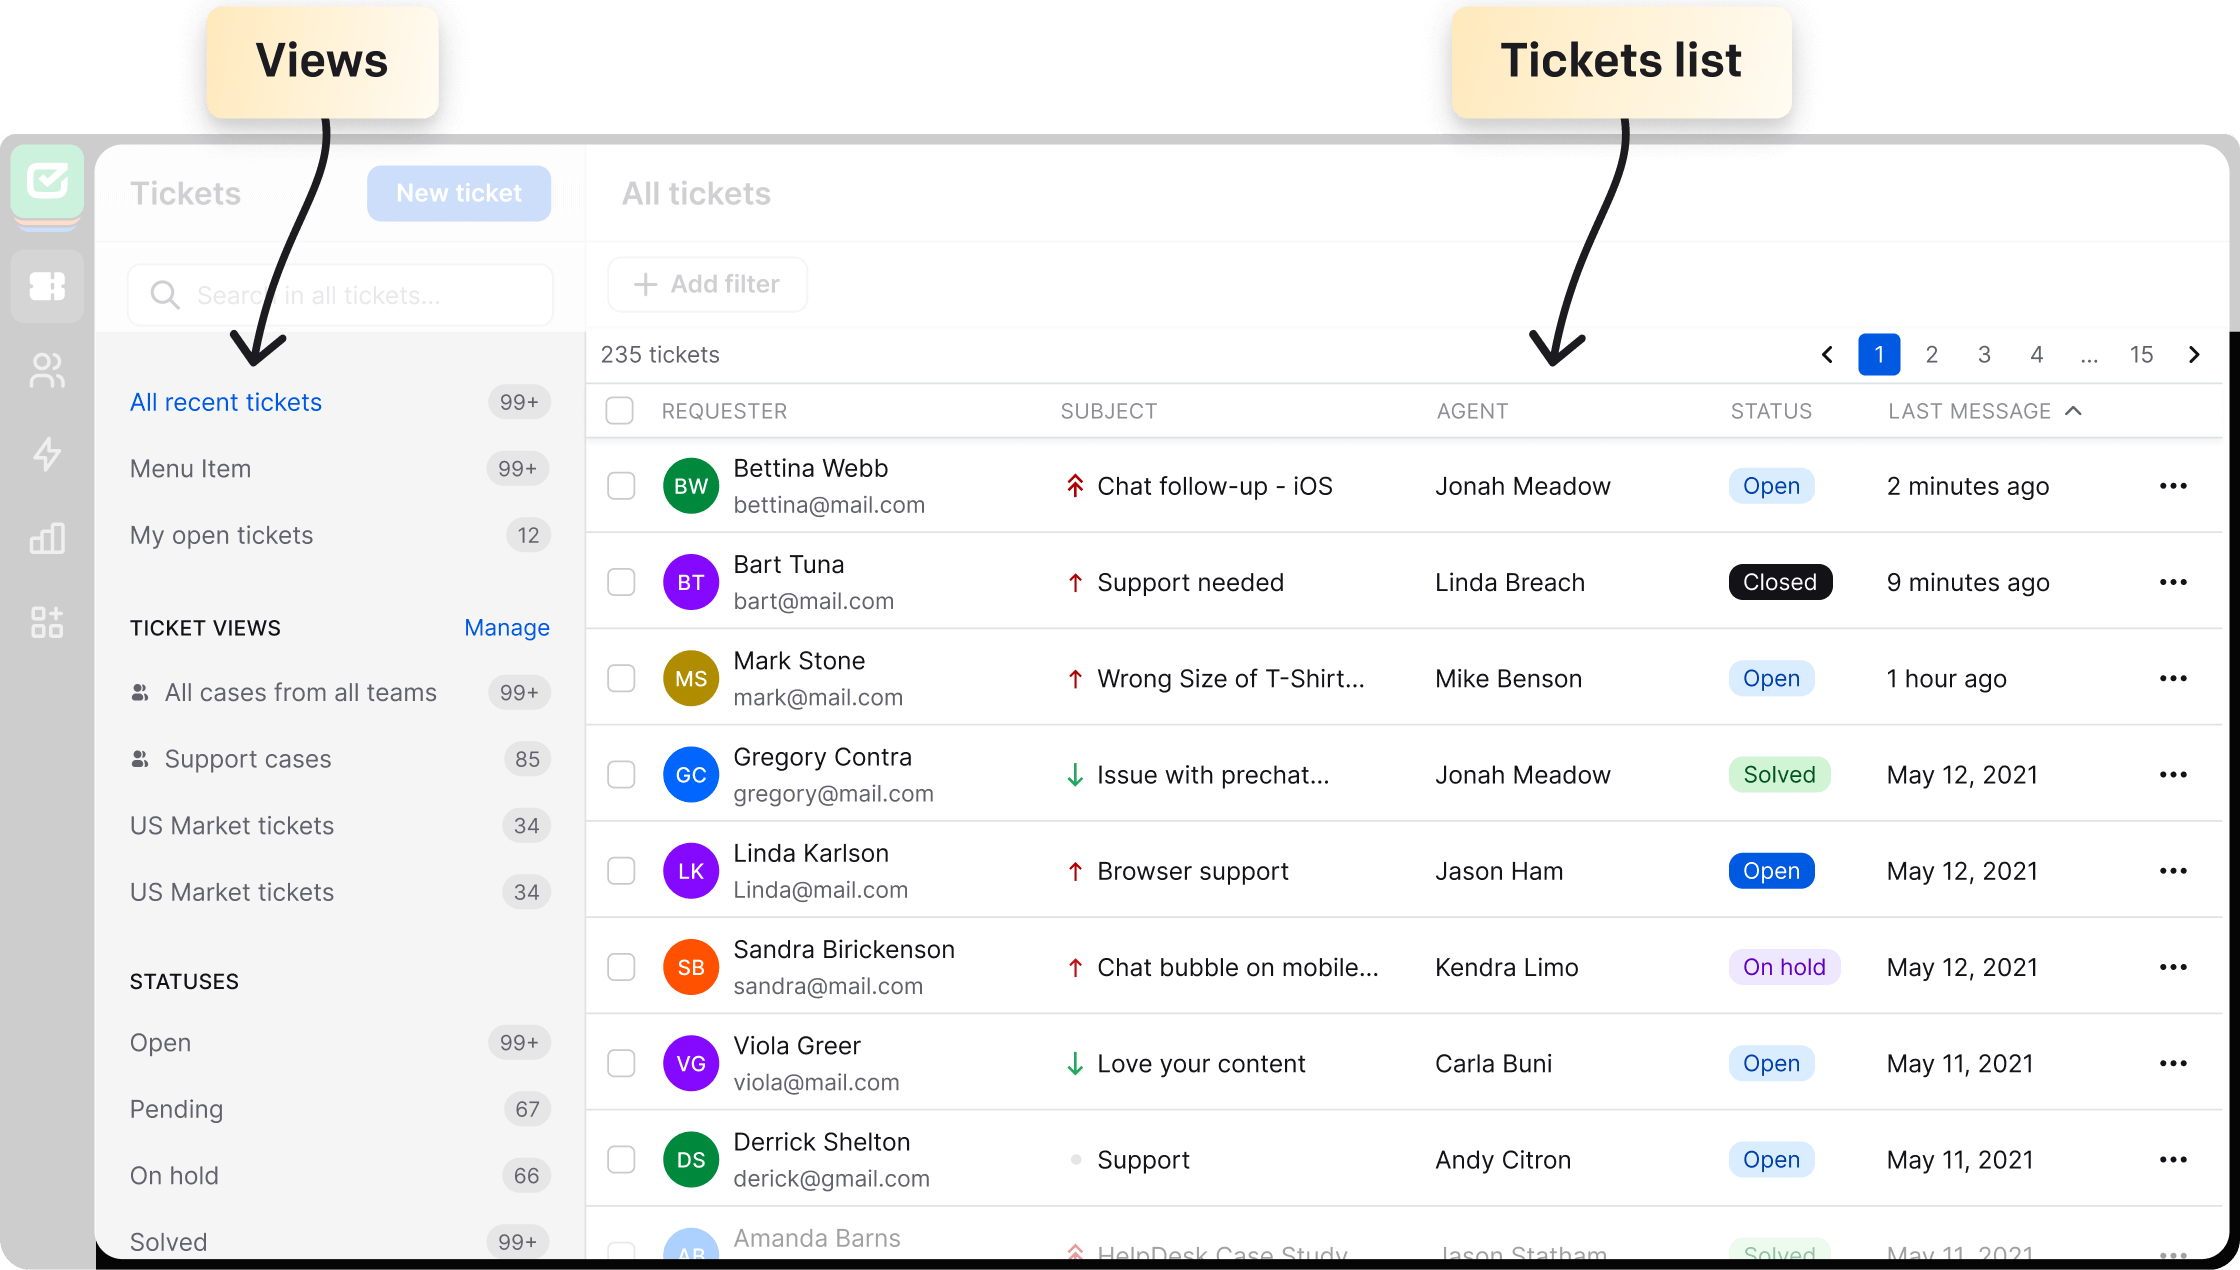
This dashboard is your main information center, which you can also use to perform actions that bring you closer to resolution.
Learn more about the main HelpDesk.com dashboardBy clicking on a single ticket from the main dashboard, you can make basic changes, such as changing status or priority using the menu button.
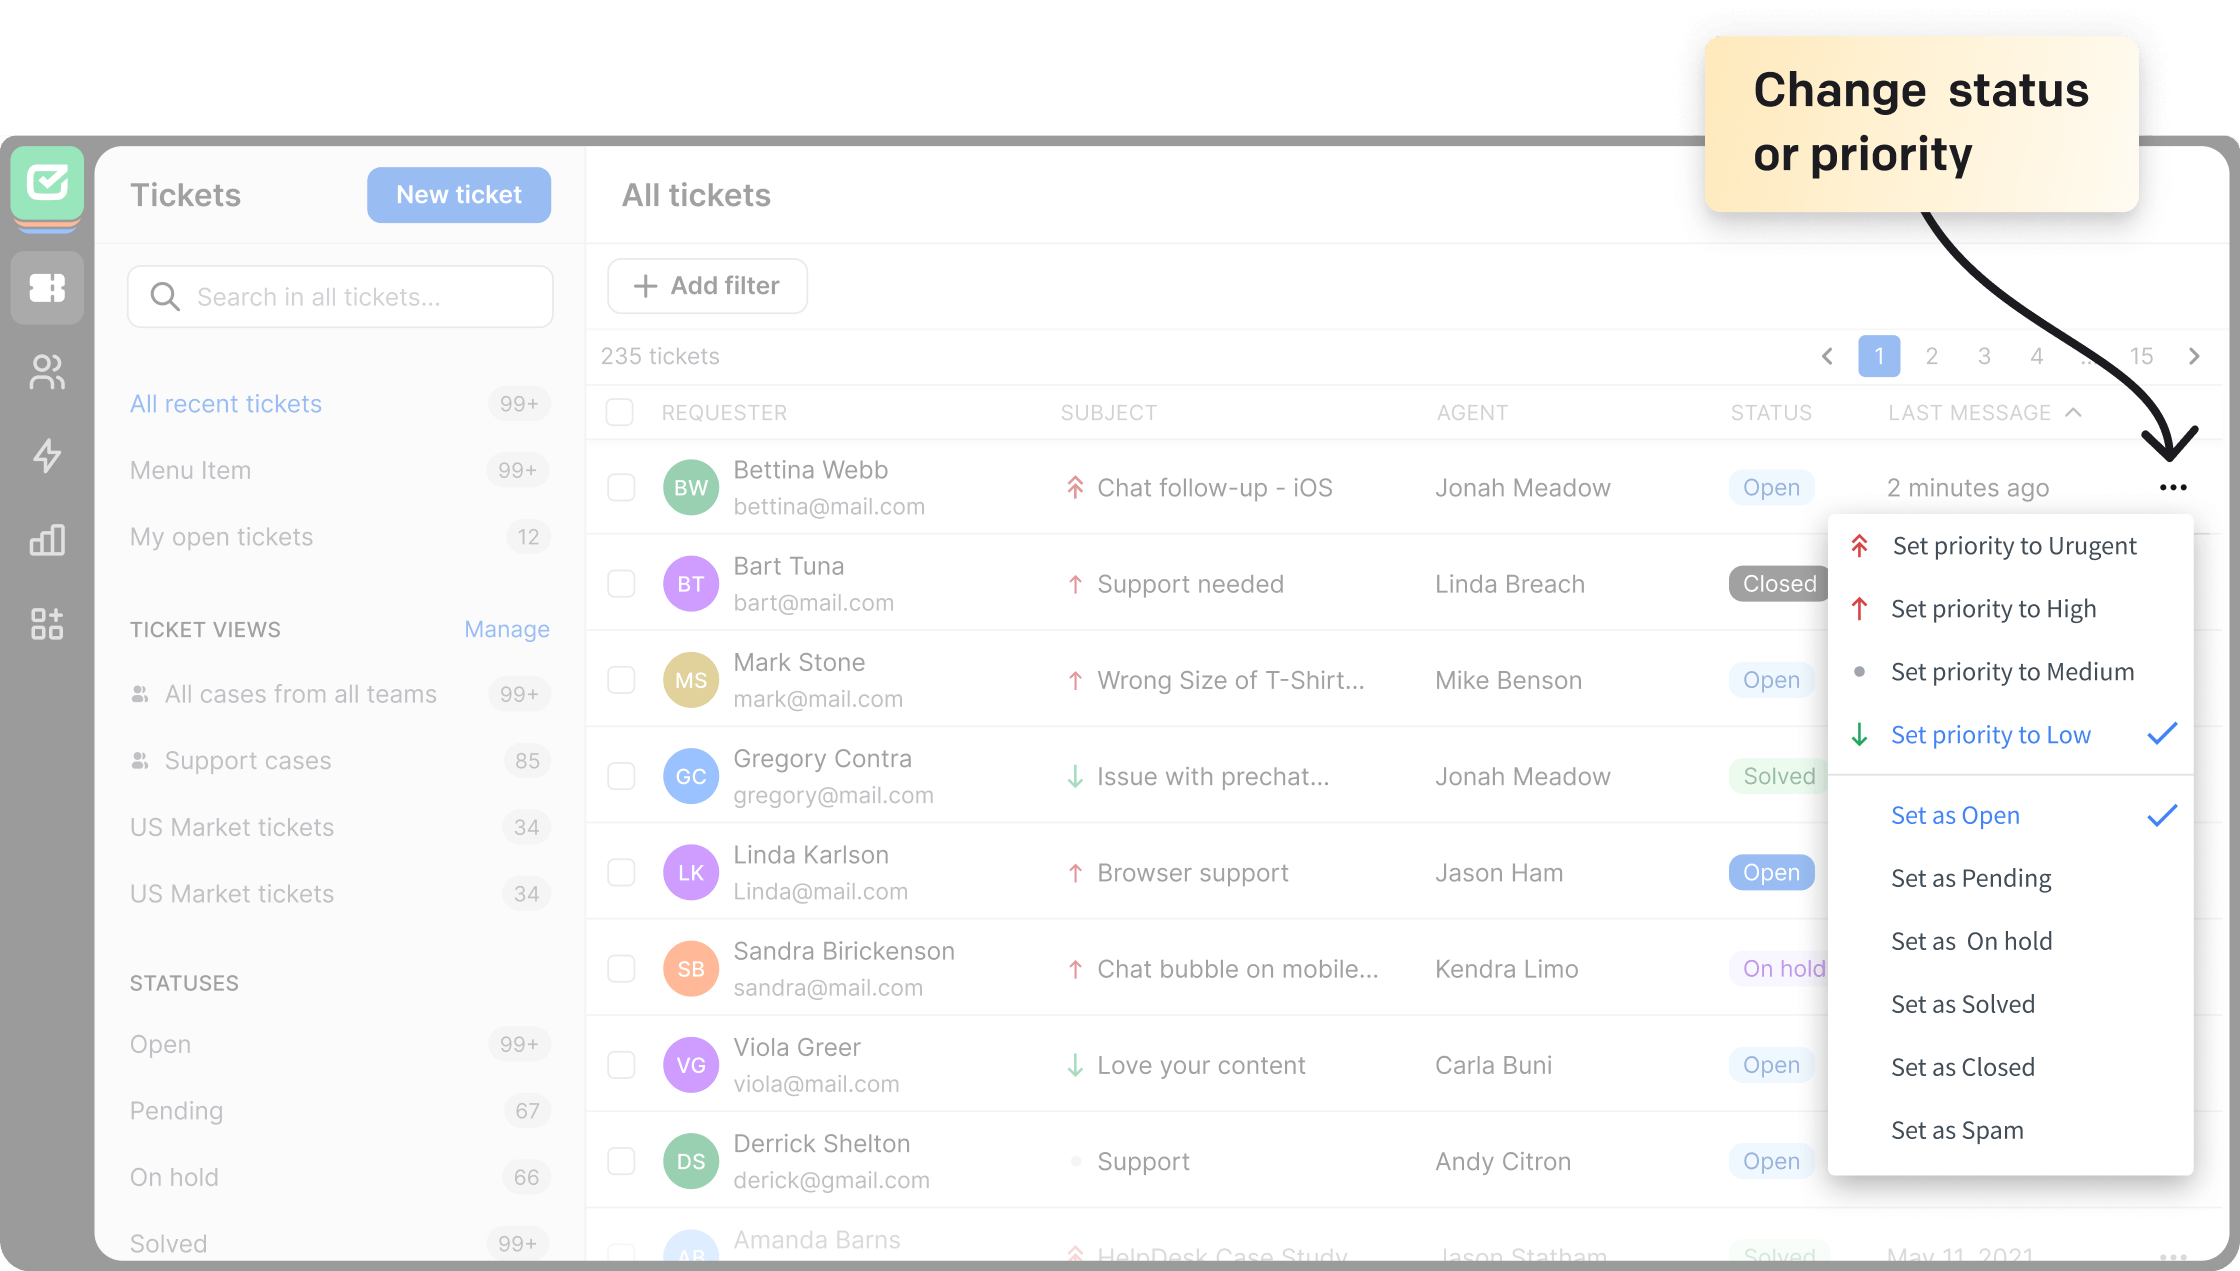
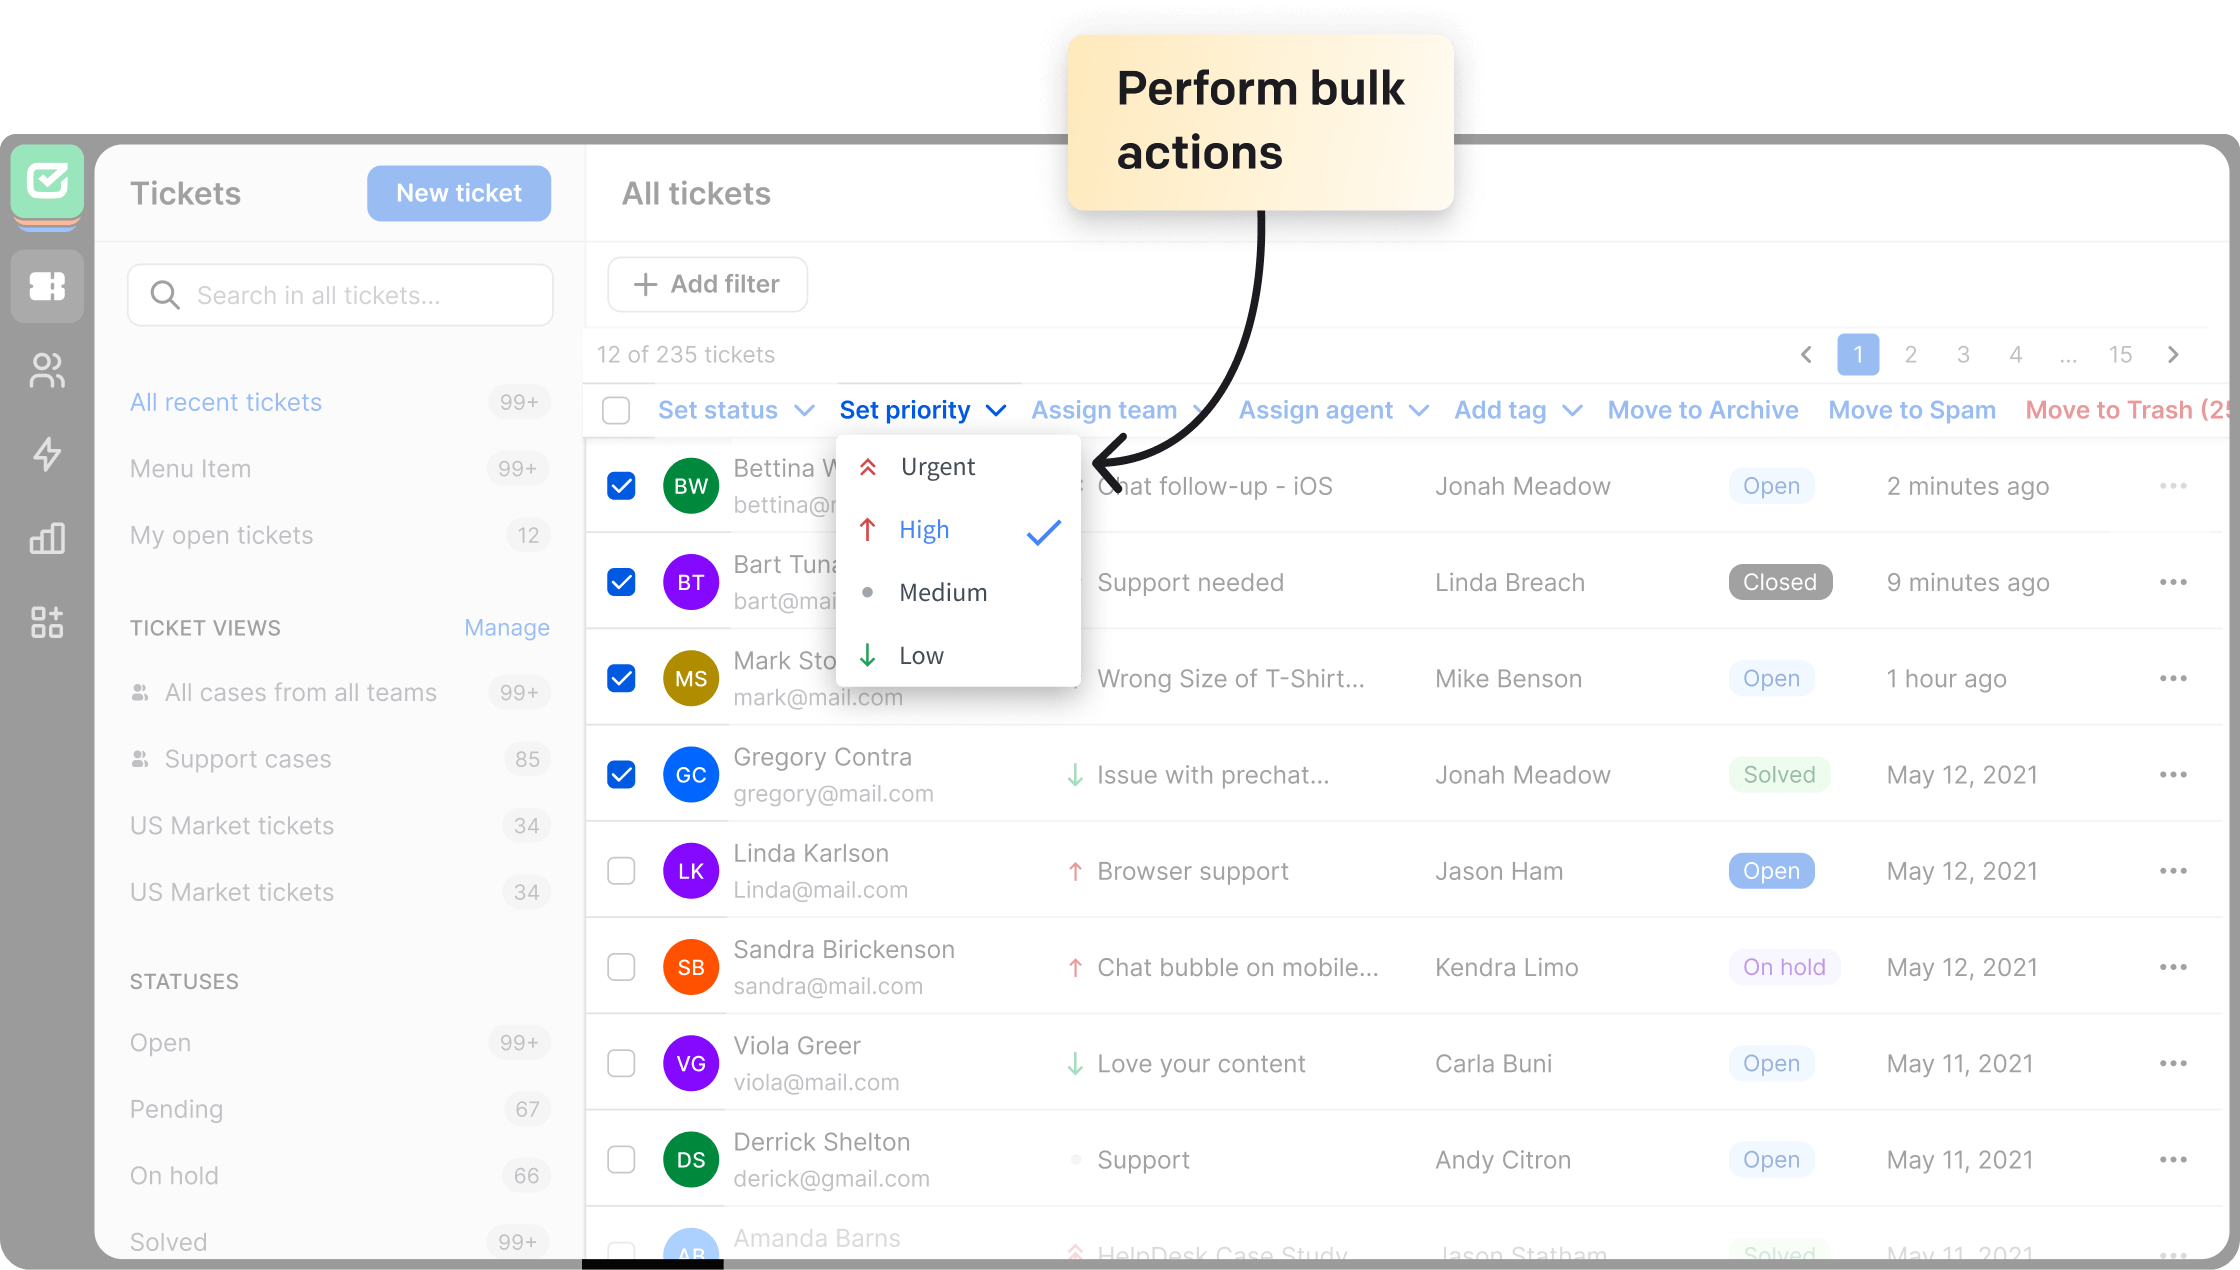
You can also select multiple tickets at once and use the menu that appears at the top to perform bulk actions.
Tickets give you a lot of opportunities when it comes to building relationships with your customers and solving their queries. Click on one of the tickets on the ticket list to see what's inside.
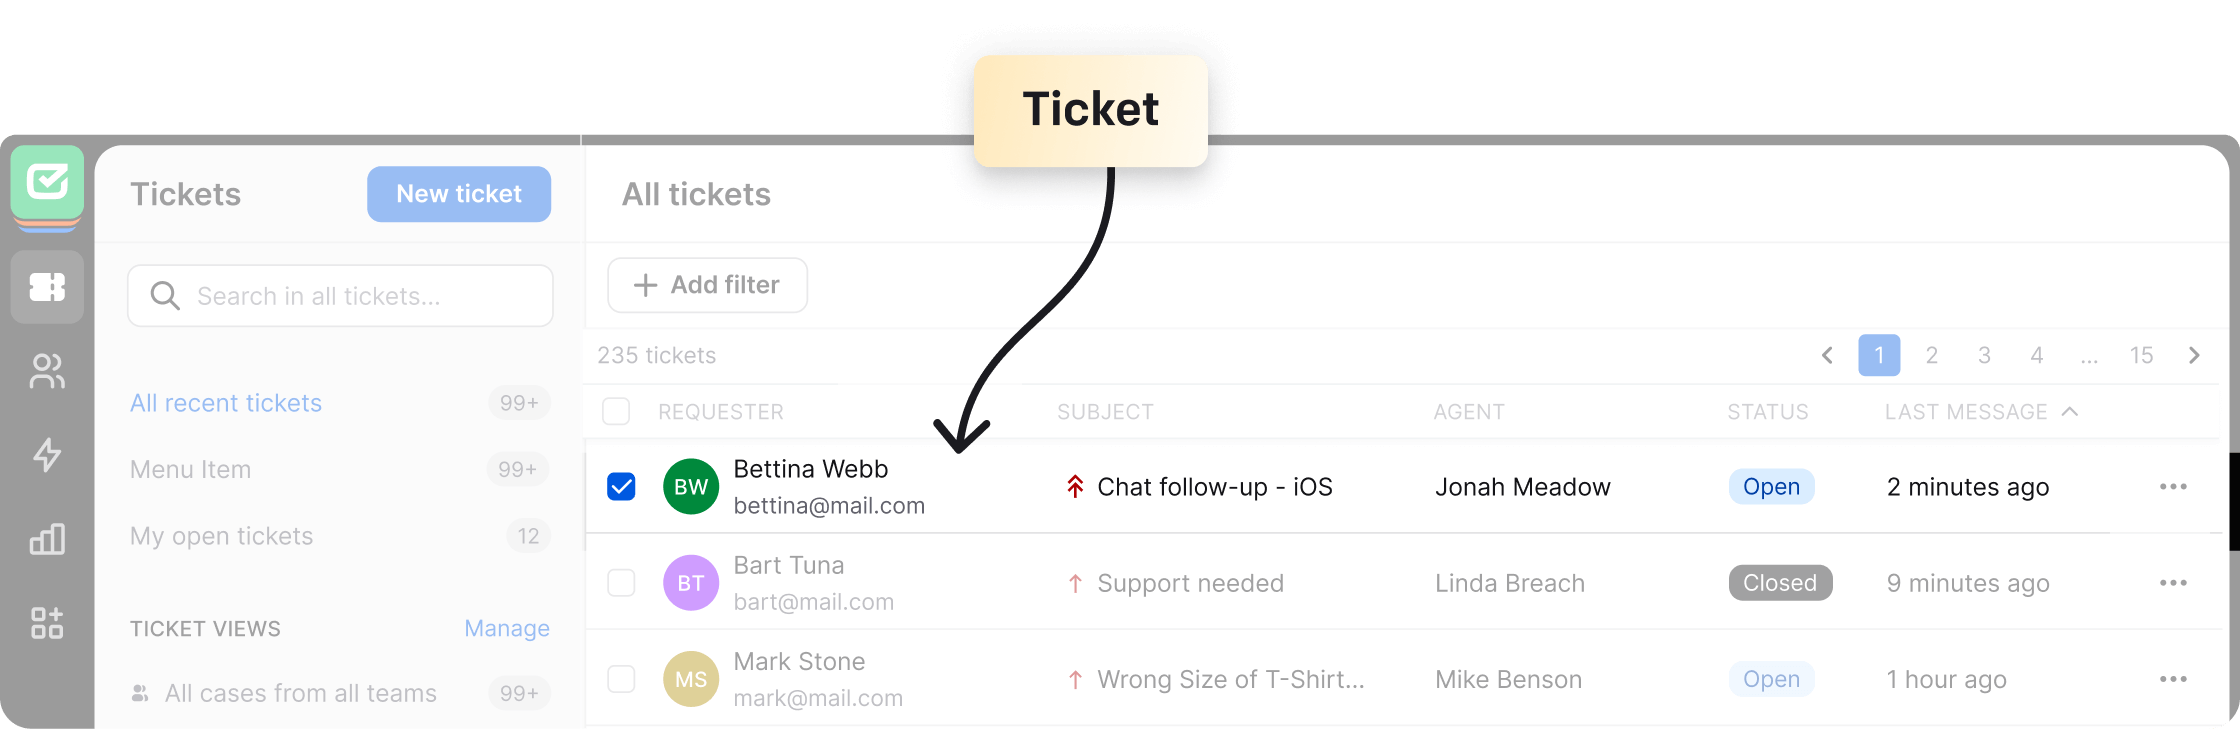
There are two sections in the ticket:
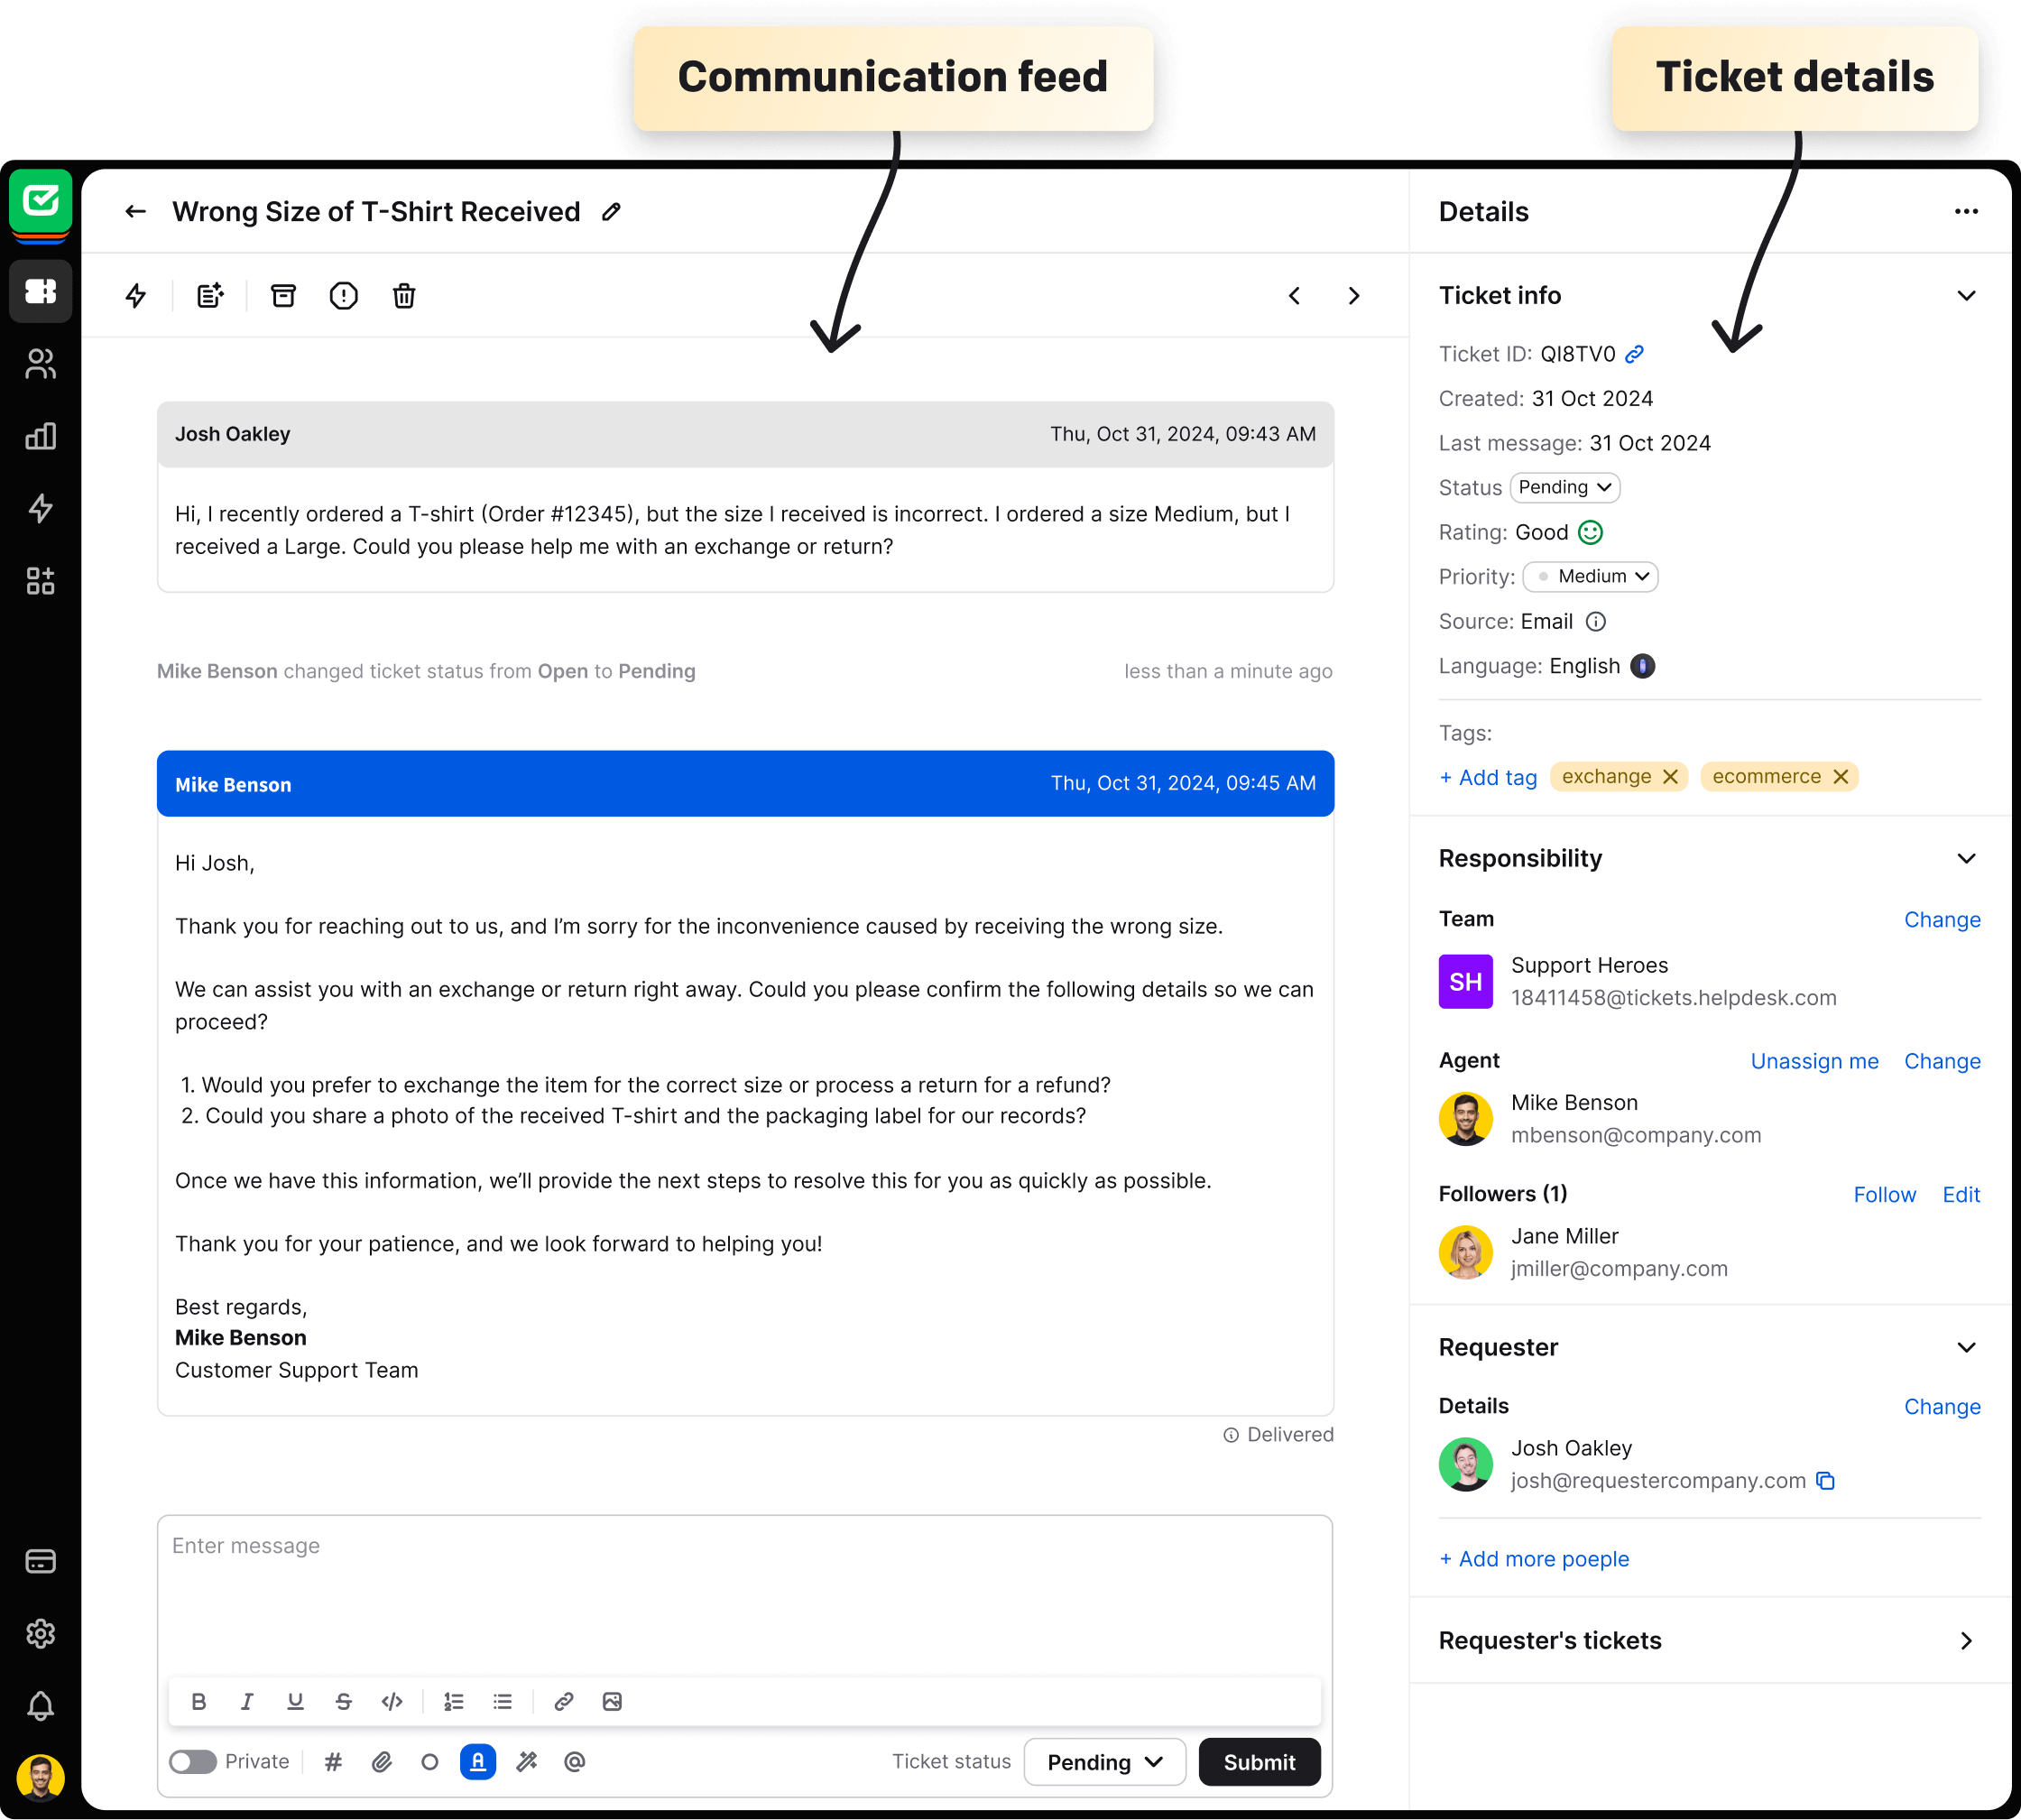
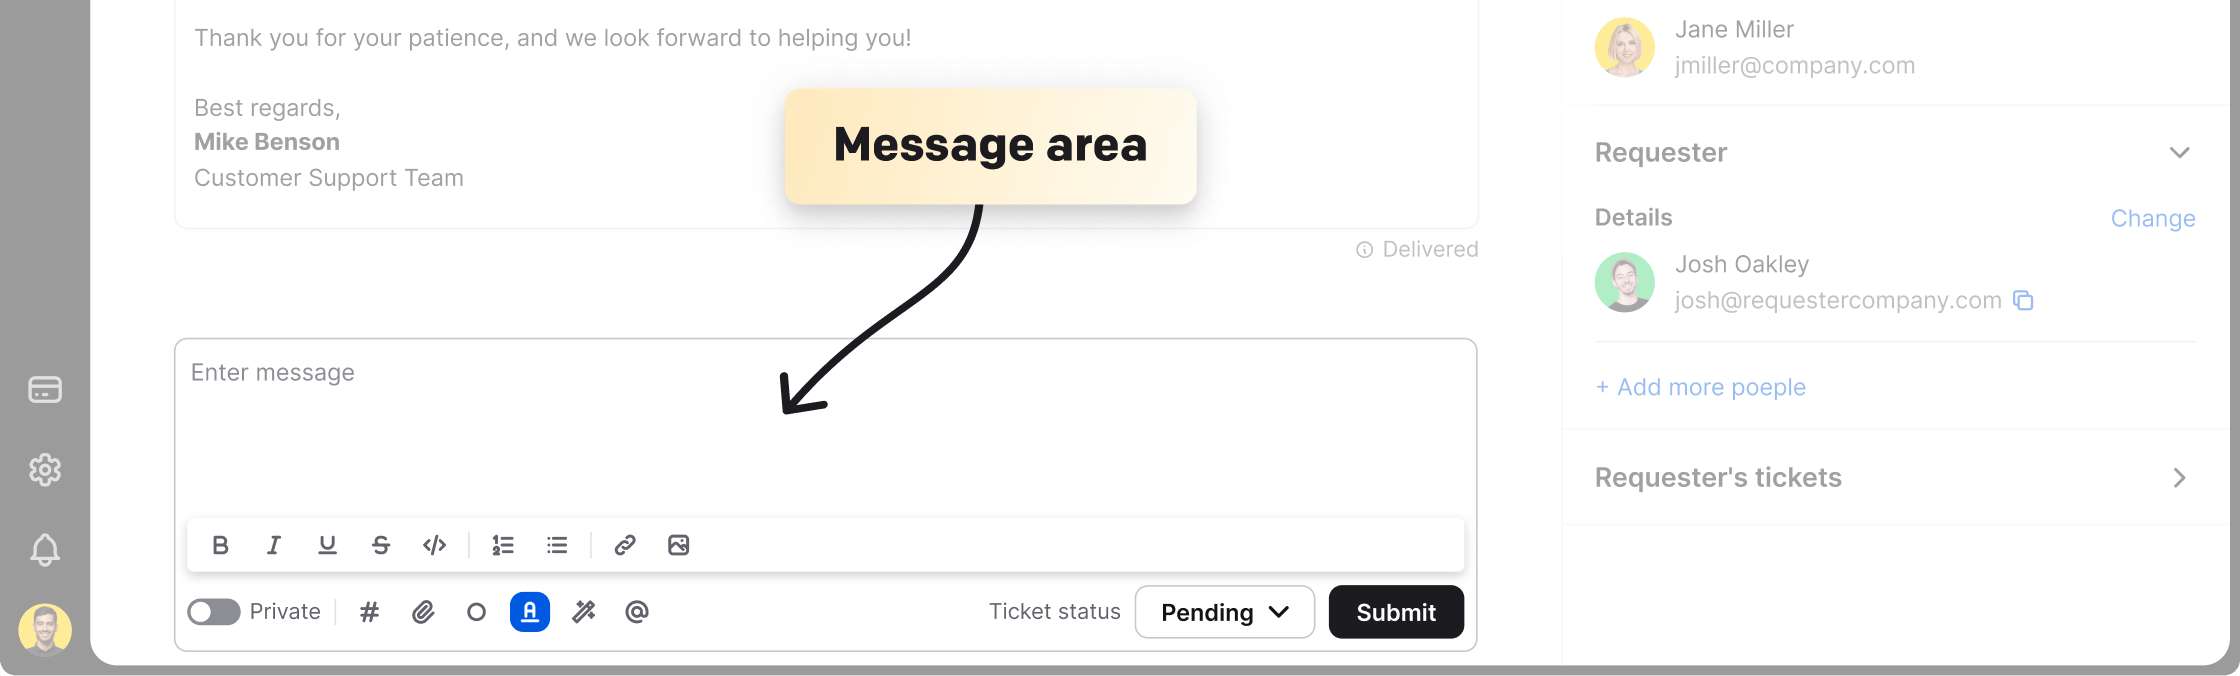
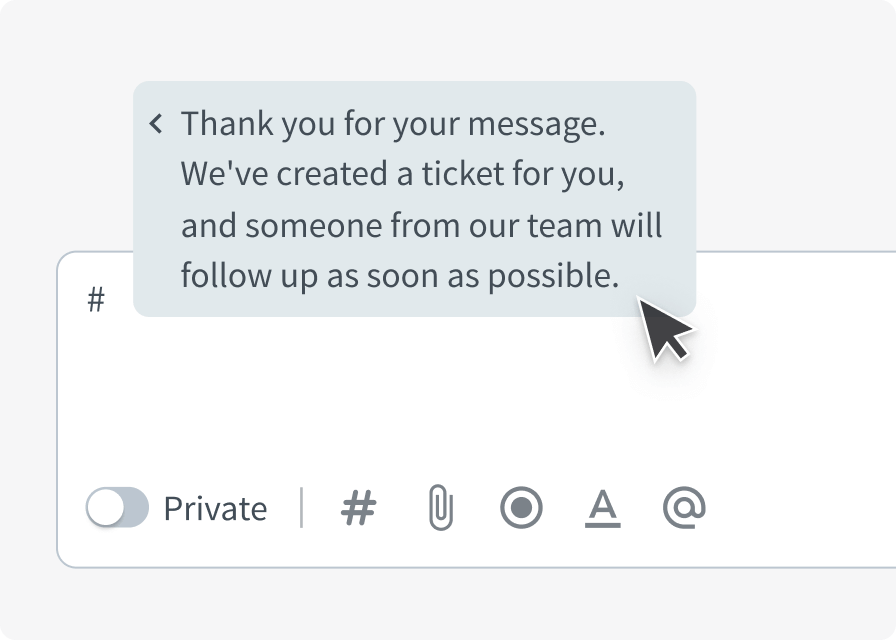
Use the communication feed to write and send messages to your customer or whisper to your teammates. Take advantage of the powerful communication toolkit.
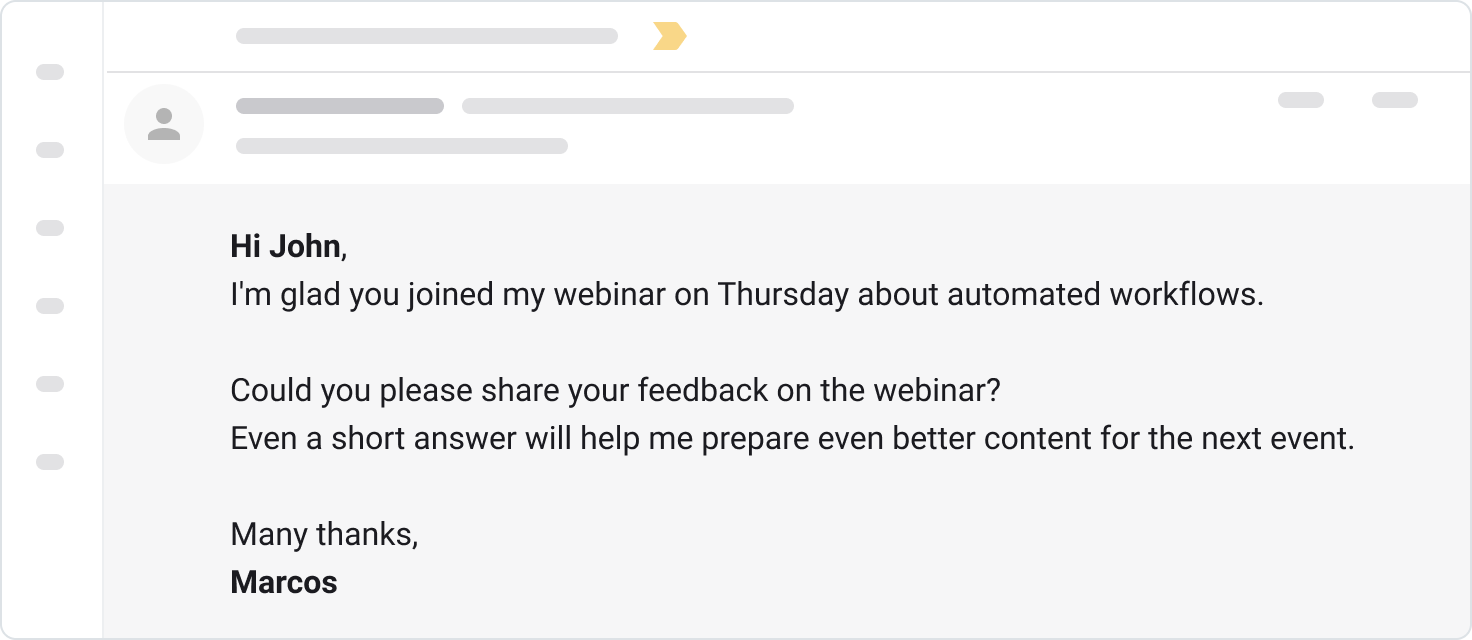
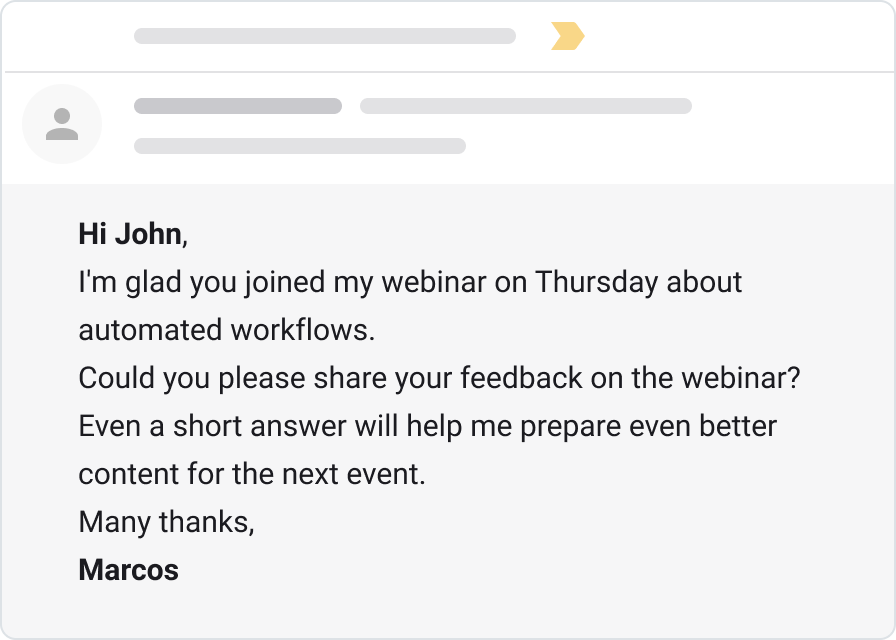
Enter your response to the ticket and send it over by clicking on the "Submit" button. Bring in proper message structure and wording tailored to your customer.
Shape your message with text formatting tools so that it resonates with your purpose and intent.
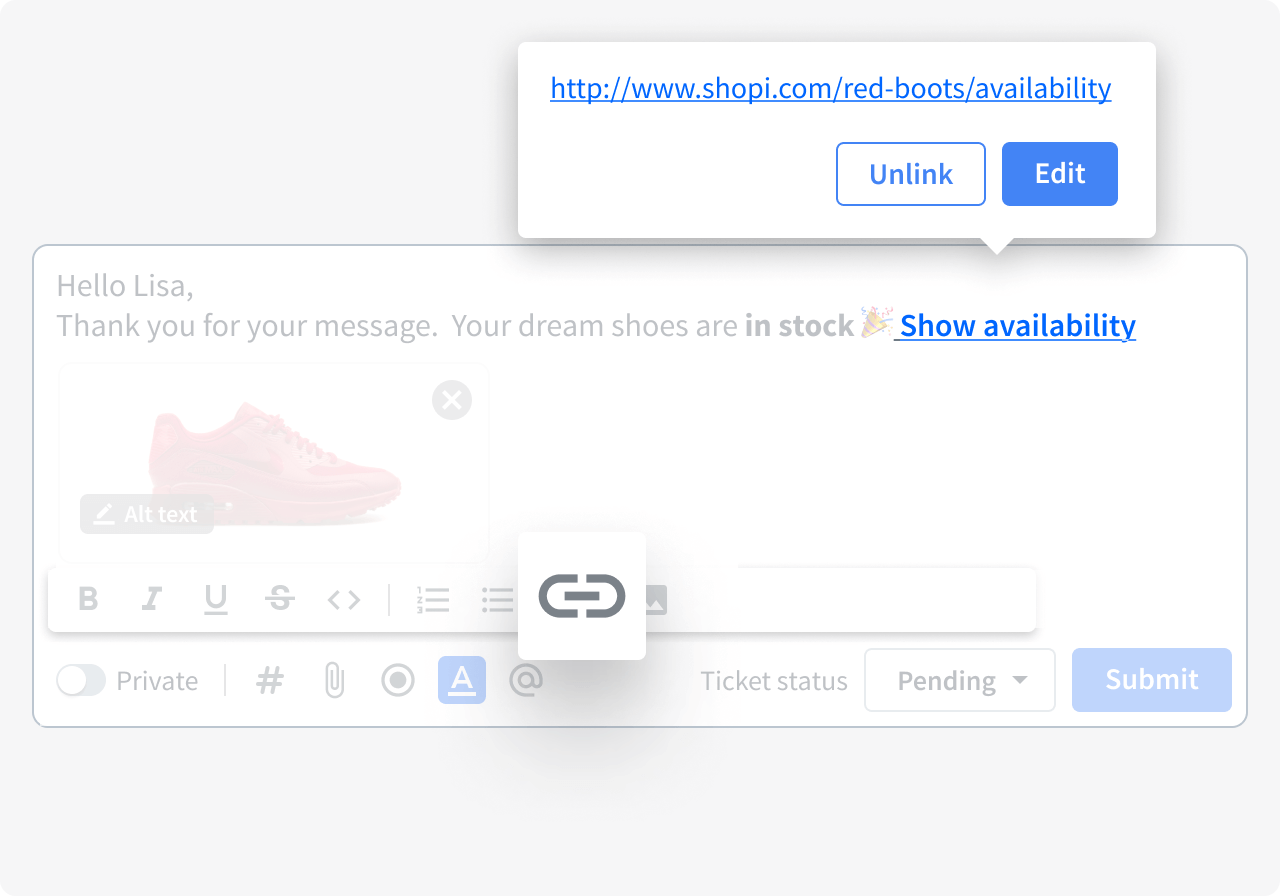
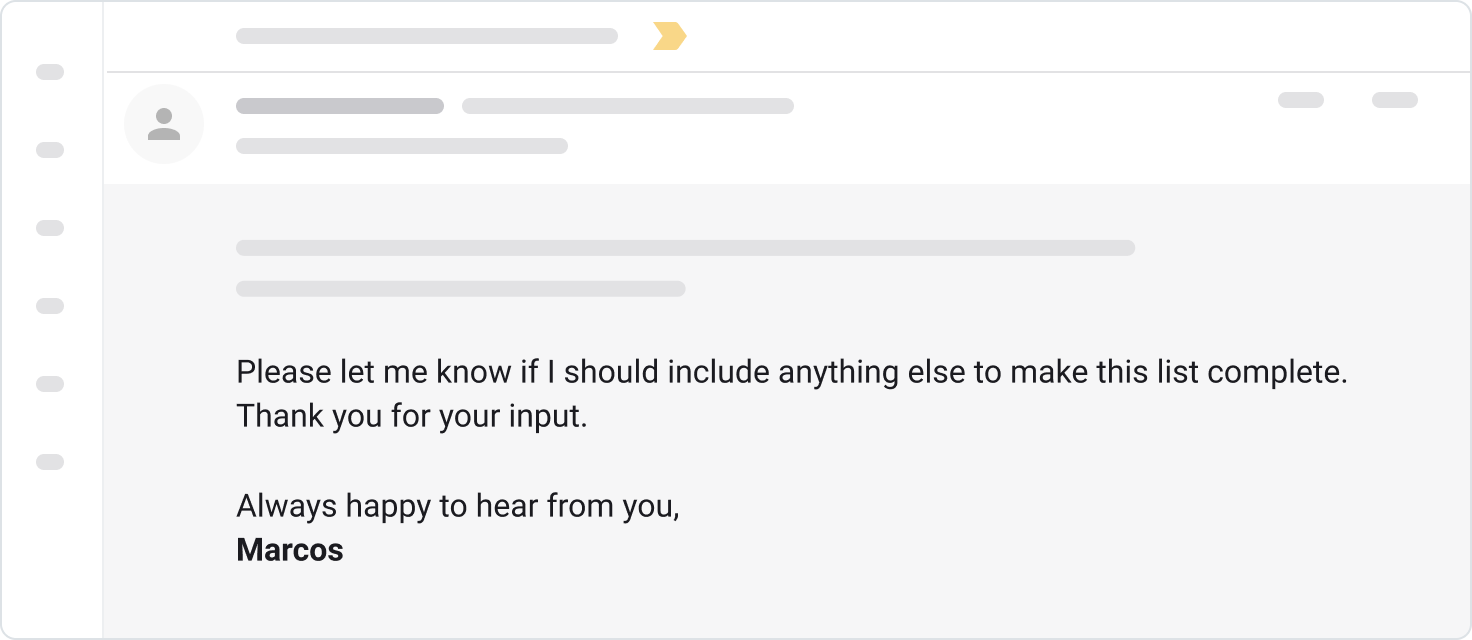
Add helpful links to internal and external resources to best explain the solution to the customer.
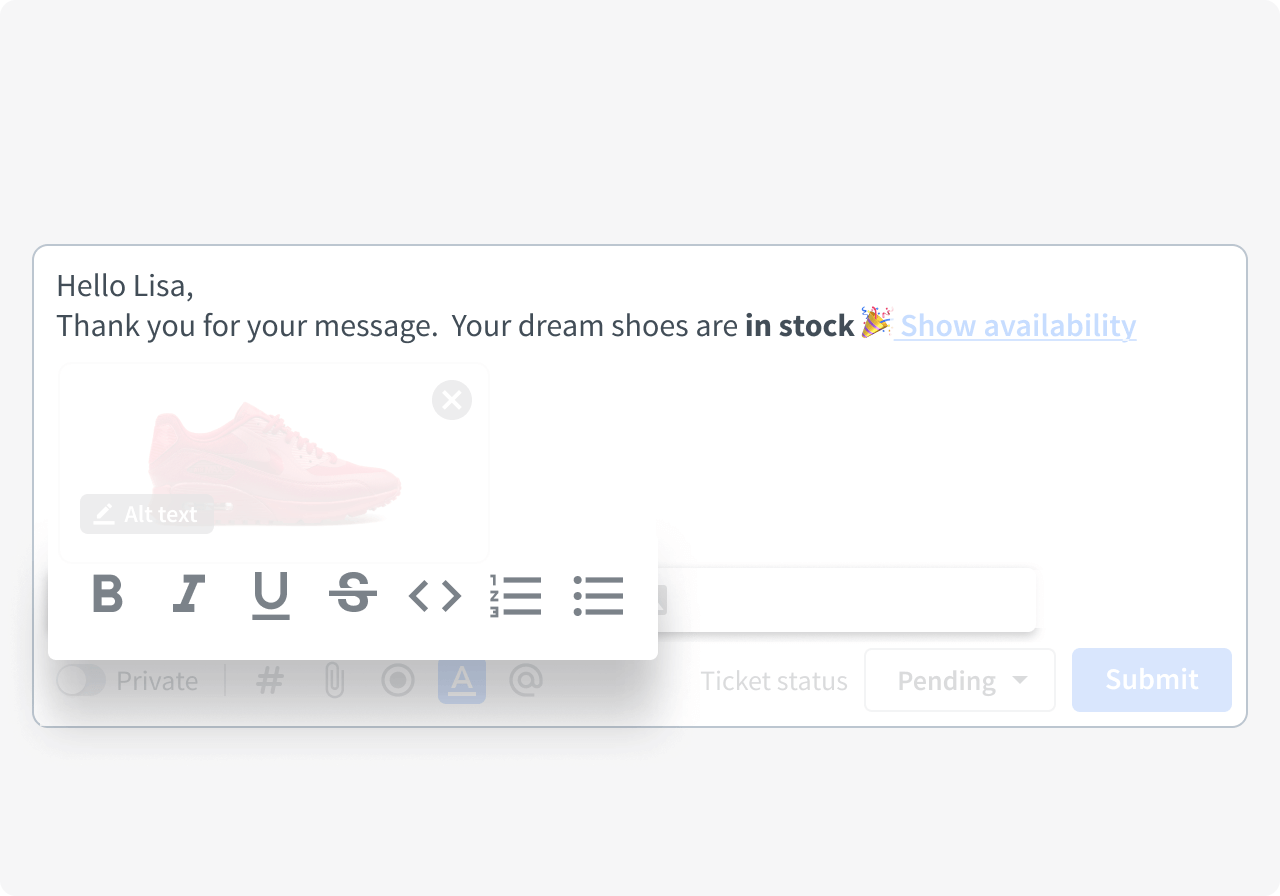
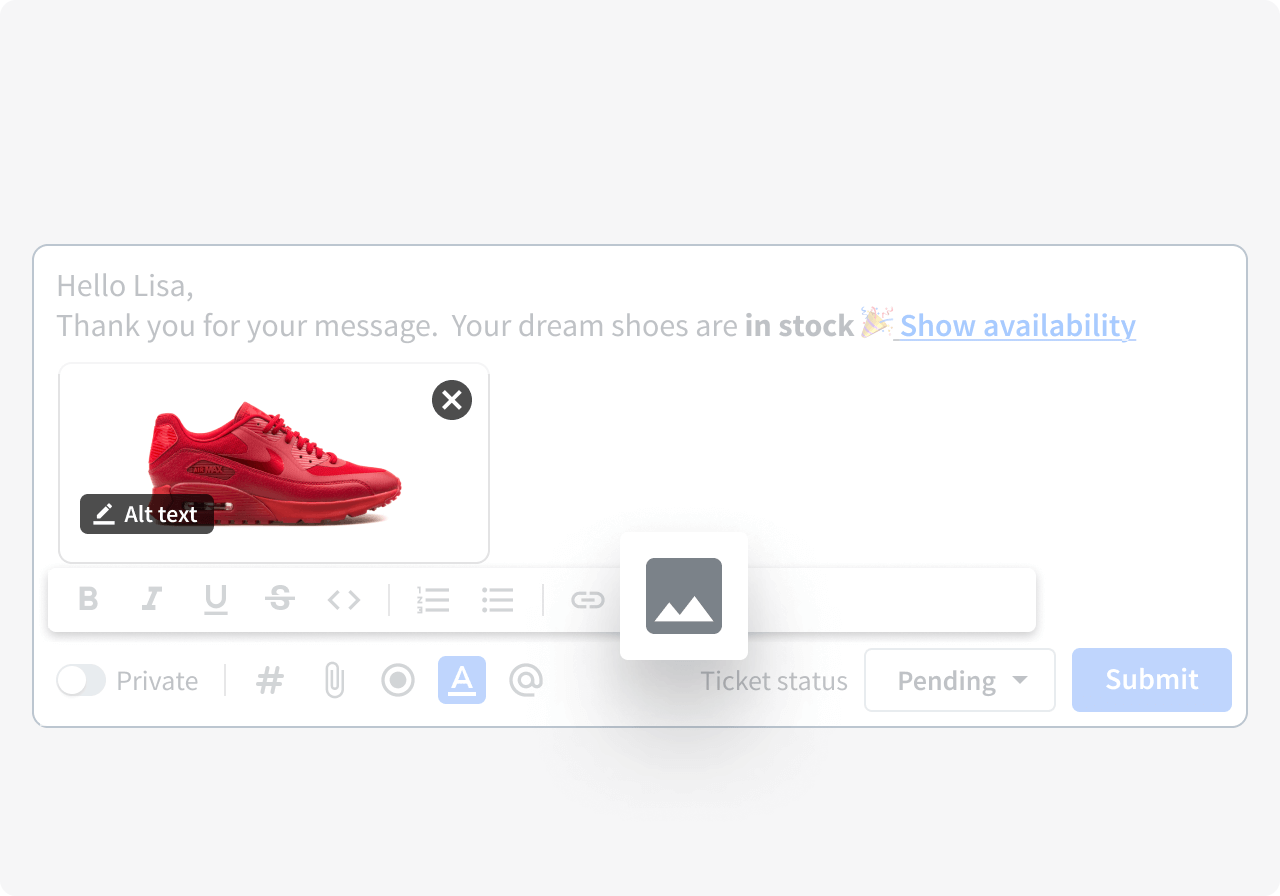
Insert useful images into the conversation. Images and screenshots are always quick to scan and easy to digest.
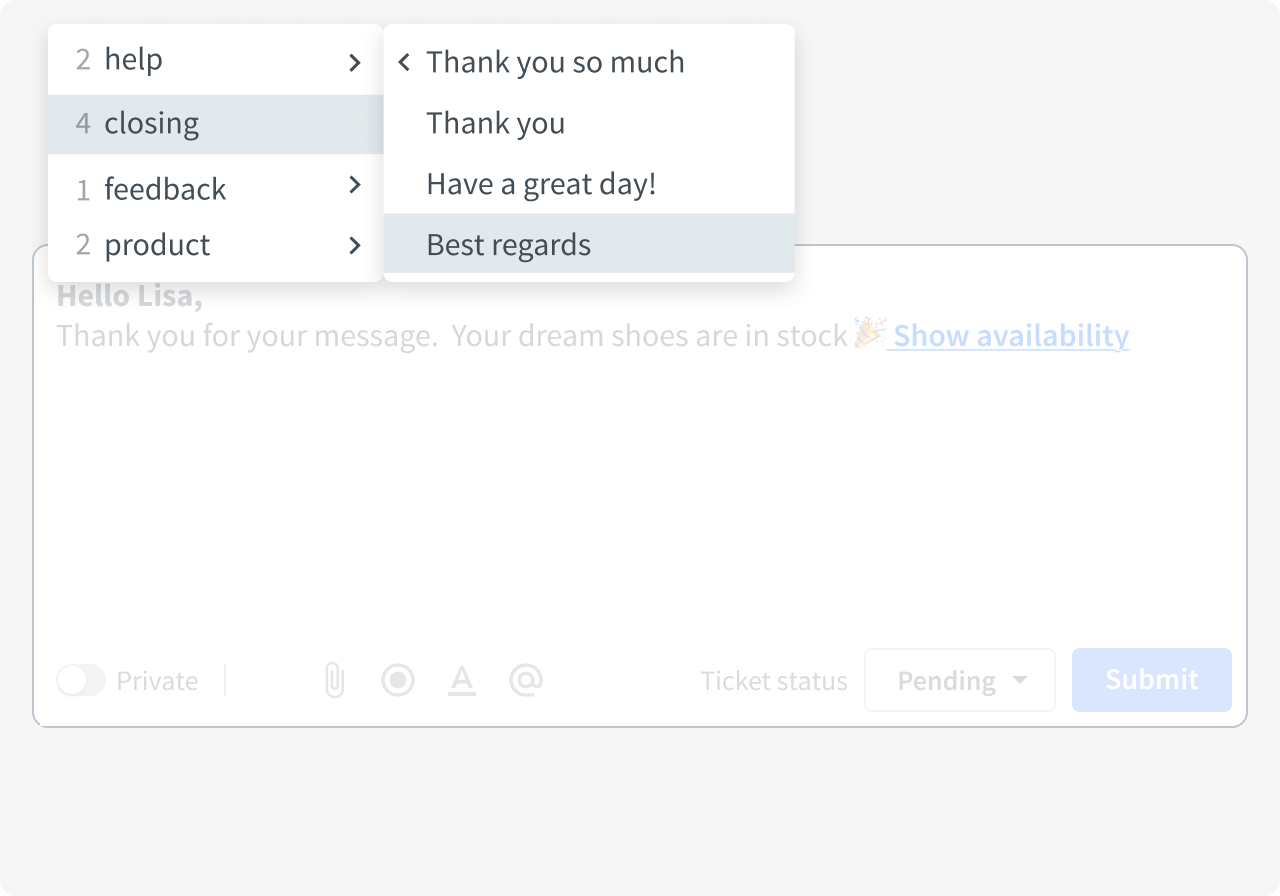
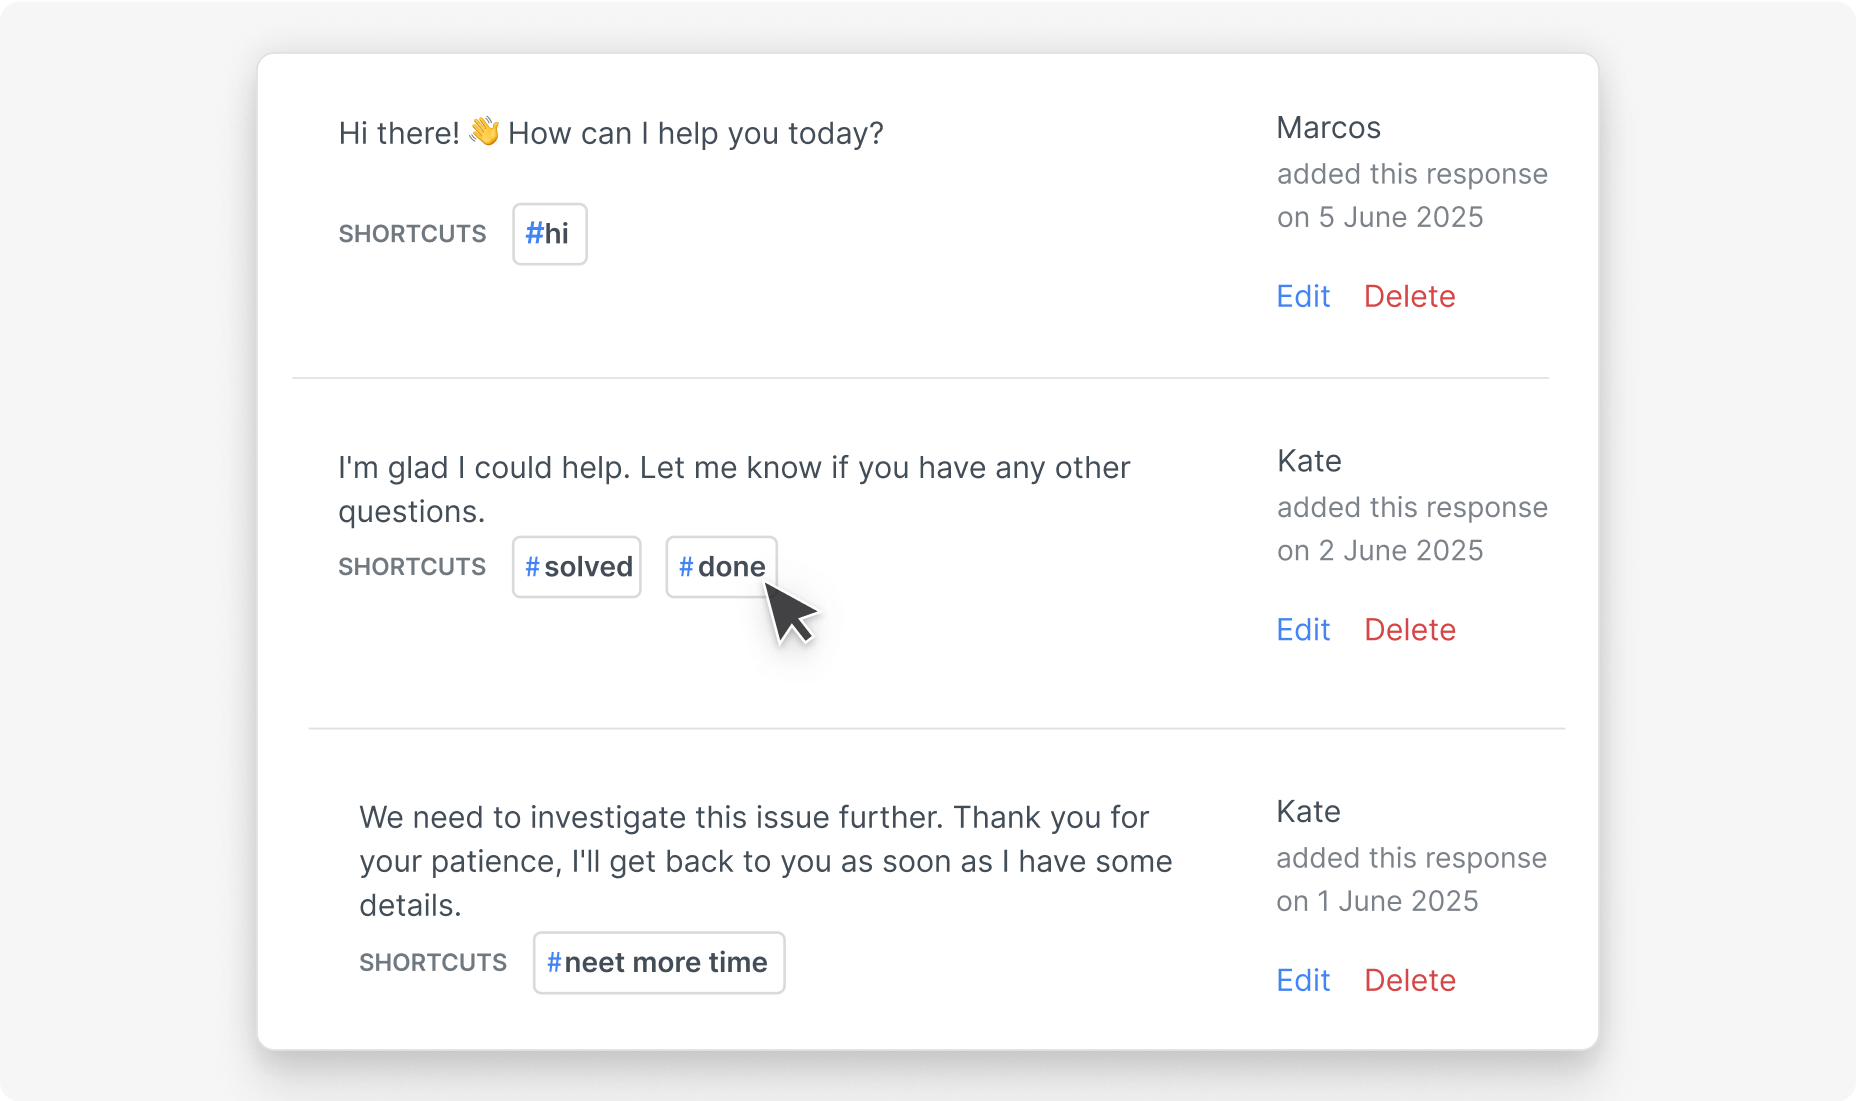
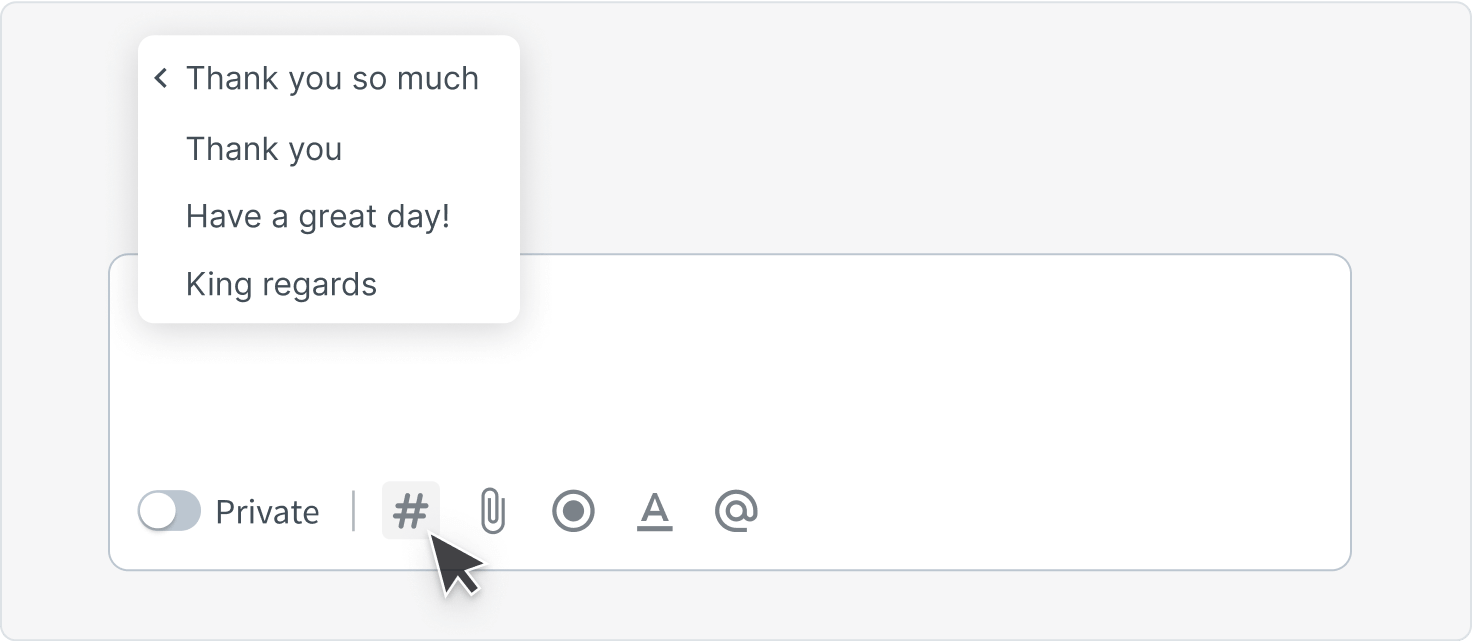
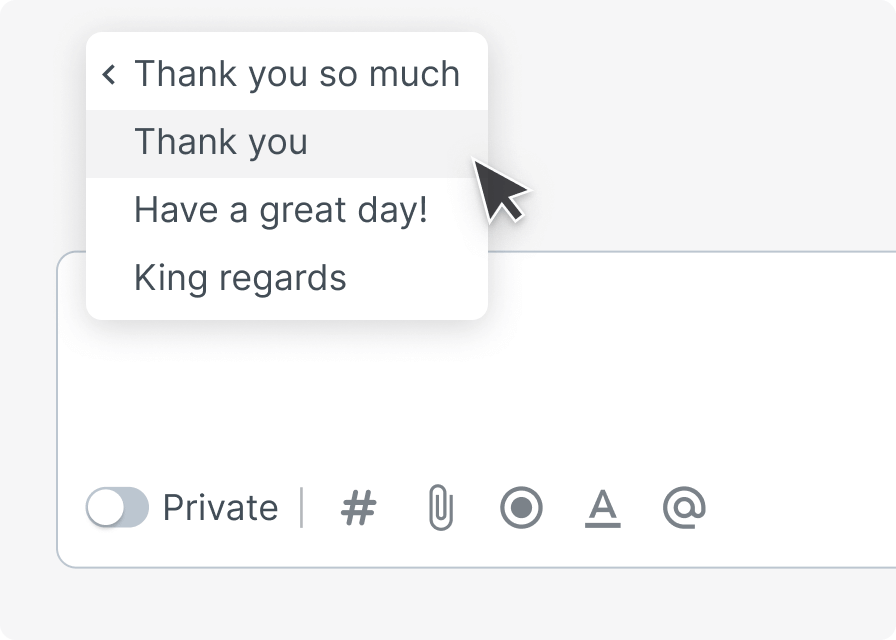
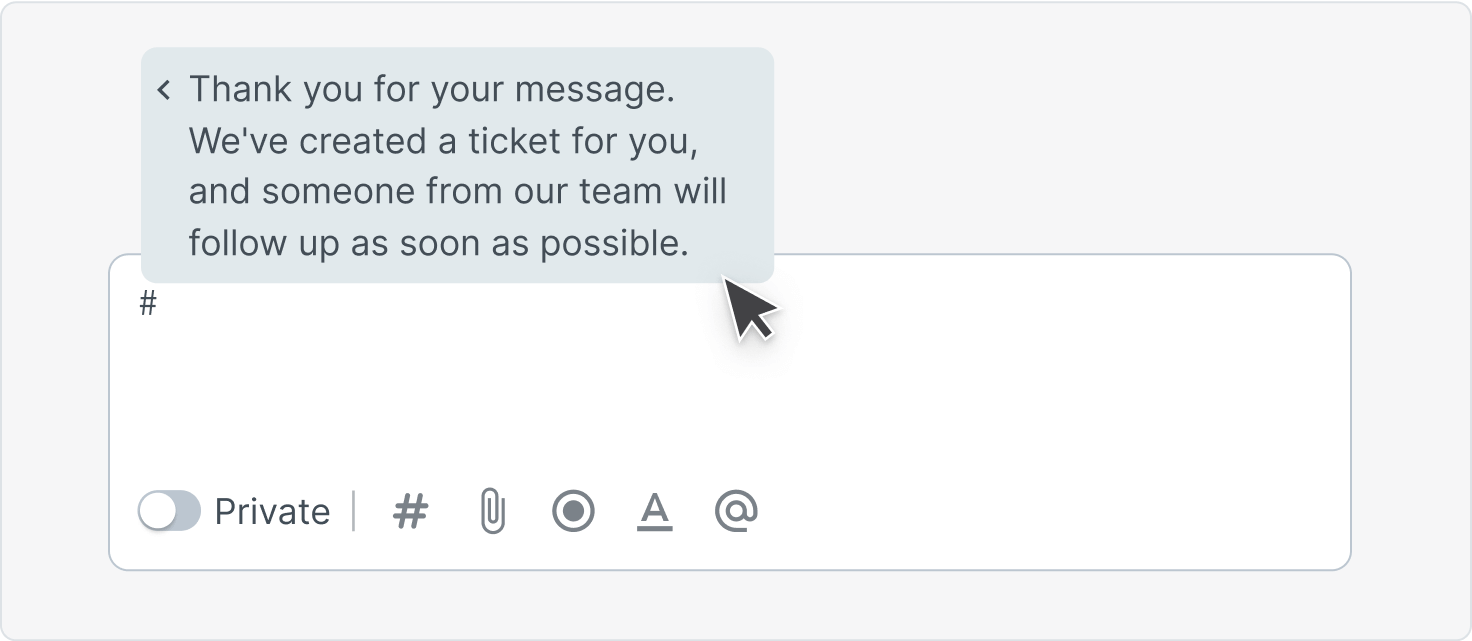
Save your best and most used messages as canned responses to keep them handy and save time. Recall them by typing the hash (#) in the message area, then enter the shortcut for the desired response.
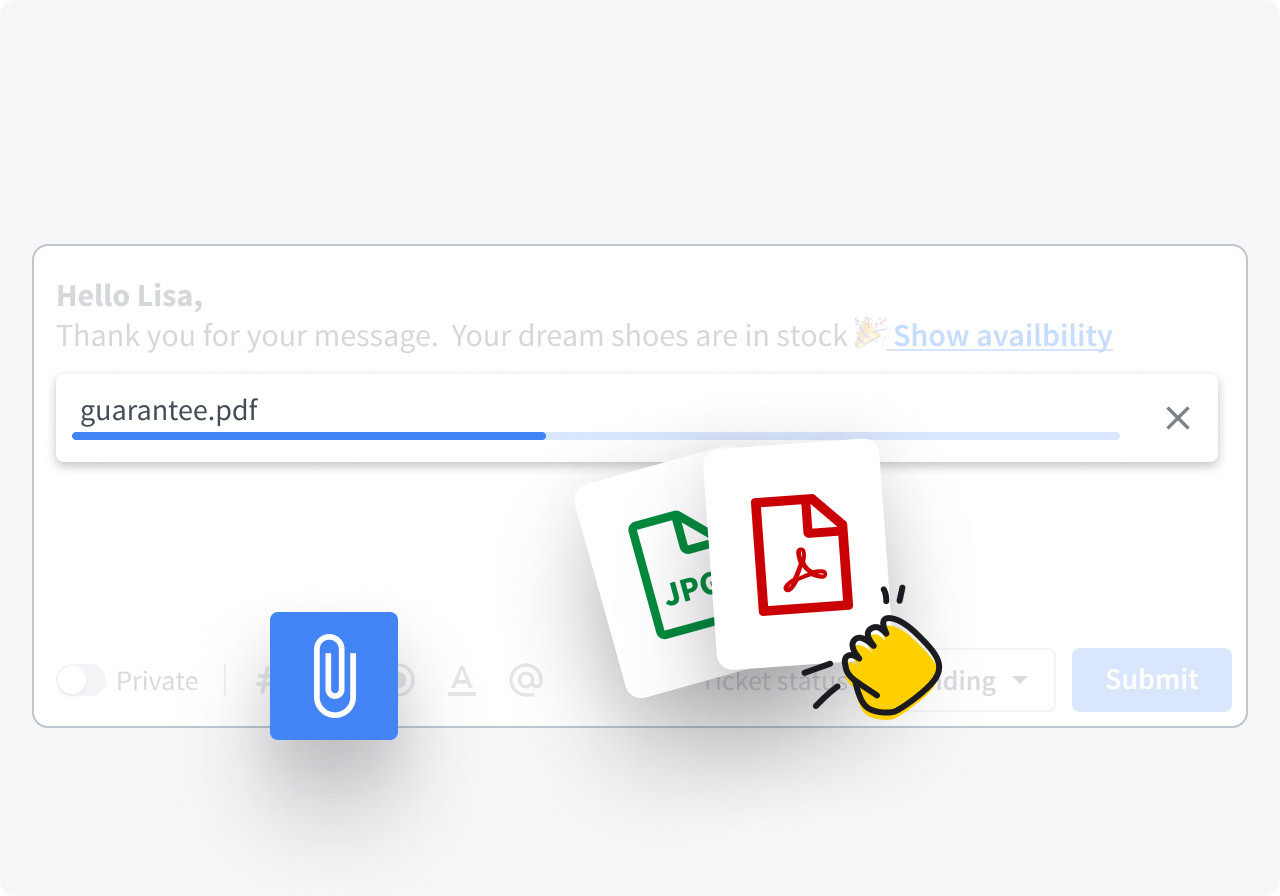
Upload necessary attachments to solve the customer case. You can use attachment formats such as pdf, jpg, doc, xls, csv, or zip, and upload files up to 10 MB to send them in the conversation.
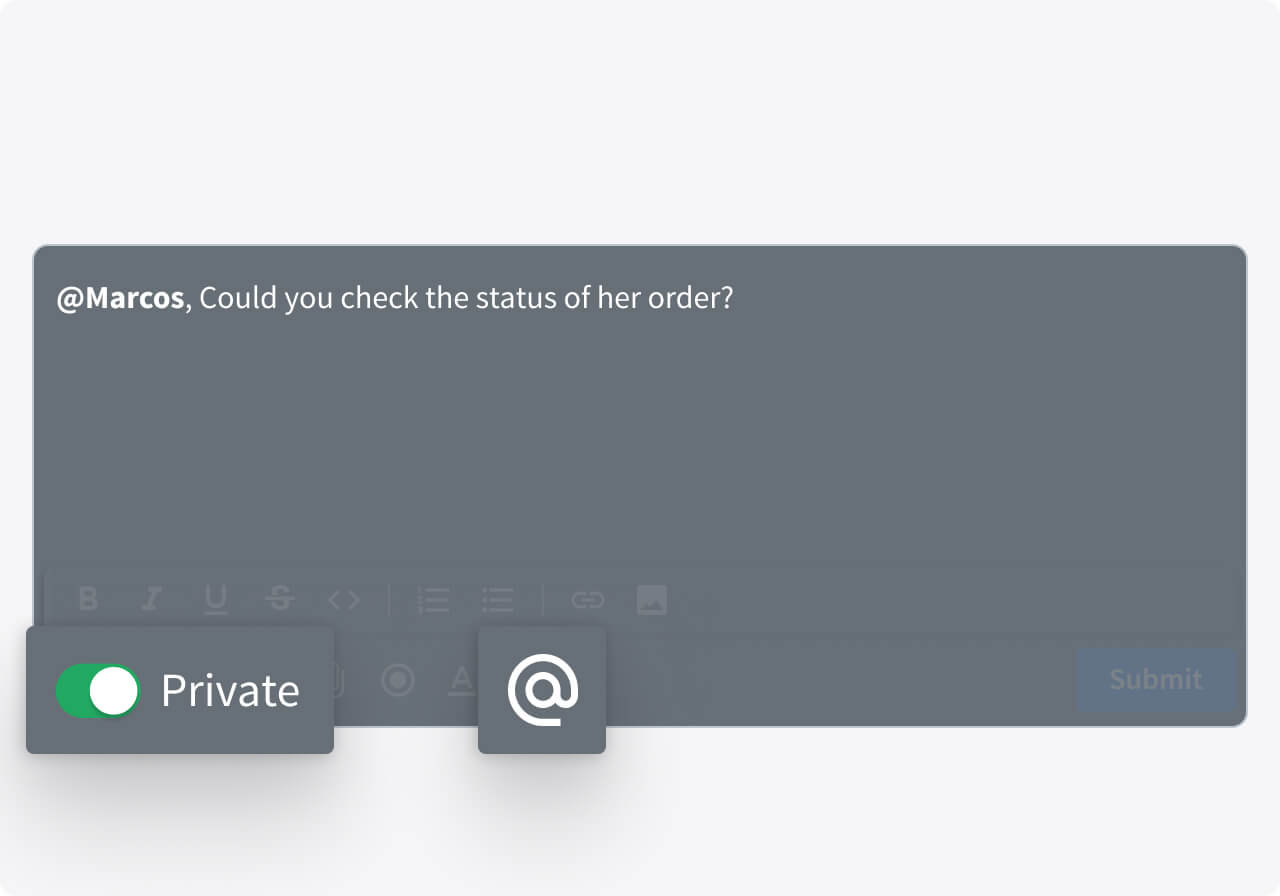
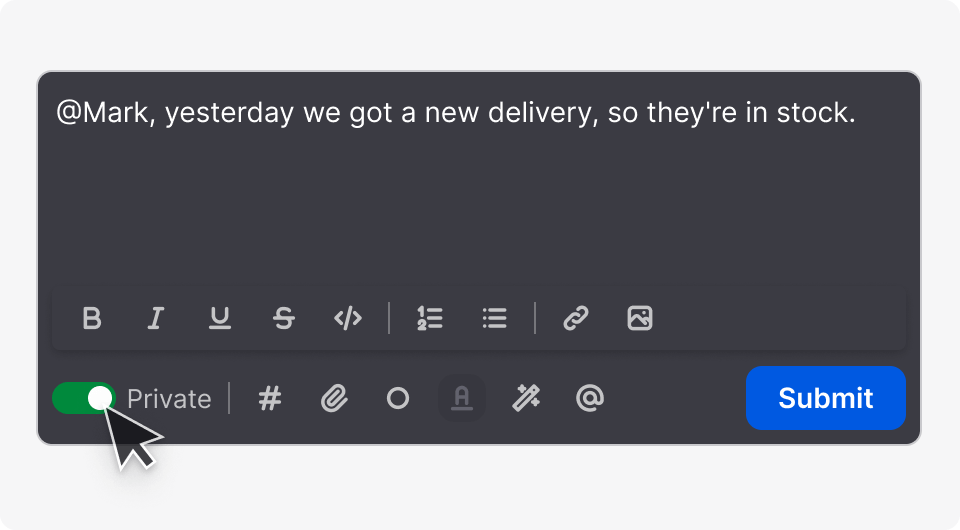
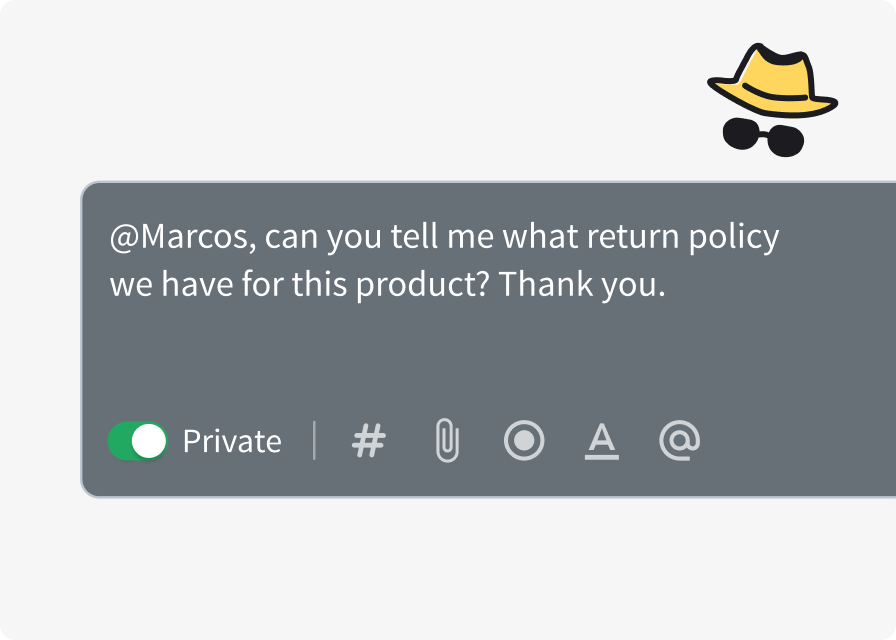
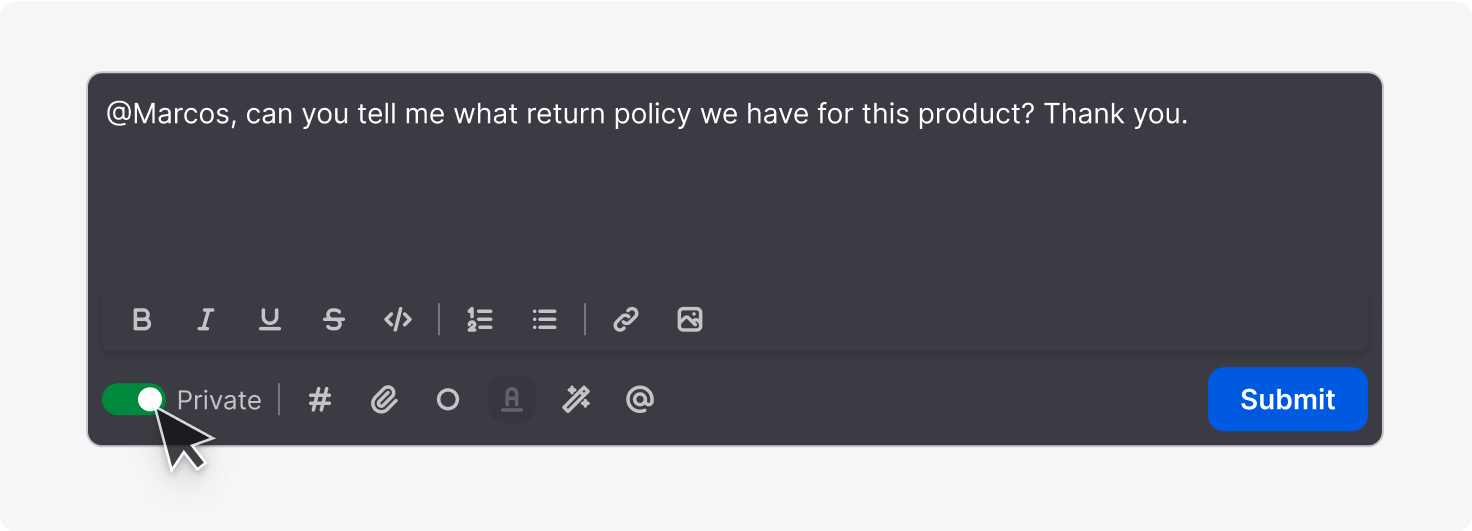
When you're in need, type "@" along with your teammate's name to mention them in a ticket and leave a private note. Anything you write will remain between the two of you as the mentioning only works in private mode.
The screen recording feature uses your browser's built-in capabilities for screen sharing. Use the screen recording feature to capture your screen and create a video response.

Be specific
Customers contact you when they have questions or something needs clarification. Don't make their task harder, and make sure your answers are straightforward so they can move on.
Take individual approach
Try to understand the customer case and be personal throughout the process. Address the customer by using their name to make them feel welcome. Mirror your customer’s language and behavior to build trust and make the experience enjoyable.

Better yourself
Grow as a professional and strive to learn from every customer message. Be proactive: Join Learning Space courses and fulfill your role to the best of your ability.
Check out the ticket details to track basic information about the customer case and its current progress. The ticket details are made up of three parts: Ticket info, Responsibility, and Requester. Use the available options to manage your ticket, update it, and streamline your flow.
The ticket ID is a unique value for every ticket. You can use it to quickly search for a ticket that interests you or use it to communicate with other agents to seek their assistance.
The exact day the ticket appeared in your system. You can estimate how much time you have left to send a response to the customer according to your internal rules.
The exact day the message exchange took place between you and your customer. You can use this information to decide whether to send a follow-up message or close the case.
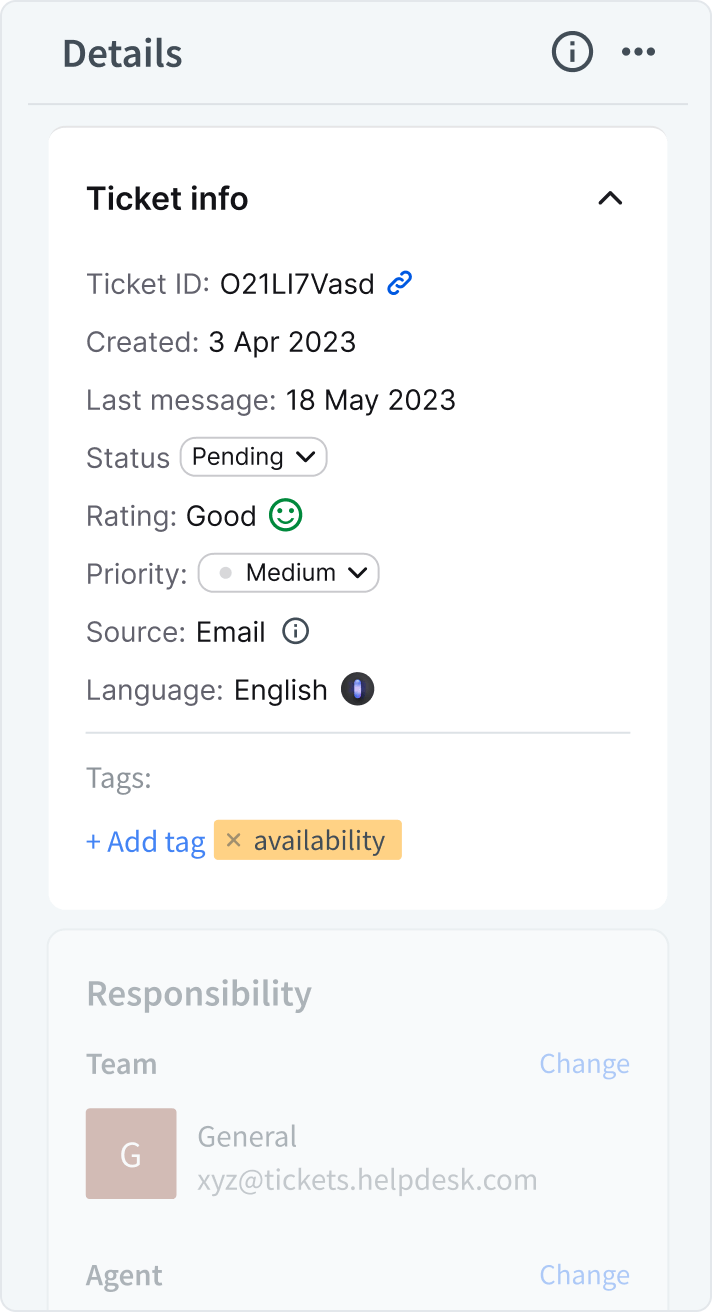
Statuses help you identify which tickets need your attention. There are six main statuses that you can use when resolving customer tickets:

When a new ticket is created in HelpDesk.com, it gets an “Open” status.

When you respond to an open ticket, its status will automatically change to "Pending".

A ticket with an “On hold” status is a case that cannot be completed right away and requires consultation.

Mark a ticket as “Solved” when you’re sure that you’ve provided the customer with the necessary answers and left them satisfied.

Set the "Close" status when you get a message with information that doesn't apply to you or your team.
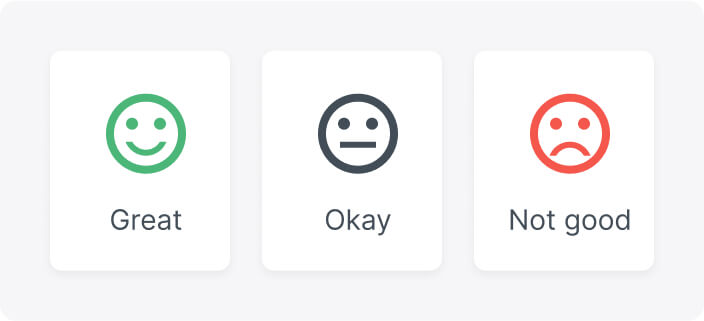
One hour after the conversation, you can ask the customer about their service experience through a short email evaluation survey. You can use this rate to measure and improve satisfaction.
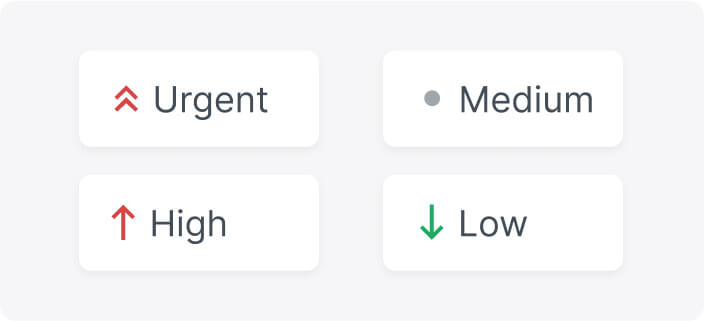
Use ticket priority to determine how quickly you should handle a ticket. Priority levels define urgency for your team and are tied to the next steps in escalating the case. There are four priority levels in HelpDesk.com: Urgent, High, Medium, and Low.
The source indicates how the ticket was obtained. By integrating with different communication channels, you can track this data, prioritize different channels, and spend more time on the ones that get you the most customer queries.
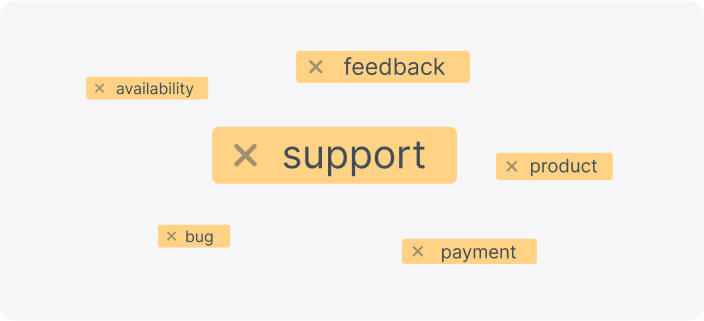
Tags can help you identify a customer case at a glance. Add descriptive tags to characterize your tickets so that you can track, filter, and segregate them with respect to requests.

Create custom fields to store additional information about tickets, requesters, and organizations. Custom field values can be managed and viewed by the teams you specify.
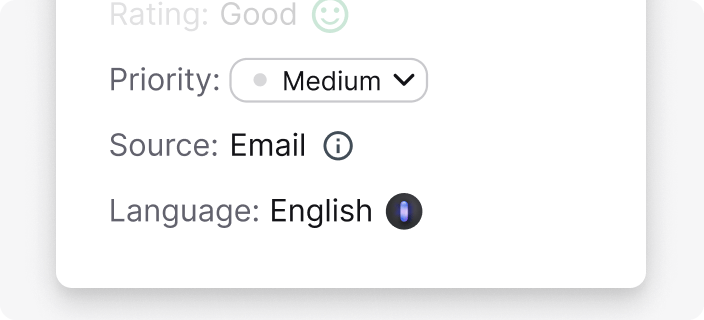
When a requester sends their first message, the system detects the language and details the ticket. Use this information to set up automations, route messages to the right team members, and send tailored responses based on the detected language.

Deleting a ticket
If you want to delete your ticket, click on the menu in the upper right corner in ticket details.
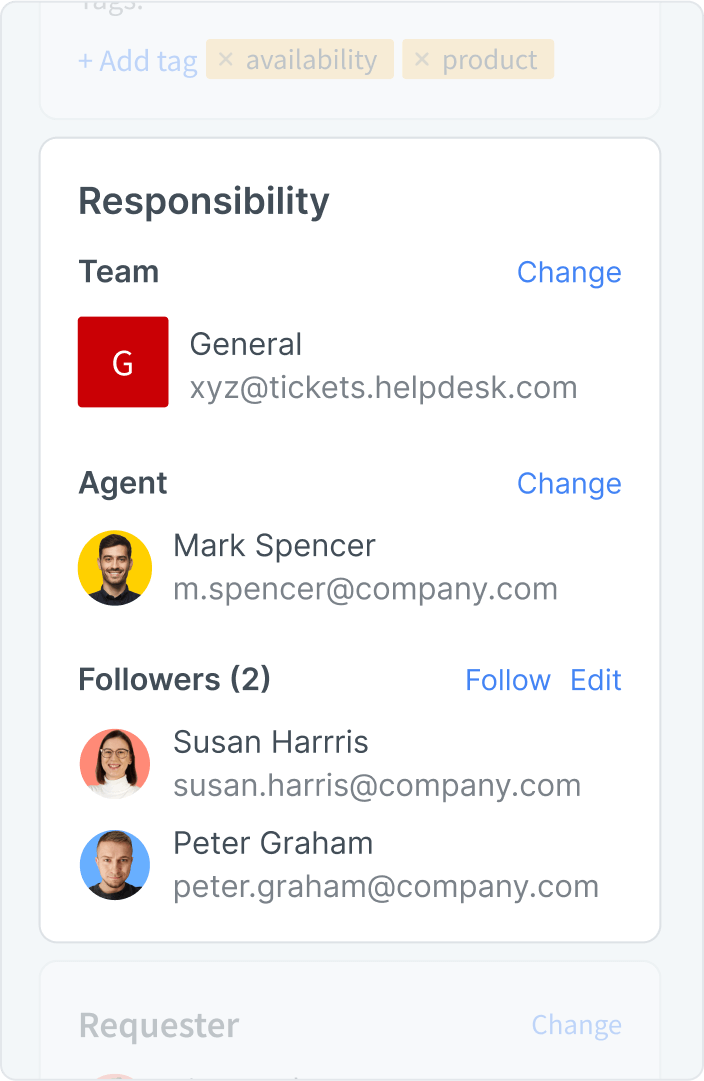
A team is a specialized group of people who deal with a specific customer case type. To change the team, click on the "Change" button.
The agent is the person responsible for the ticket and its successful resolution. To change the agent, click on the "Change" button.
You can add yourself as a follower if you want to be notified of any change in a particular ticket. You can also add other agents as followers to keep them in the loop.
Defining responsibilities is a key part of the ticket resolution process. Depending on how you manage your ticket flow, you can use three effective ticket assignment strategies to share duties and clarify ownership:
Manual
assignment
Supervisor
assignment
Automated
assignment
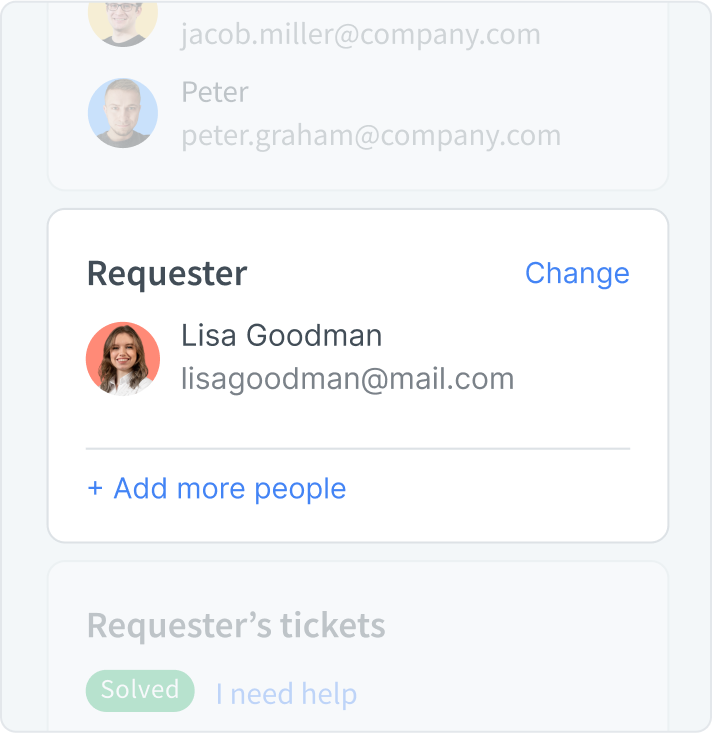
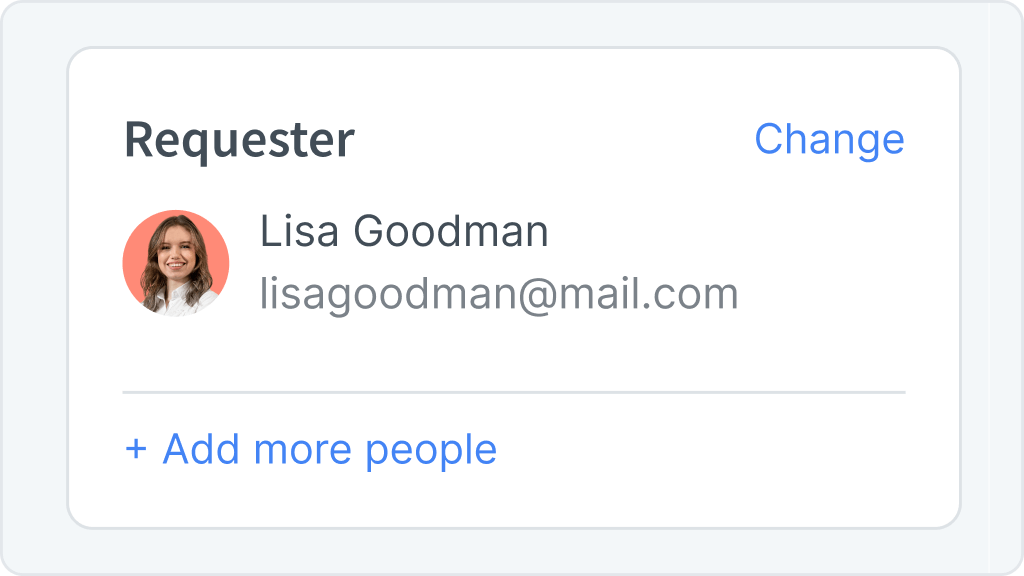
See the requester's details, such as name or email address. You can change this data at any time to keep information consistent.
Reach multiple recipients with your message by adding them to the loop. This way, every person related to the case can stay on top of things and be informed.
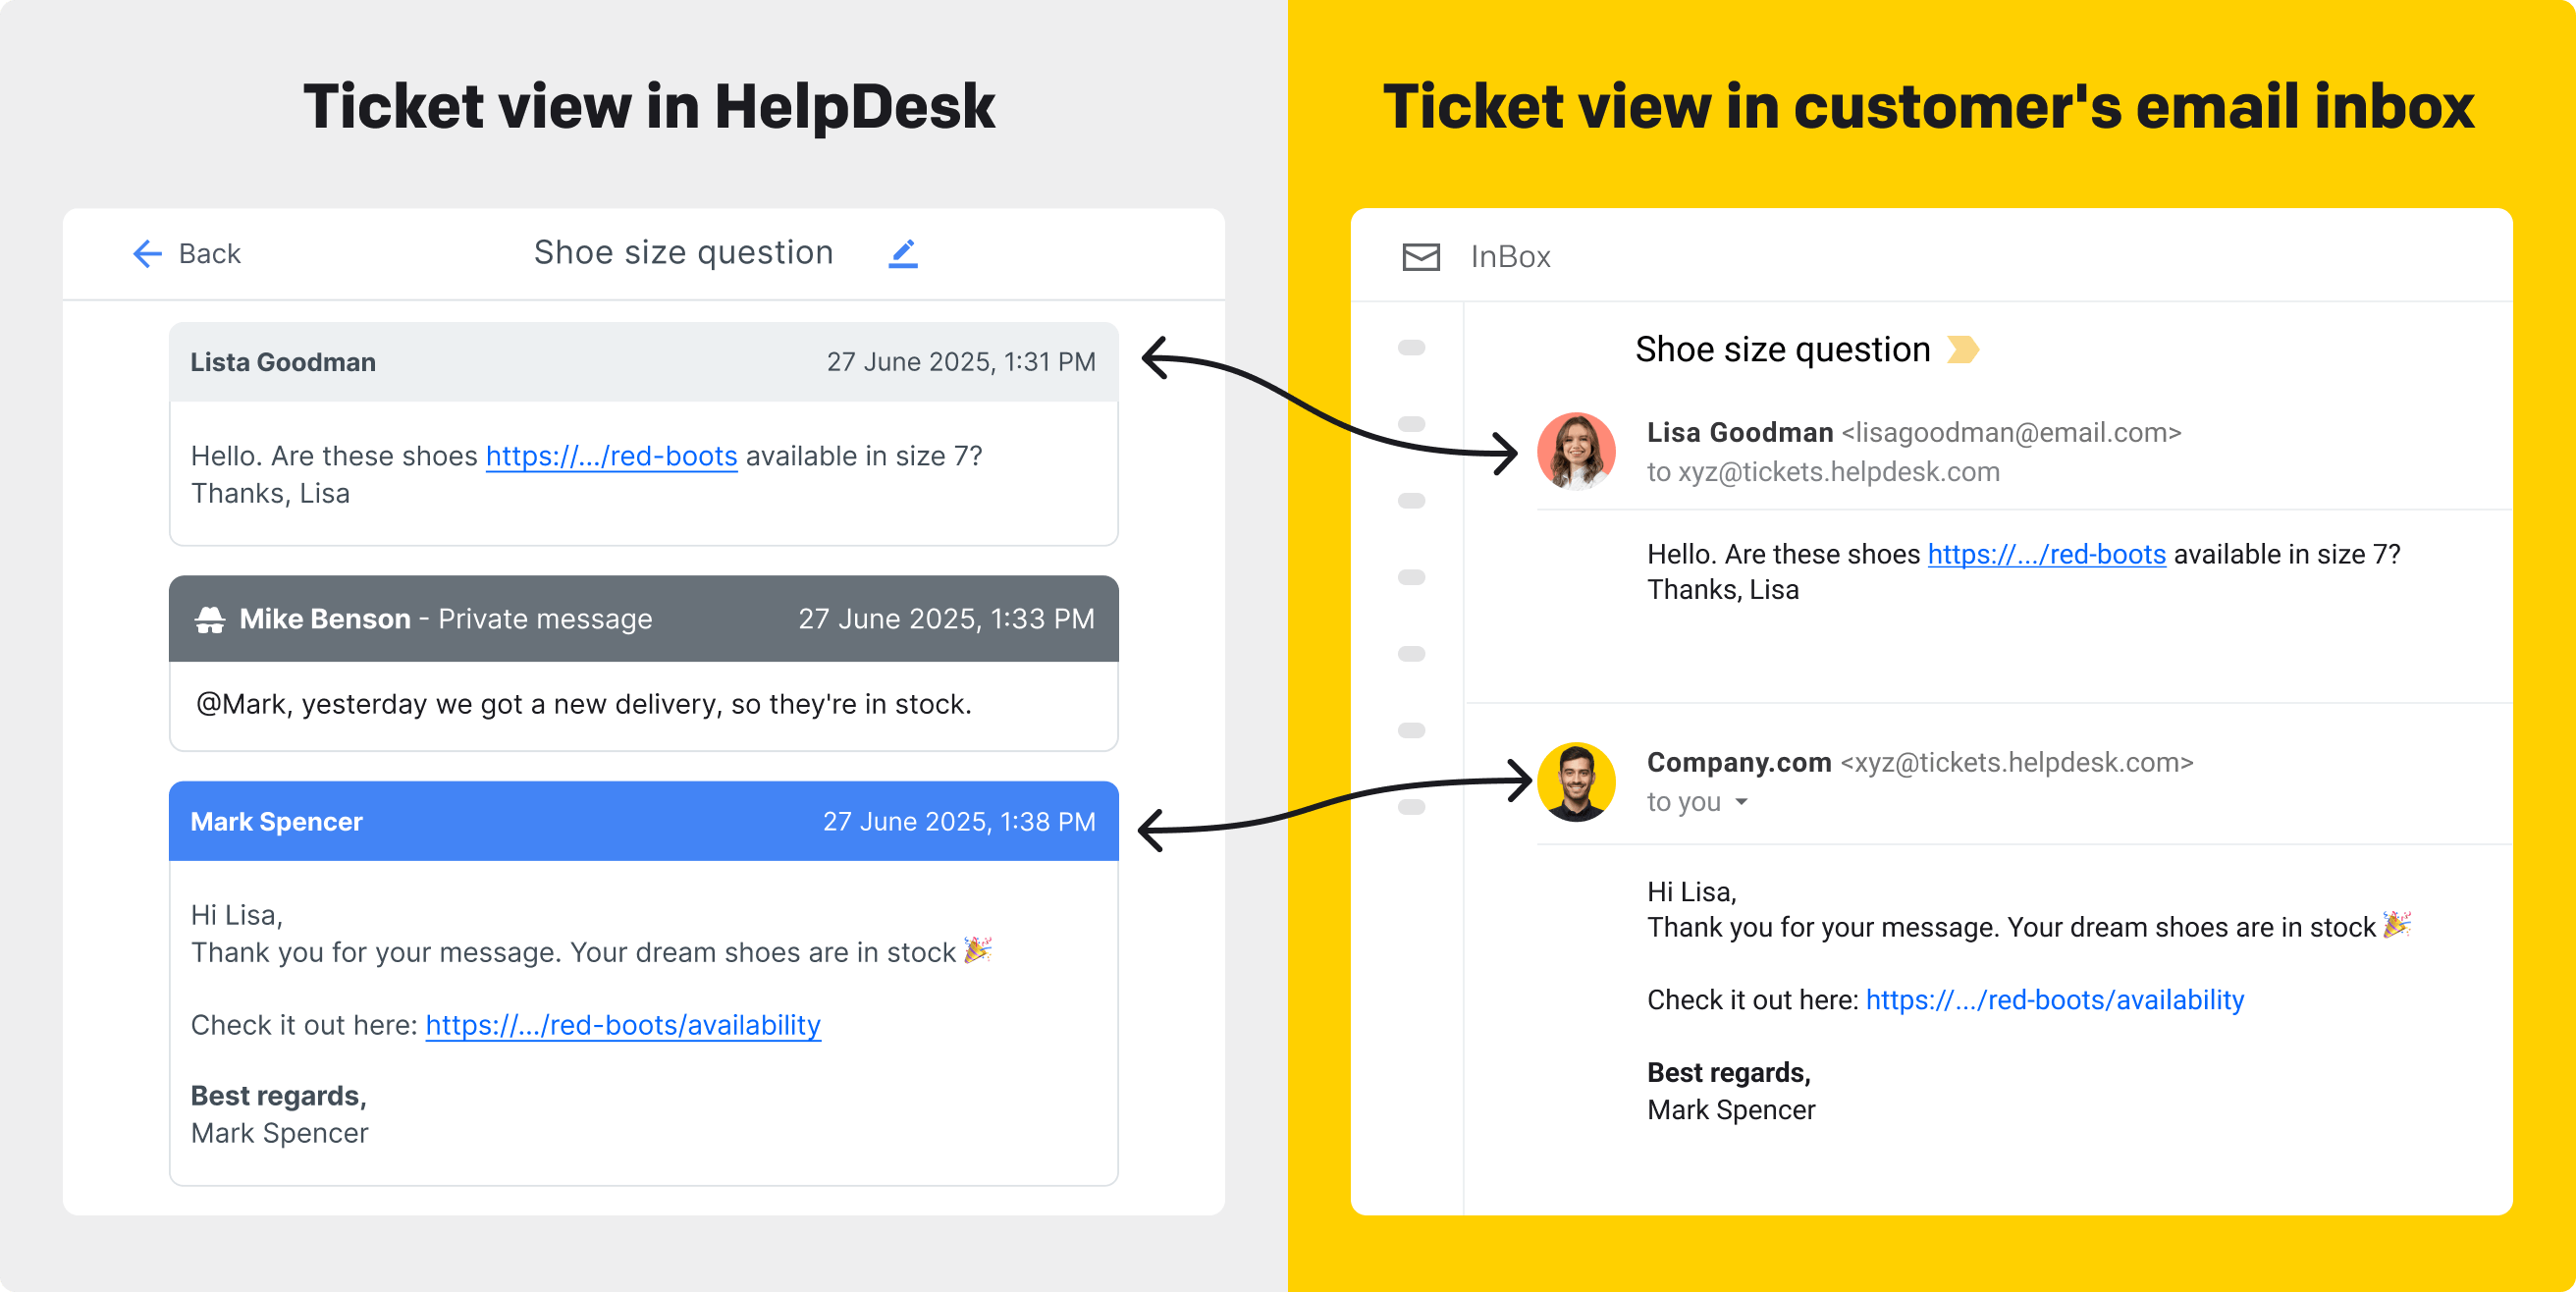
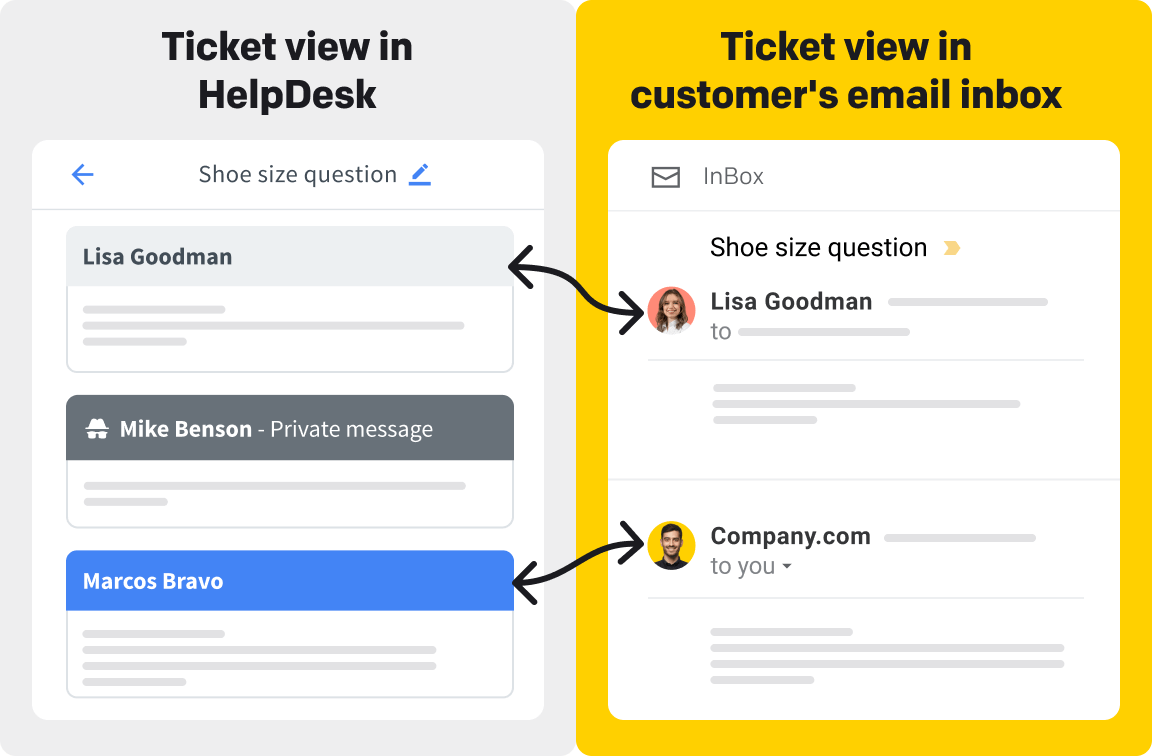
Perfect! You already know how to manage tickets, but are all those changes made to the ticket details visible to the customer? The answer is no.
Indeed, all ticket changes will be confirmed in the communication feed with a short notification to keep agents and your team up to date. Still, they will remain invisible to your customer. Your customer can only see the messages you sent to them using the communication feed on the left, and they clearly stand out.
HelpDesk.com is designed for both small and big teams that need to handle customer communication. Working on tickets streamlines information flow between people, speeds up the resolution process, and improves knowledge sharing and productivity. Invite your team to HelpDesk.com and see how your work gets better and better.
Think about the teams in your organization and move them into HelpDesk.com to reflect your actual work routine. Go to the "Agents" section and click on the "+Add" button to create a new team. Set teams up by skill sets or departments. You can also go a little further and break them down by geography, language, or product line.
Learn more about teams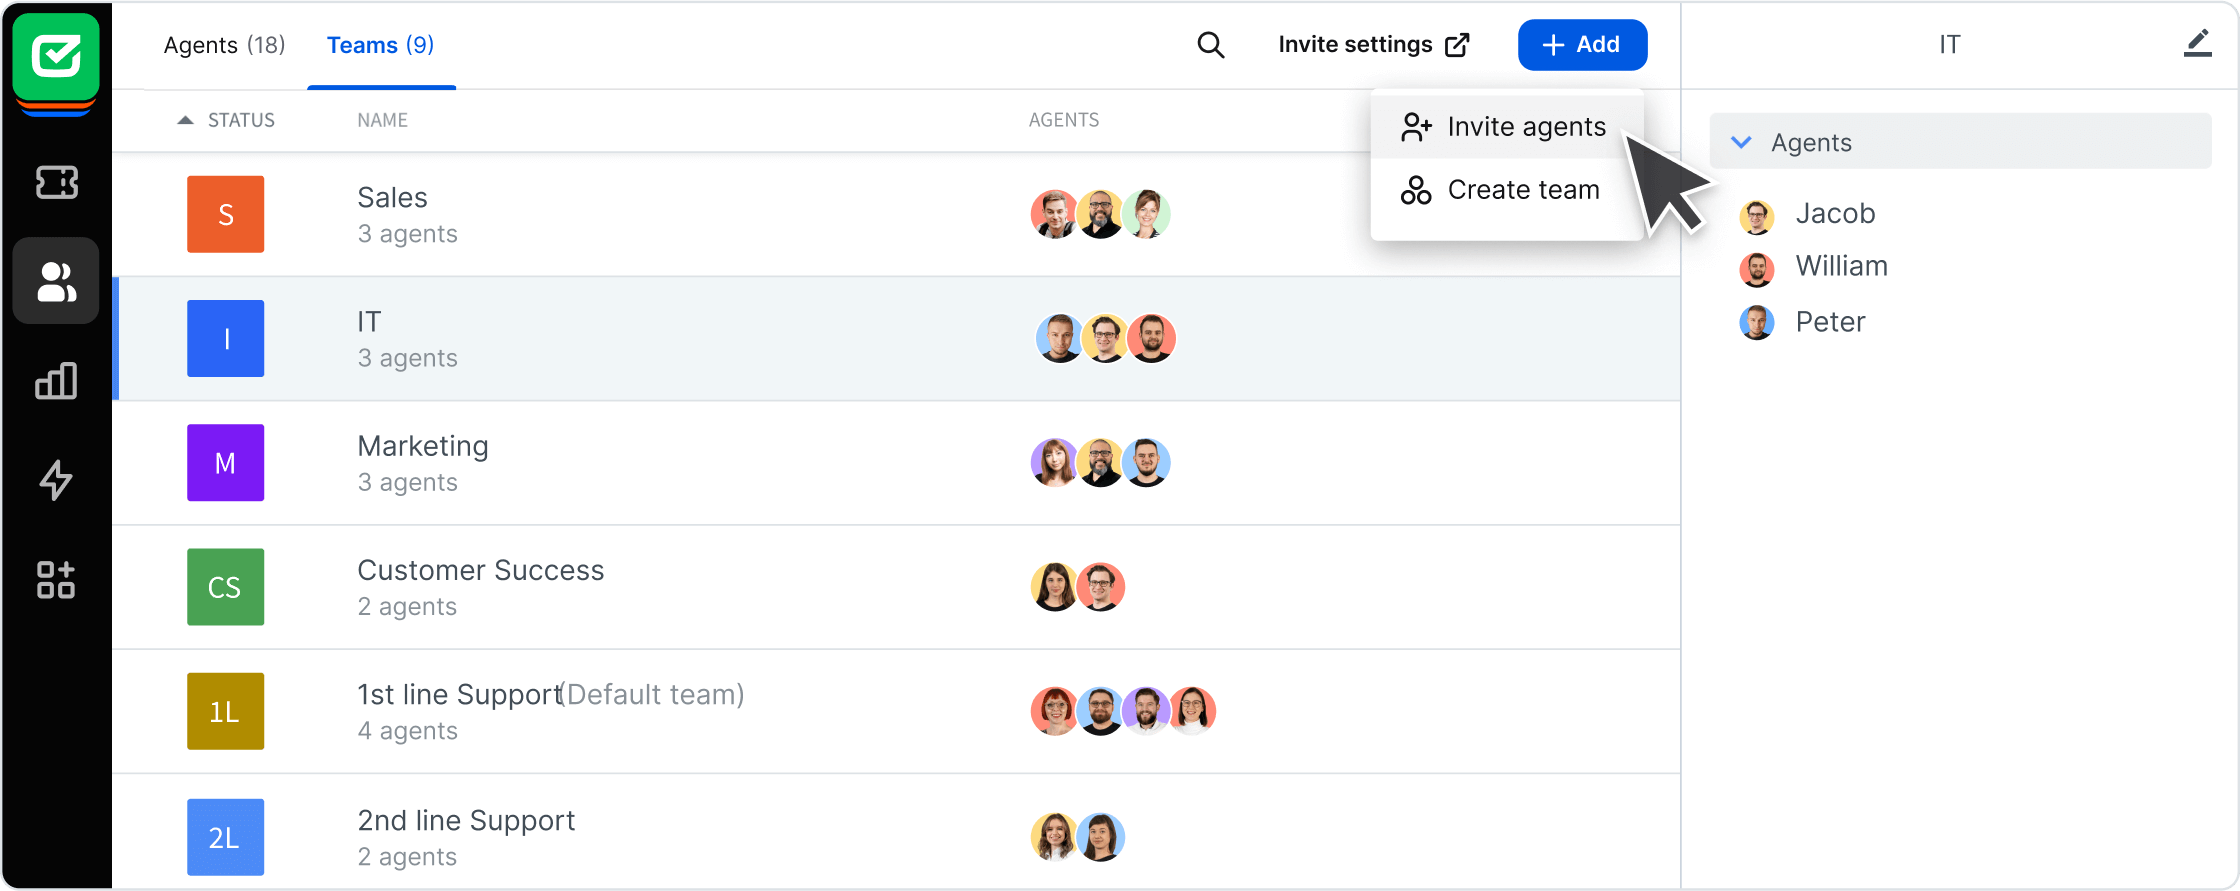

Managing multiple email addresses
You can create a dedicated forwarding address for each of your teams in order to streamline your ticket handling process. This way, you can easily separate messages directed to sales, marketing, or other departments, but still, all communication will drop into one HelpDesk.com dashboard.
Move your entire team involved in driving customer success to HelpDesk.com. Move to the "Agents" section to see your teammates on the list. Click the "+Add" button to invite new users by entering their email addresses, choosing their roles, and assigning them to the proper team.
When adding a new user, you can select one of three roles to differentiate responsibilities. Depending on the role, you have access to various sections and settings in HelpDesk.com. Divide roles among teammates to provide excellent customer service.
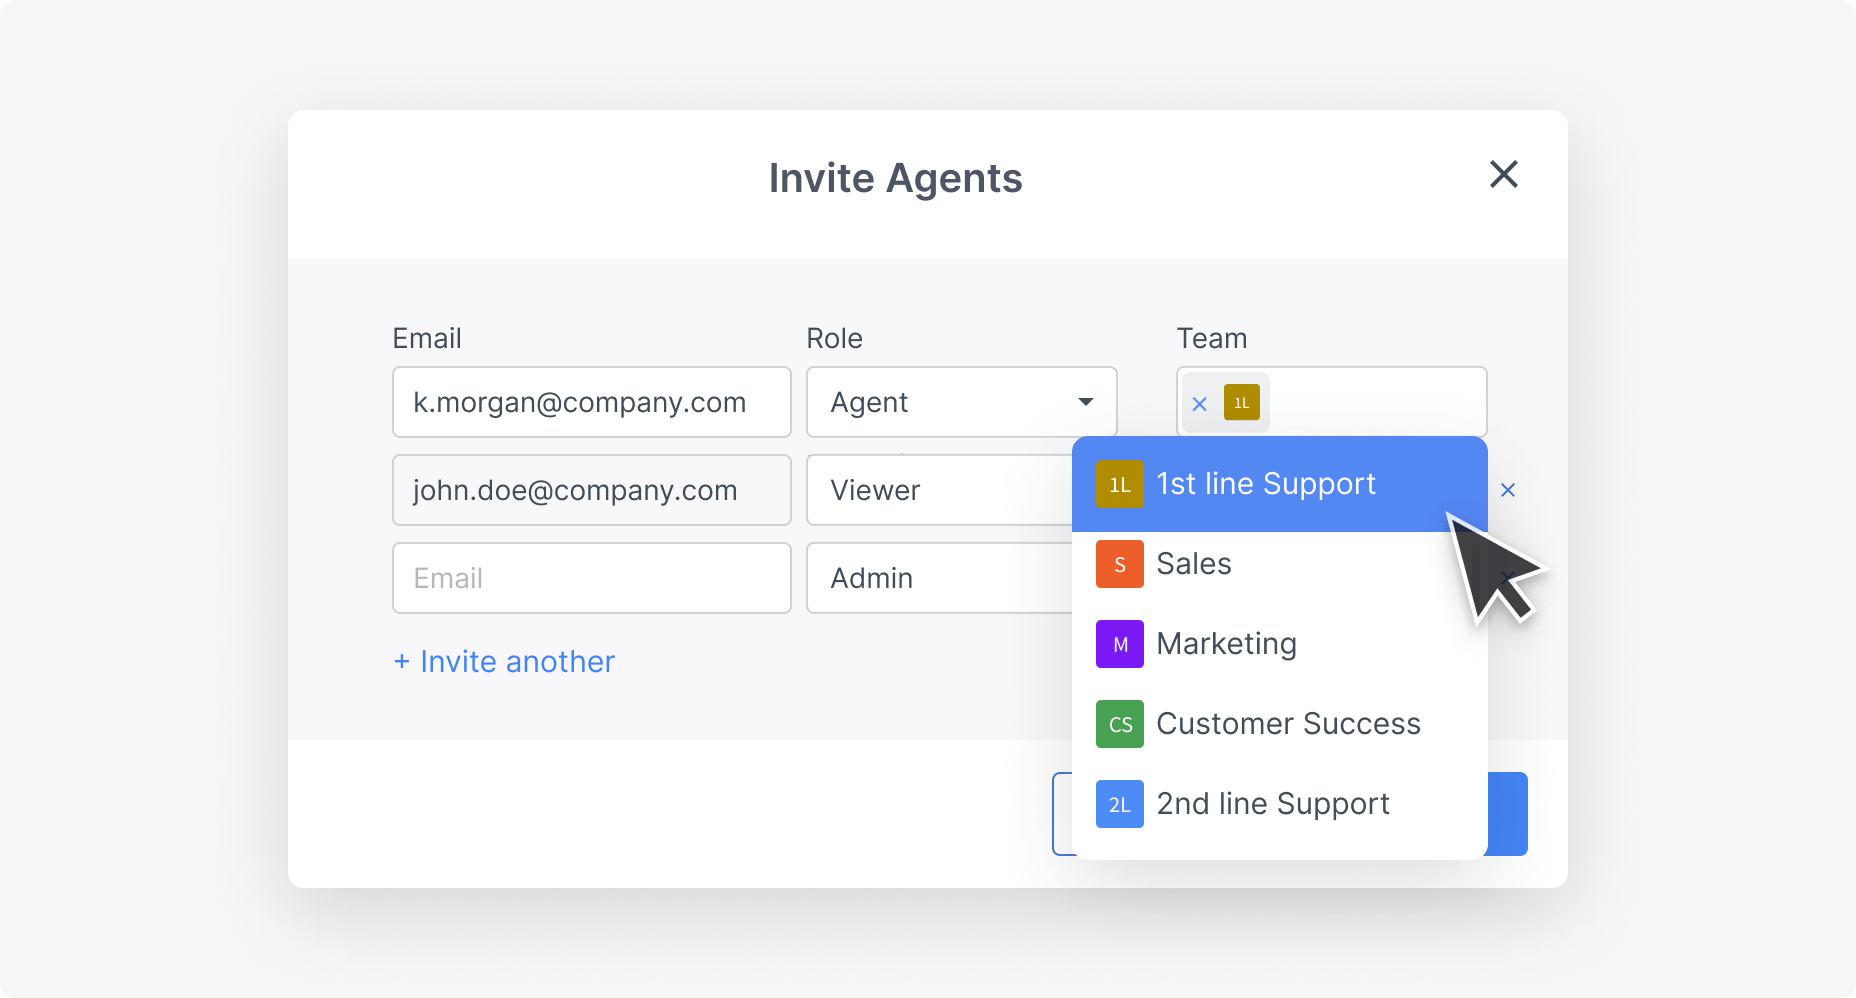
Has all possible permissions. When you create a HelpDesk.com account, you instantly become an admin. As an admin, you can add more users, set global settings, access all reports, and manage your entire HelpDesk.com account to serve your team best.
Works with tickets in HelpDesk.com but doesn't have to make changes to global settings. An agent can use all features to handle customer tickets, change their personal settings, or access reports to see the team's data.
Is a free user you can add without updating your subscription details. A viewer has limited access to HelpDesk.com and can browse or read tickets but can’t take any action. This is an ideal role for people who want to stay informed.

The right person in the right place
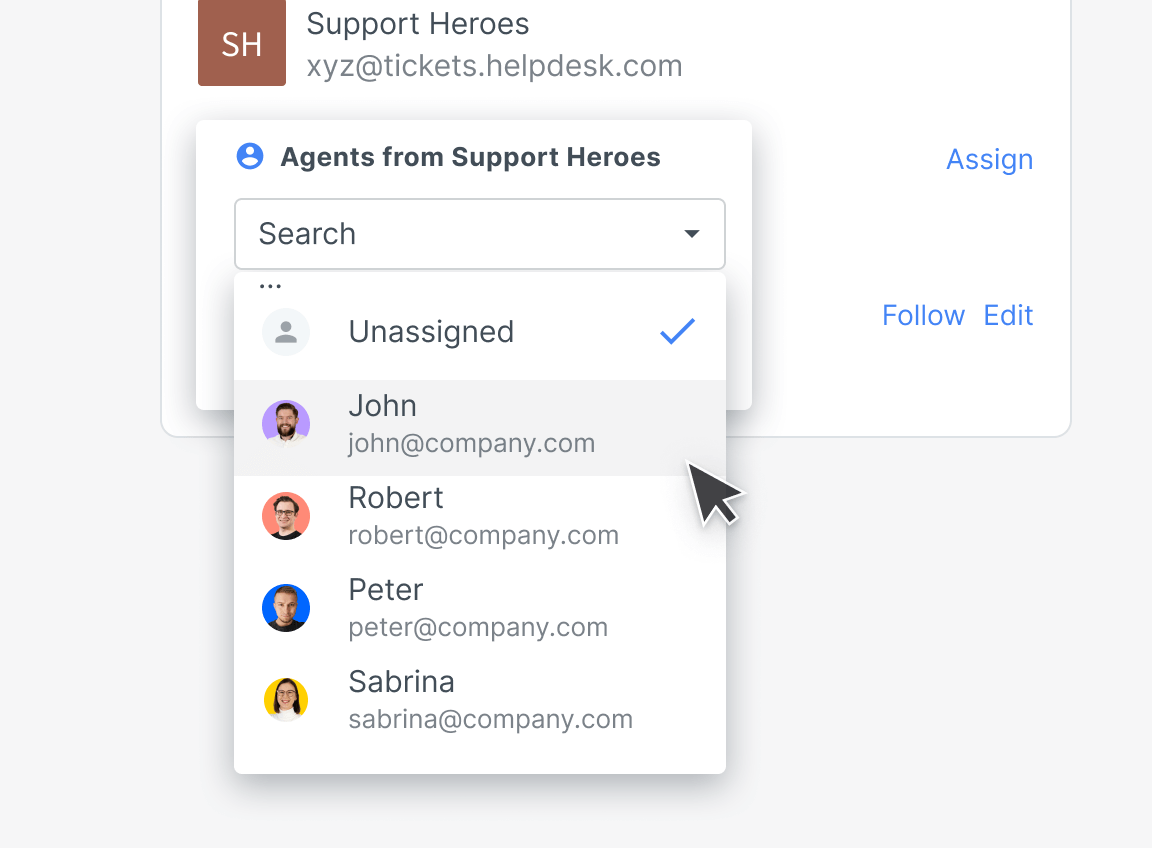
Assign your agents to appropriate teams so that their competencies and skill sets align with the team's purpose.
When a ticket hits your list, know that the customer is in need. Enter the ticket and click the "Assign" button to start skills-based routing. Select a qualified agent who can quickly and efficiently resolve the customer case.
Learn more about assigning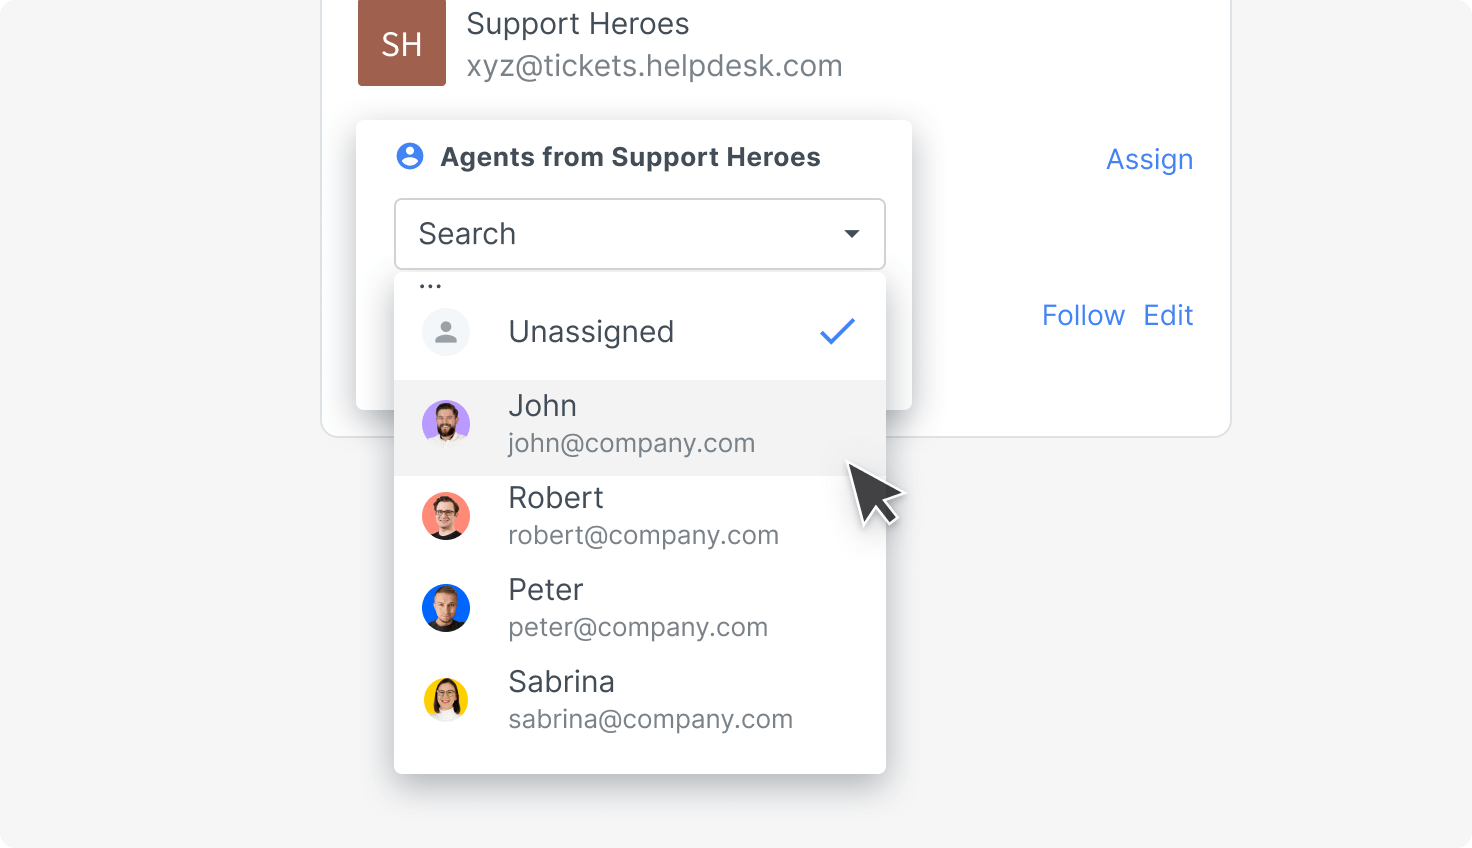
HelpDesk.com is packed with useful features that will speed up the troubleshooting process and streamline your team's efforts.
When handling a ticket and writing text in the message area, you can click on the toggle marked Private to enter private mode and send private notes. Use this feature to document your findings on a case, add quick notes, brief a teammate before changing the assignment. You can also use private mode to mention your teammate by typing "@" and their name to assist you if the case is complex.
Learn more about private notes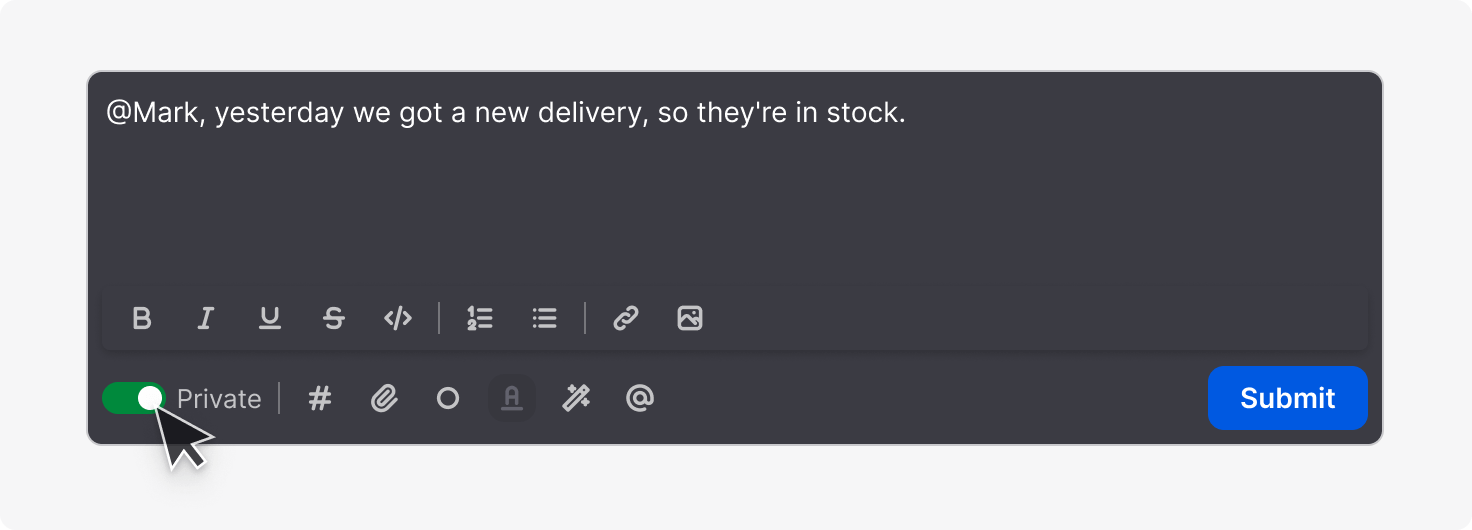
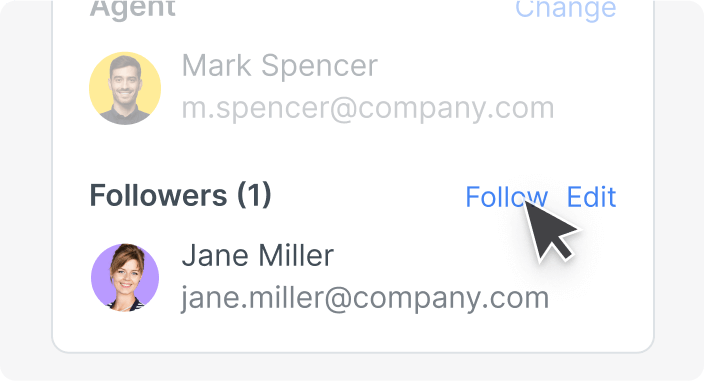
Become a ticket follower to oversee the ticket resolution process. Click "Follow," and you’ll be notified of any changes to your ticket in real time. Mention agents, add them to the loop and work together for the best assistance.
Learn more about followers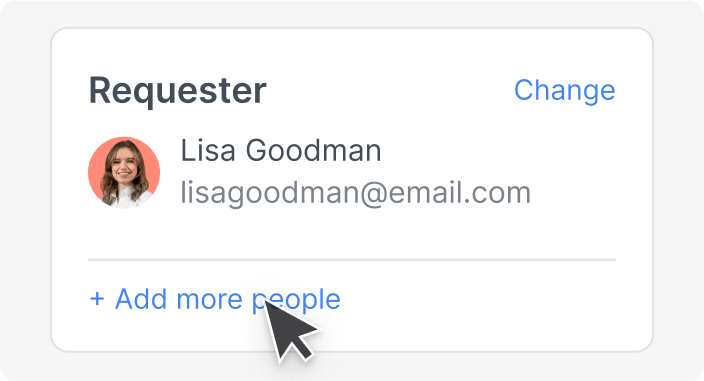
Click on the "+Add More People" button and add more message recipients. Engage other people who you think should be updated with the information. Add the "People in the loop" parameter to your email template and let your end recipient know who's involved.
Learn more about people in the loop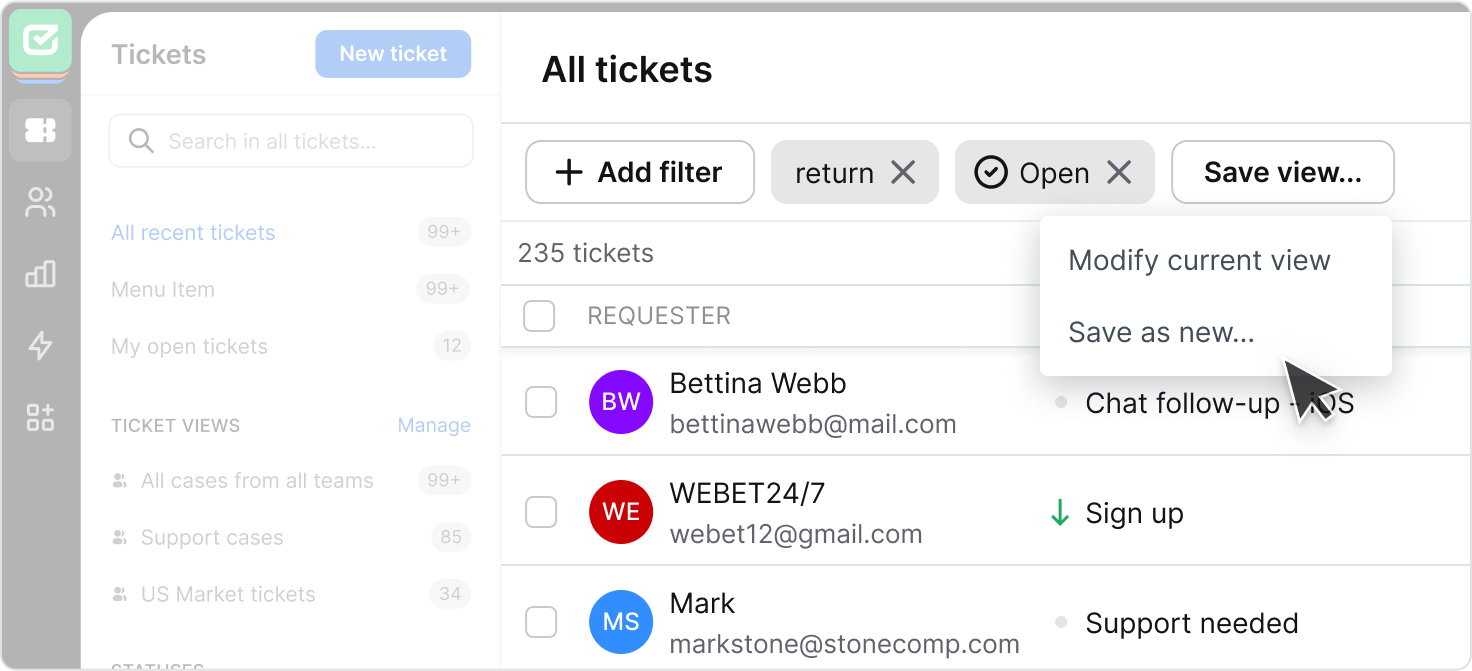
Organize your work and click on the "+Add Filter" button to filter out the tickets you want to keep at hand. Then save your settings as a view that allows you to browse through your selected tickets quickly. If you feel the view you created is essential for your team to meet their goals, mark it as "Shared." You can access all created views and "Shared Views" and easily navigate between them using the left side of the main dashboard.
Learn more about views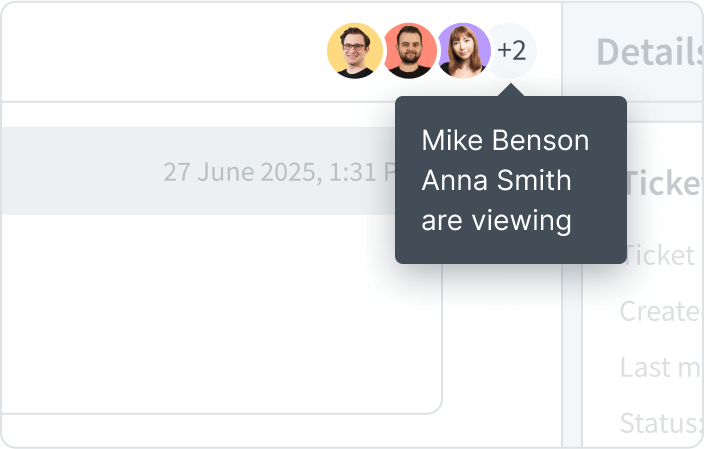
The collision detection feature prevents unwanted situations where several users are working on the same request. Instead, respect each other's work and time by following what the collision detector shows.
Learn more about collision detection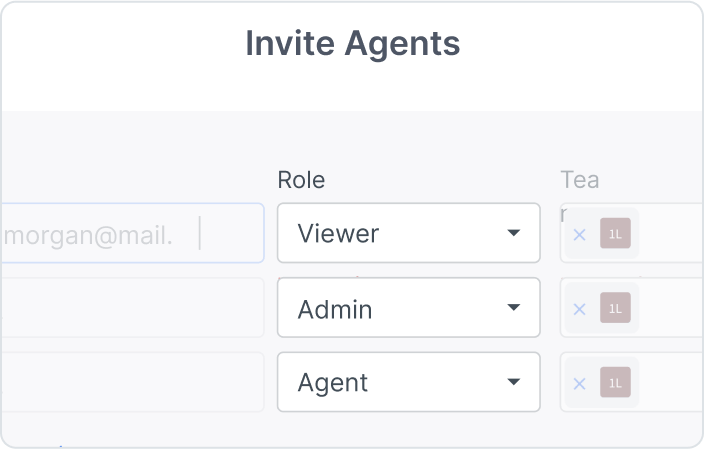
Use the viewer role for internal and external professionals who can contribute to solving the customer case.
Learn more about viewer roleSpeak to your customers using your voice and elements they can easily associate with you. Customize your HelpDesk.com account and reflect your company's branding in your communication.
The domain included in your email address can build trust and increase the credibility of your messages. Set up your own domain or use the domain provided by HelpDesk.com to be seen as a legitimate business.
Set up a domain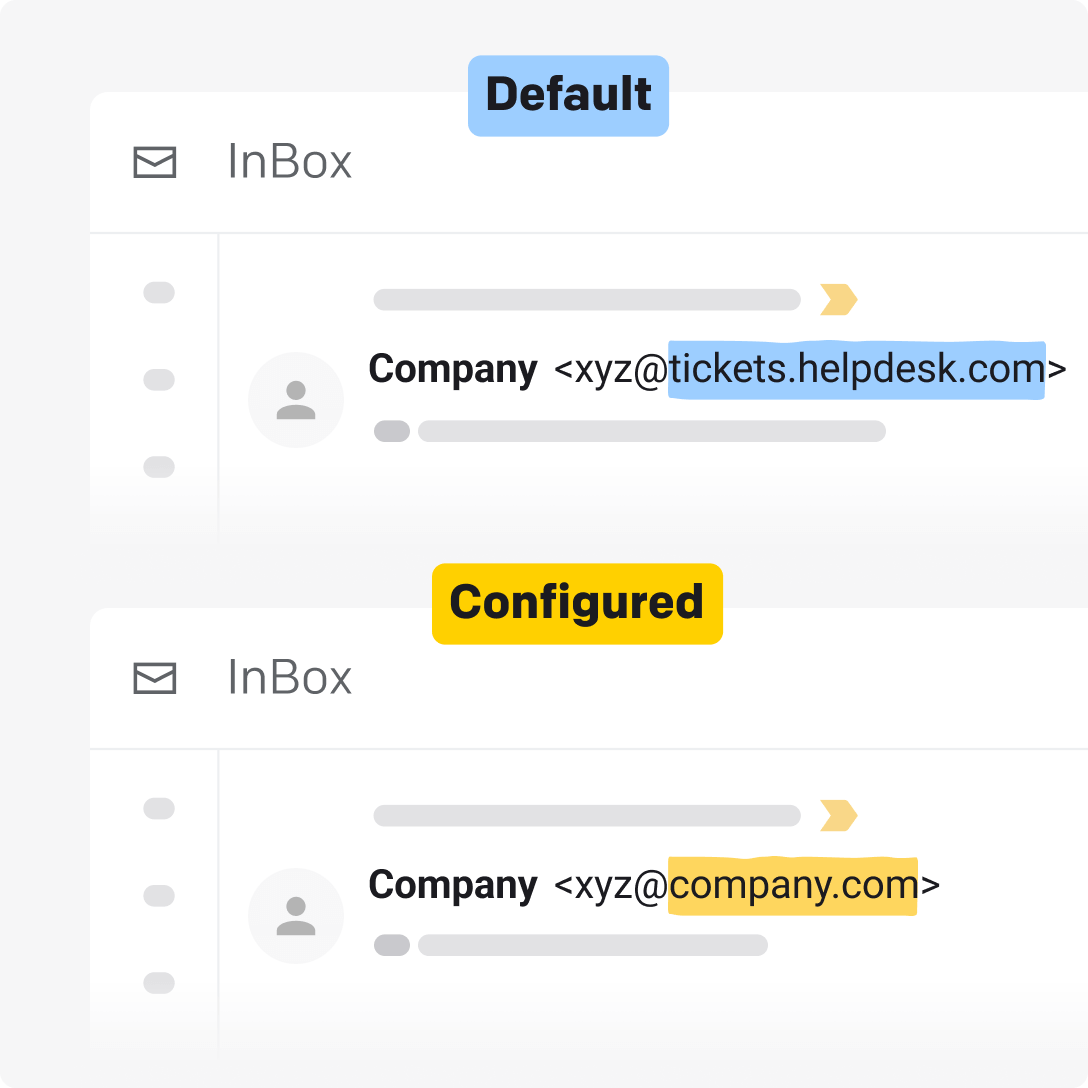
The email address is one thing that recipients pay close attention to. Tailor your reply address to your team's needs and its mission so that your messages look trustworthy when they hit the inbox.
Set up a reply address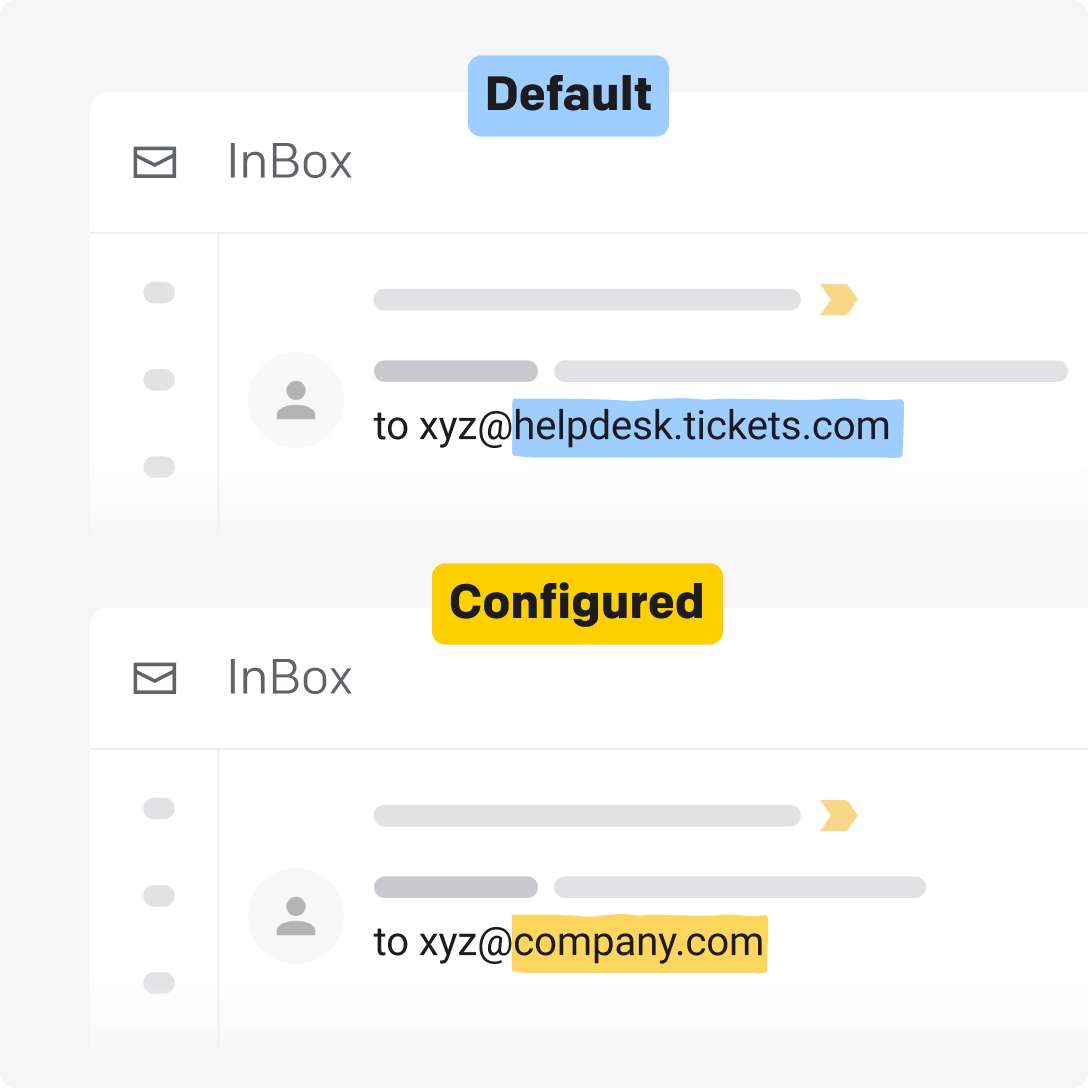
Personalize your customer communications and customize the visual appearance of the messages you send using HelpDesk.com. Include useful parameters, such as ticket ID, agent's name, or ticket history, and let all elements match your branding. This is optional, so if you want to keep it conventional by using plain text, you can always do so.
Set up an email template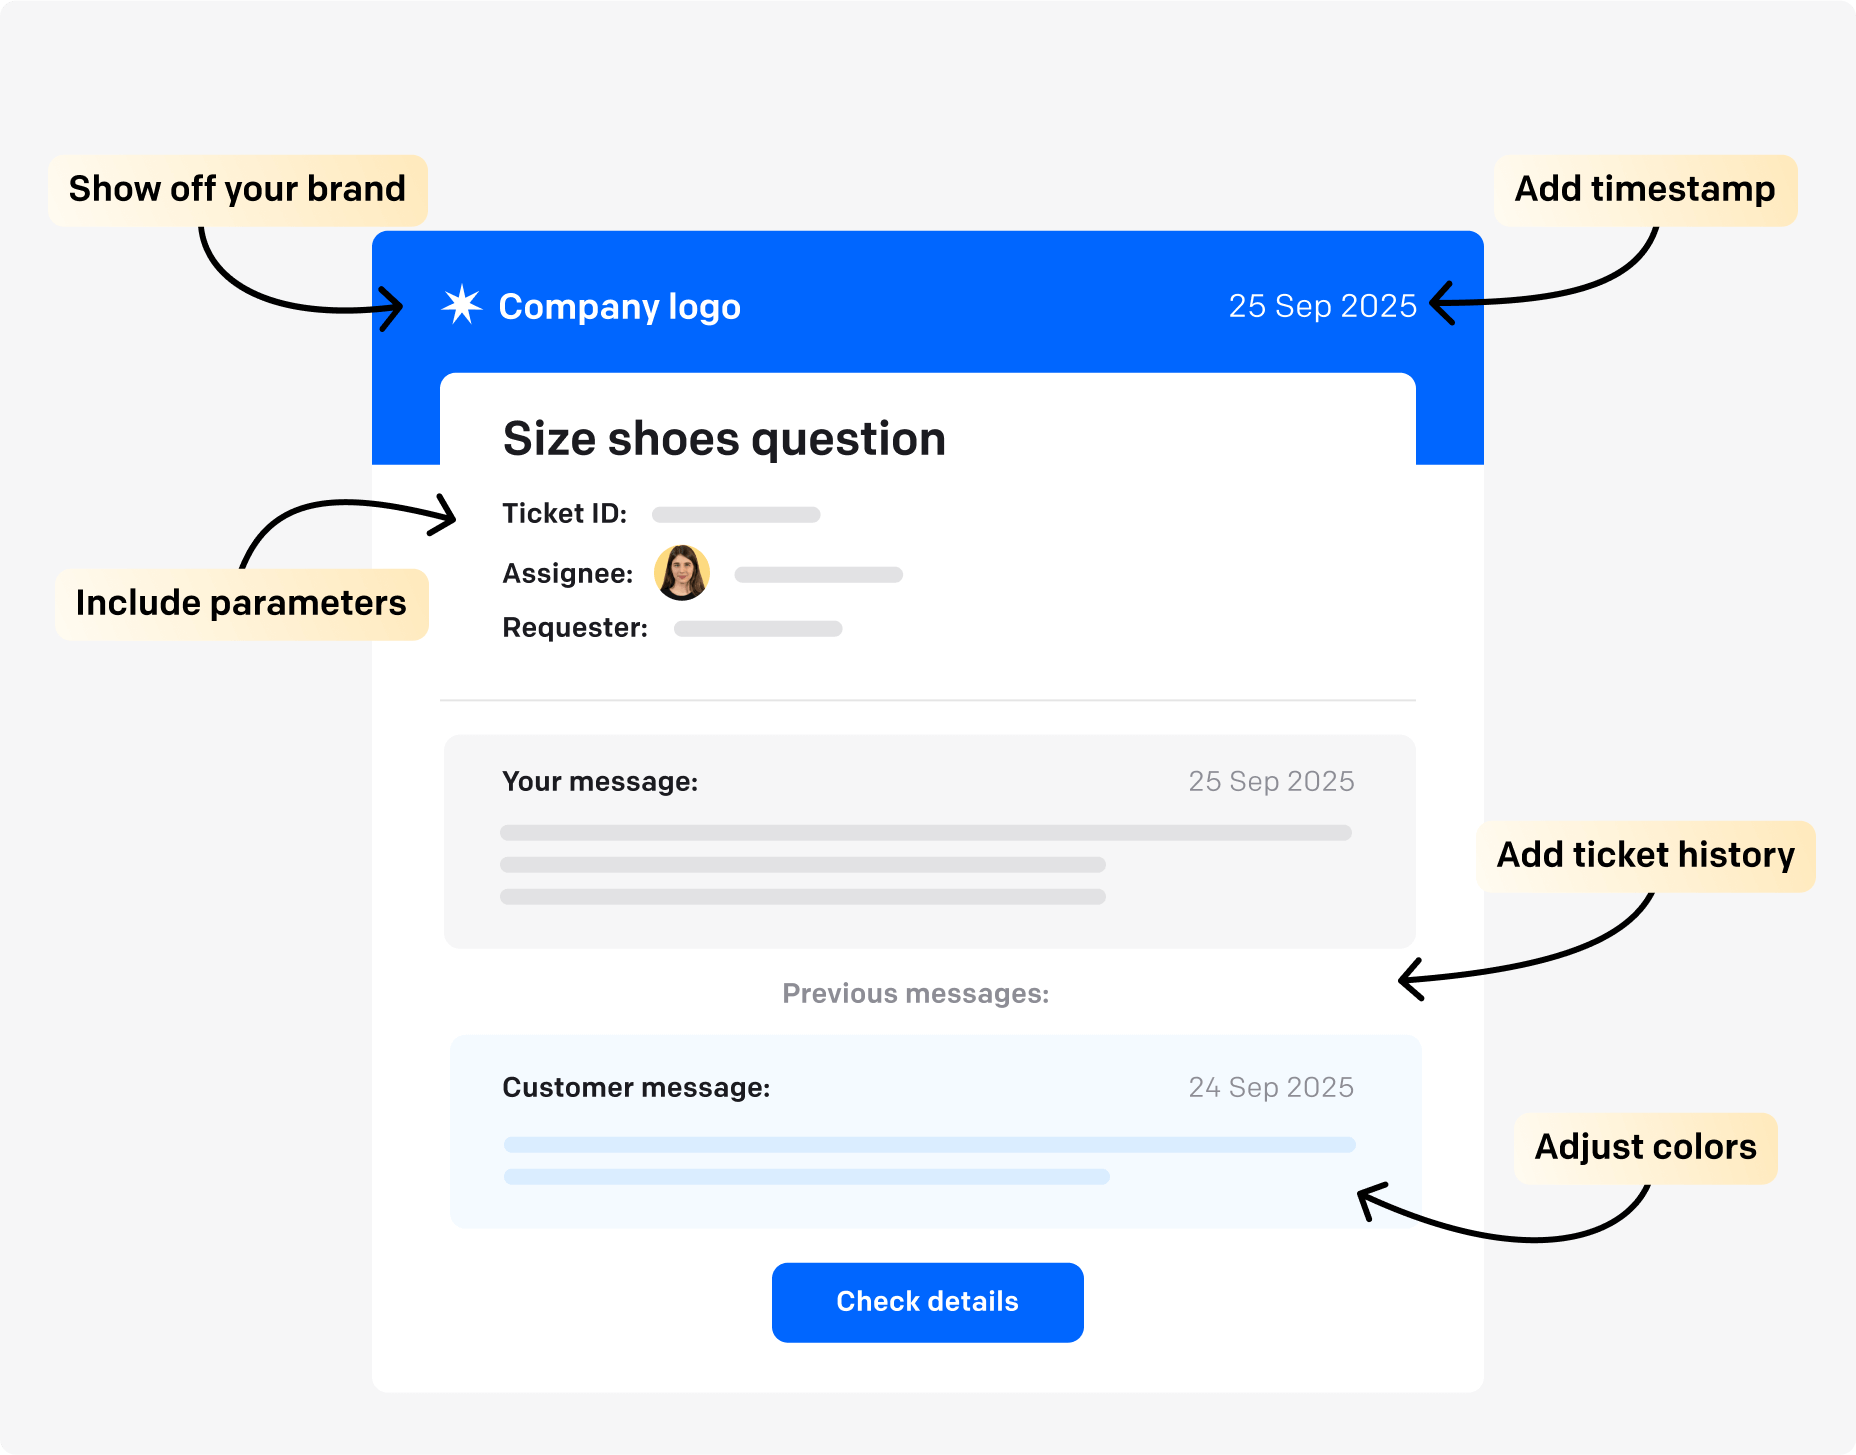
Create your contact form by writing a header, caption, confirmation, and selecting a team and necessary consents. Then, embed the contact form on your website so that visitors can easily contact you, and you gain another trackable ticket source.
Set up a contact form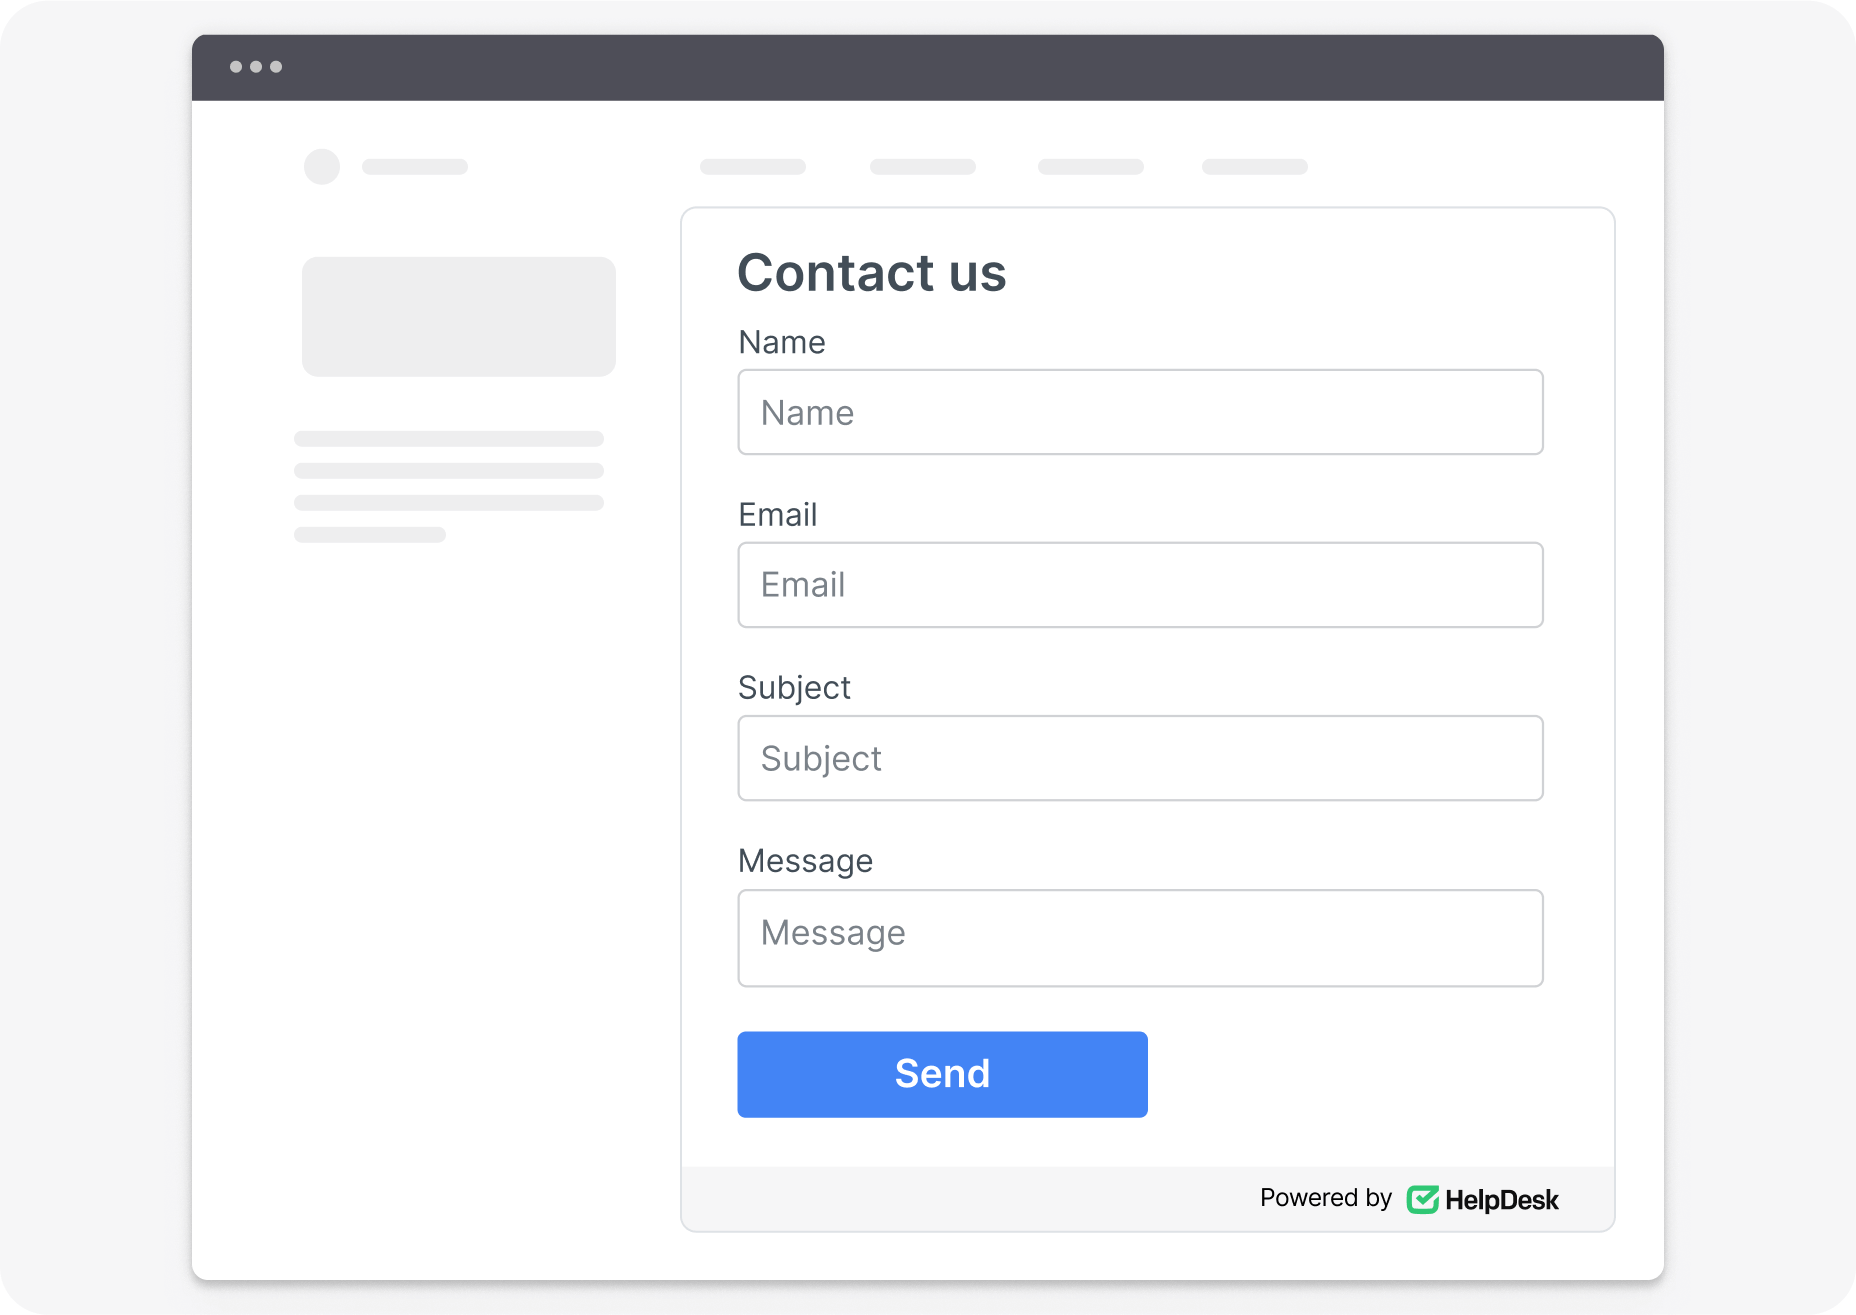
Show who you are and create your signature. It'll be automatically added to messages. You can include images, insert links, and use simple text formatting to make your signature stand out and inspire trust.
Set up a signature
Be credible
If you add branding elements, you can increase customer confidence in your messages and build trust.
Keep track of everything from small tweaks to major changes made in the system, making it easier to manage and oversee team actions.
Browse the primary data in the audit log, such as:
Speed up your customer service workflow with available ticket management and messaging features.
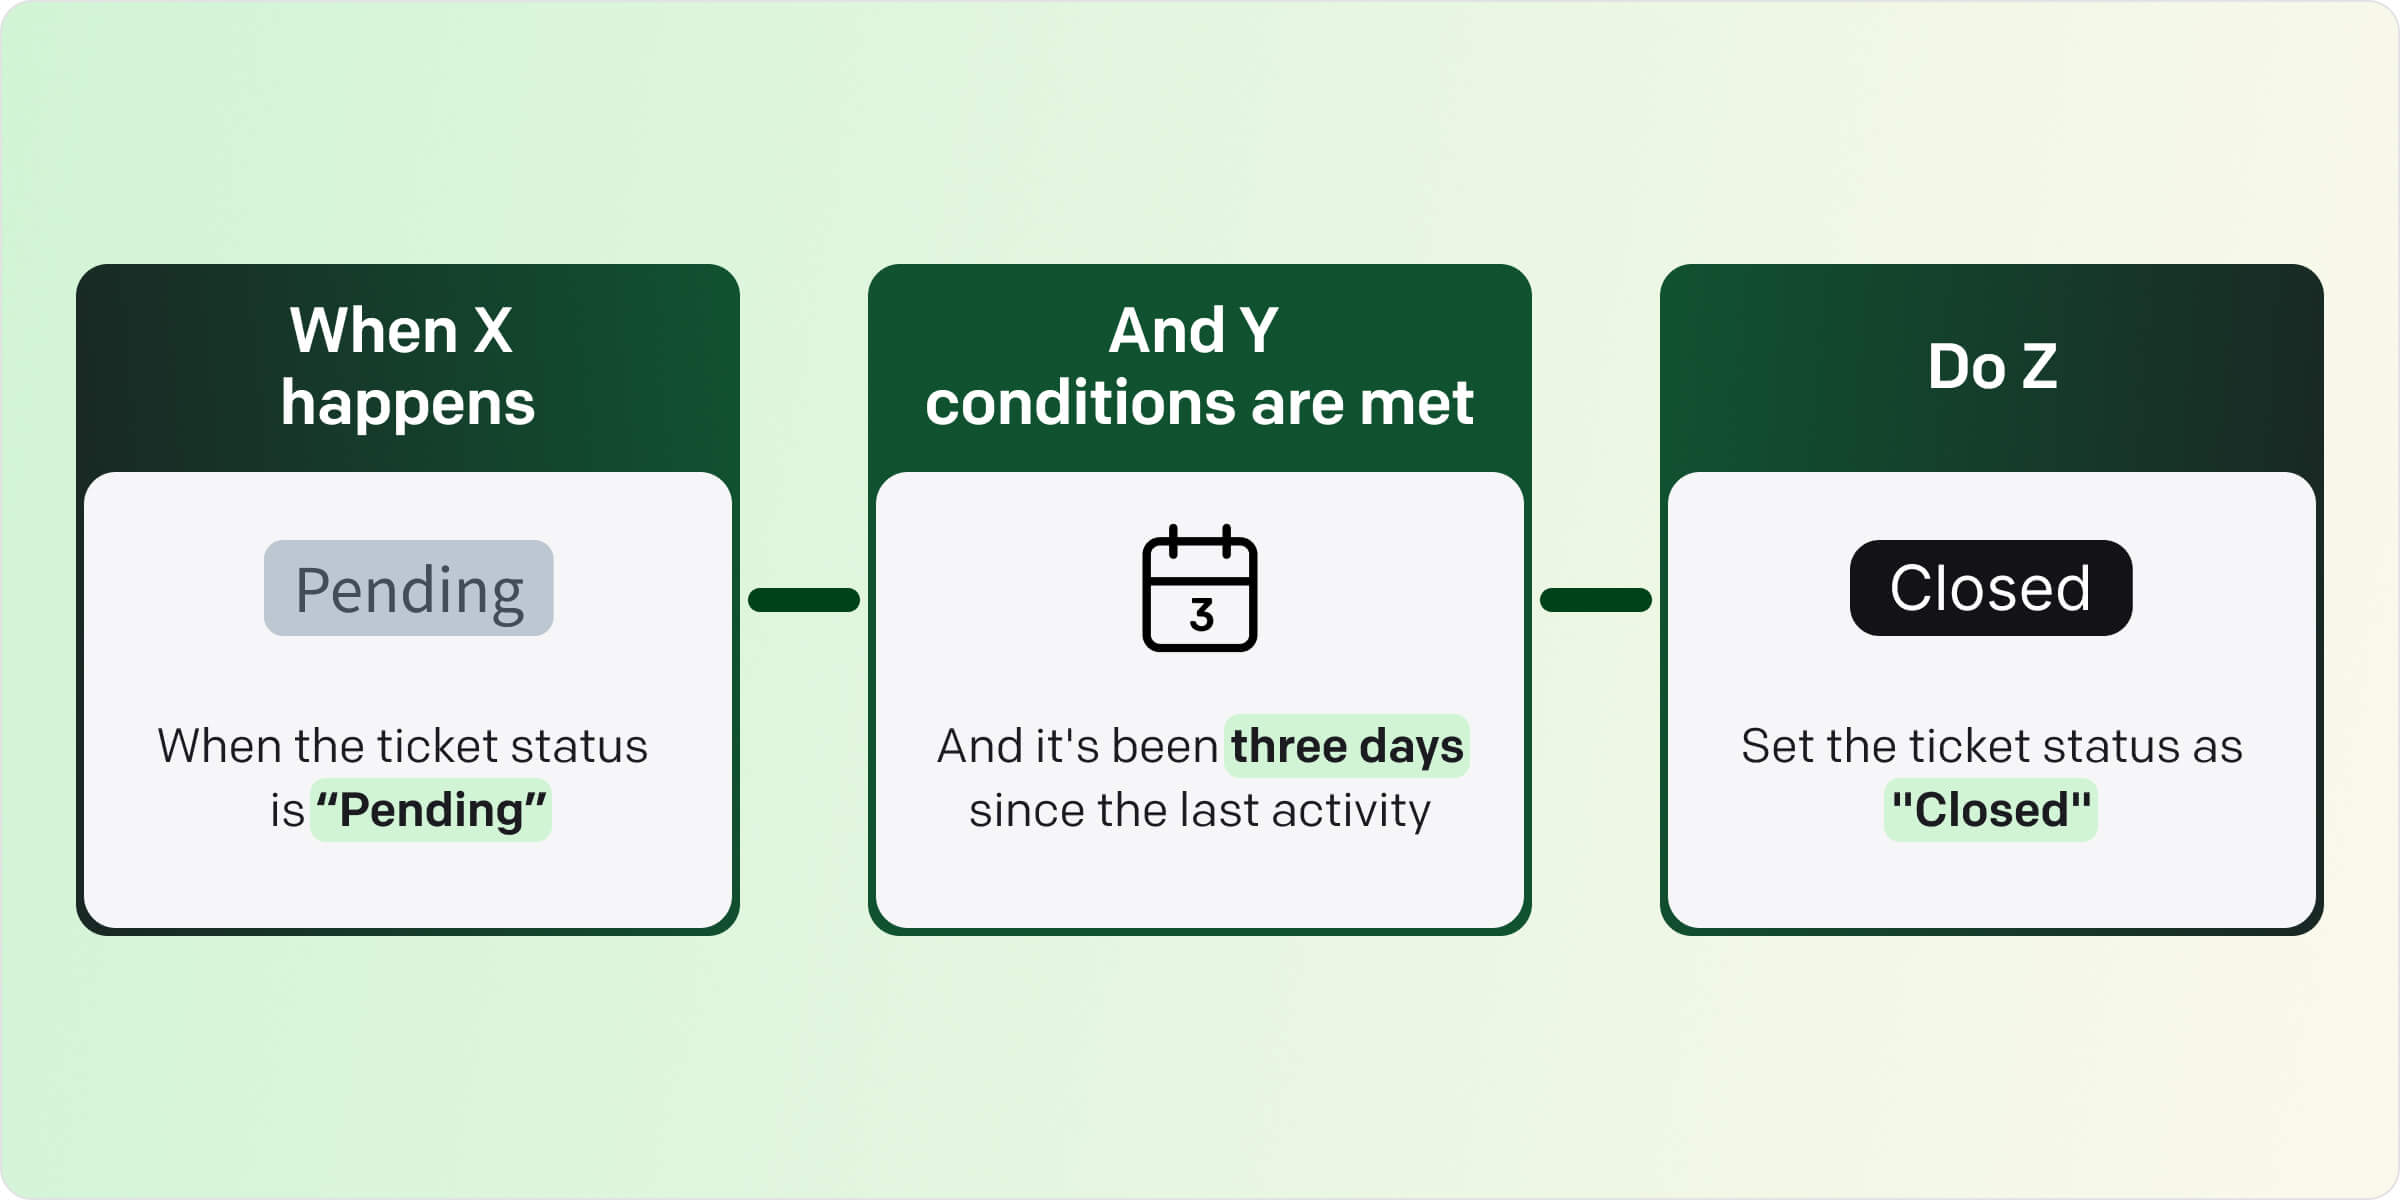
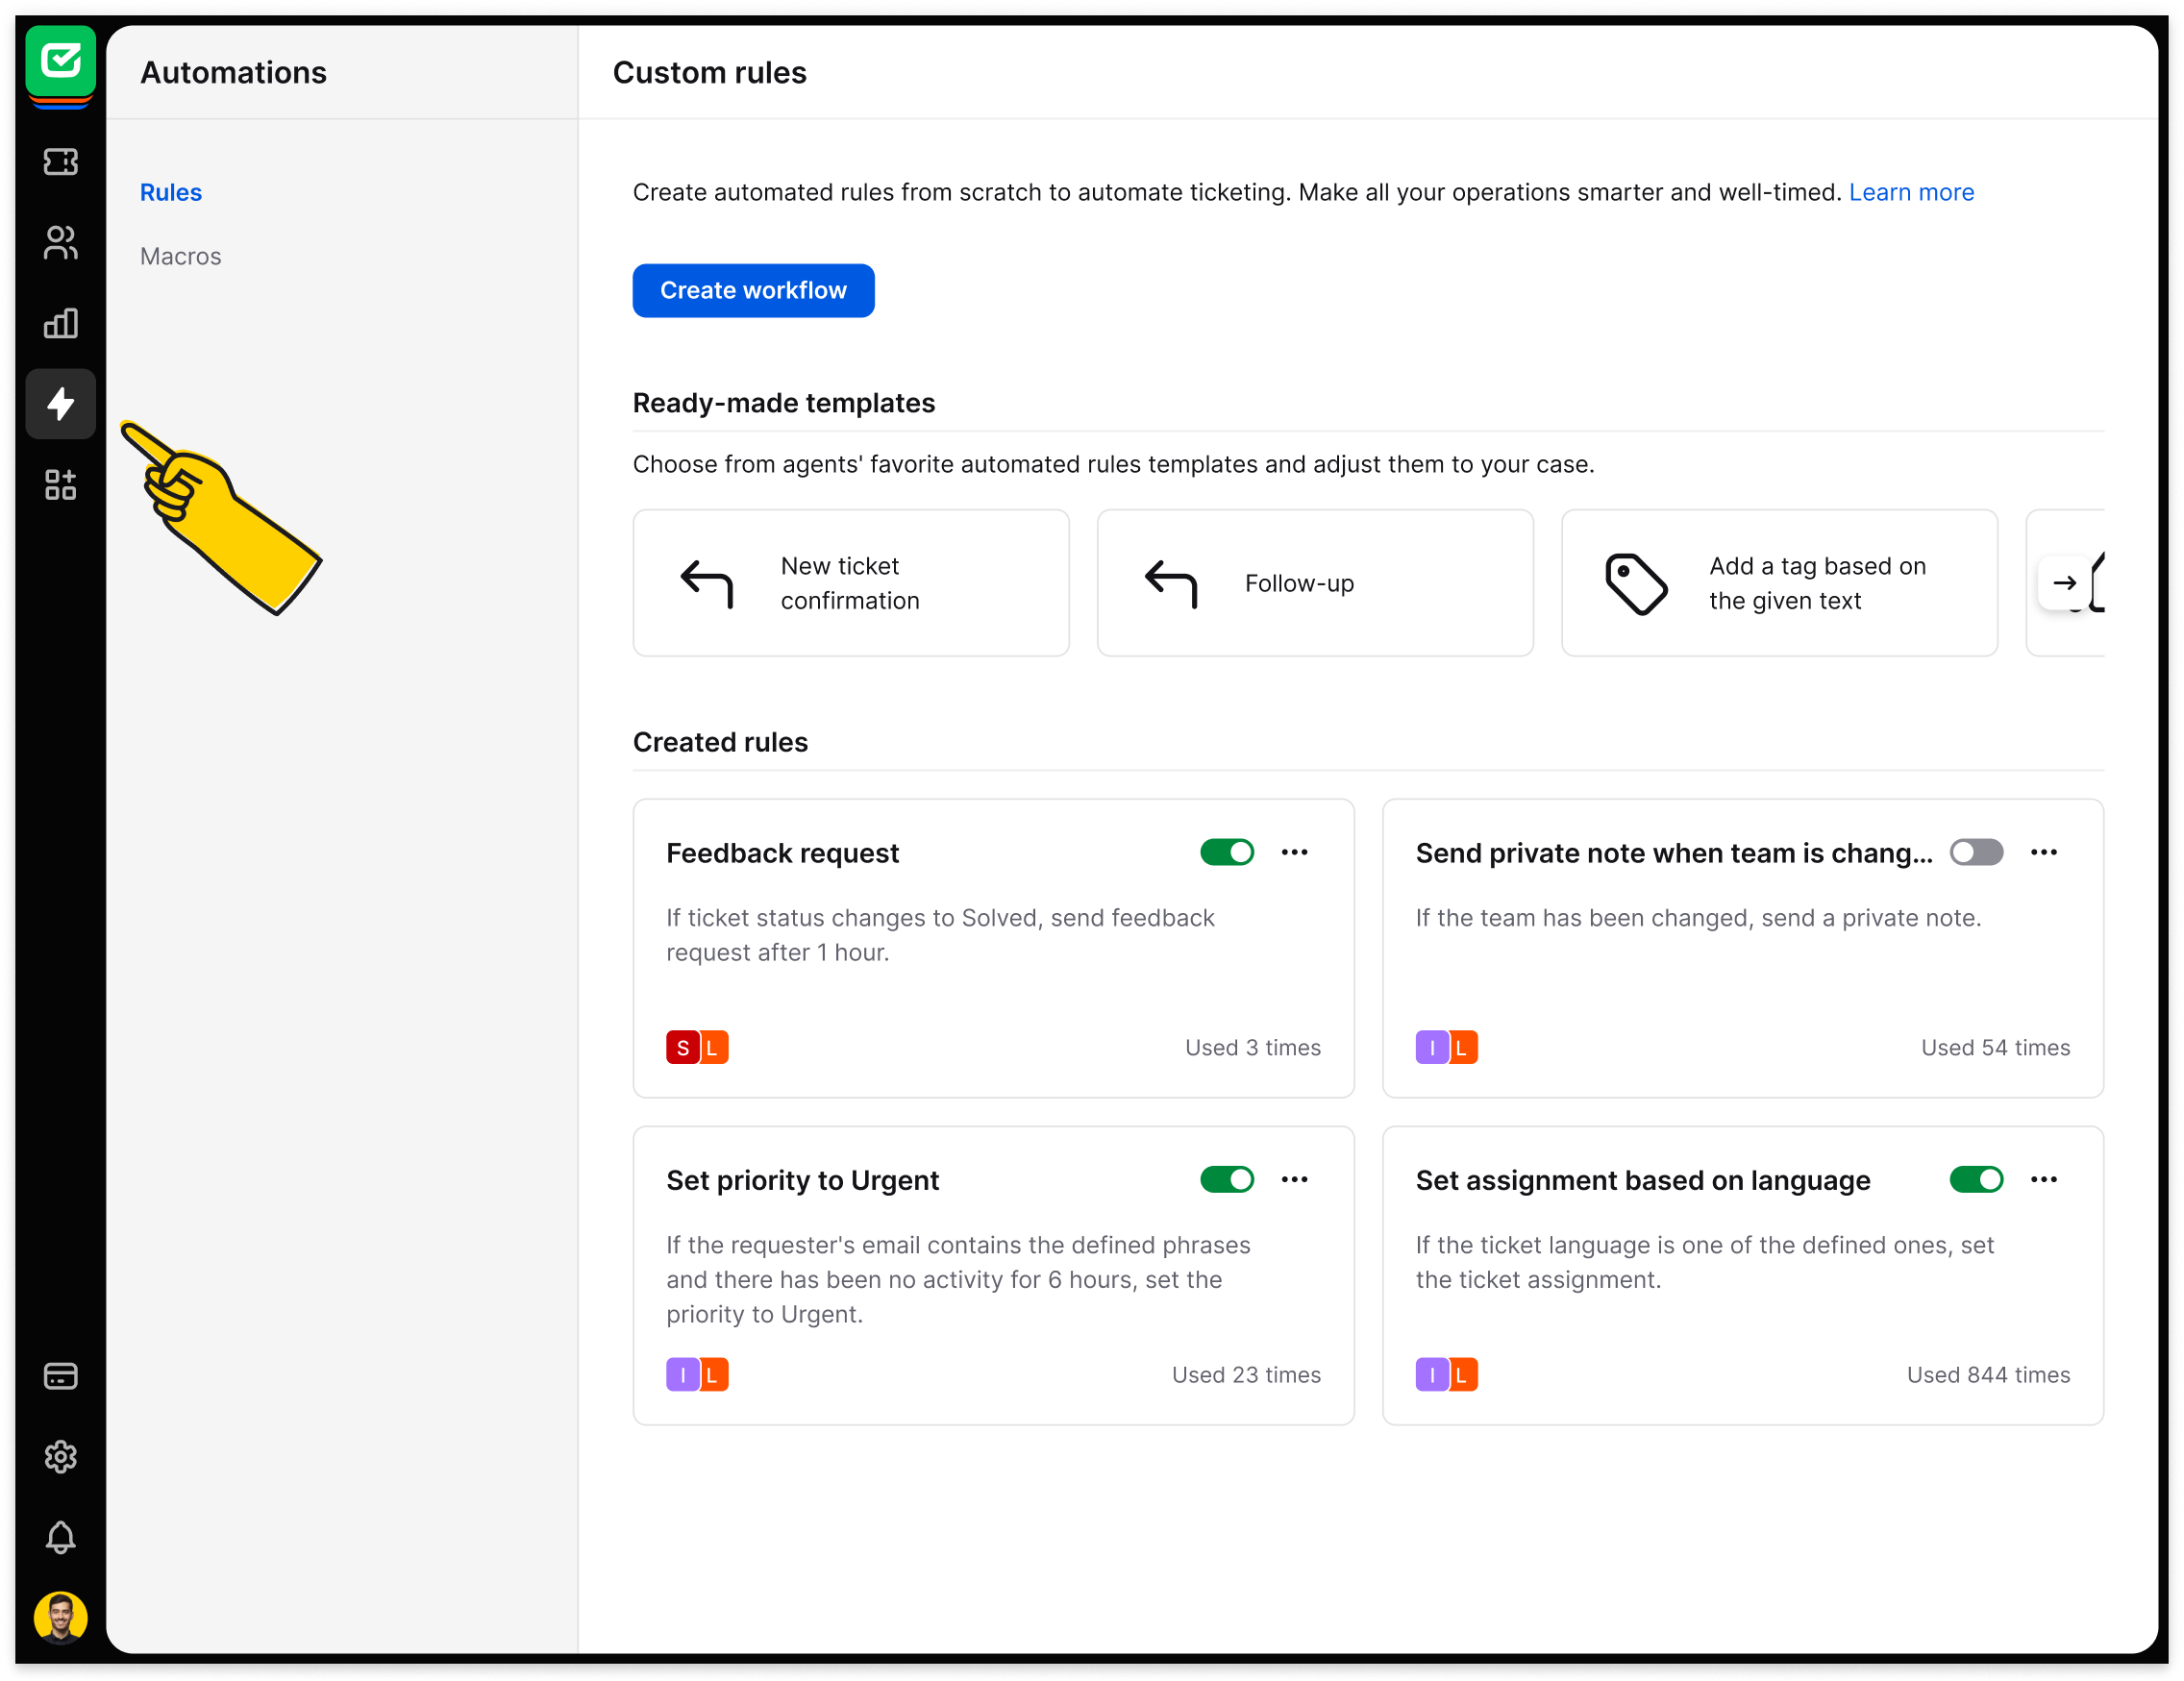
Leave the manual work behind and bring automation into your day. Create automation rules to cut out repetitive and labor-intensive tasks and lower the time spent on handling tickets. HelpDesk.com automation is easy to use and intuitive no matter how technologically advanced you are.
Set up automation rulesYou can also use pre-made automated rule templates to get a quick start.
Balance workloads
Use auto-assignments to distribute tickets fairly and reduce response times. Exclude agents to keep managers or specific roles from being overloaded, deactivate for absences, or use round-robin.
Transform lengthy to-dos into quick completions. Use fully controlled macros that combine a preset series of actions to automate tasks instantly with one click. Tailor them for private use or share with your team, increasing task productivity and focusing on your most critical projects.
Create macros
Have all the answers at your fingertips. Save the most common messages as canned responses to focus on more complex customer cases and unusual issues. Also, canned responses can help you maintain consistency in your brand's tone of voice and customer communications, as your team is made up of different people with vibrant personalities.
Keep resources
Save links to external resources, e.g., your product sign-up page, help center, FAQ, and product pages so you have them at hand when needed. Type #resources, and your aids are already here.
Work smarter
With canned answers, you don't have to learn everything by heart. Instead, the answers are ready and waiting for you to recall them. This option will especially appeal to the newbies on your team and help them feel more confident.
Save instructions
Keep multi-step instructions as canned responses, but send them in manageable chunks. Break down the entire instruction into several easy-to-digest canned responses so you can be precise and considerate.
Improve your day-to-day conversations using AI-powered text enhancements. Effortlessly modify the tone, expand your thoughts, or improve your grammar in a snap.
Discover all the benefits of using AI enhancements
Use ticket summary to automatically create a brief and informative overview of a customer support ticket. This feature will assist you in quickly grasping the ticket's context and essential details without going through the entire conversation.
Find out more on ticket summaryTake a quick look at past cases like the one you're handling to find what worked before. Use proven solutions, keep your responses consistent, and solve tickets faster without the hassle of searching.
Find out more on similar tickets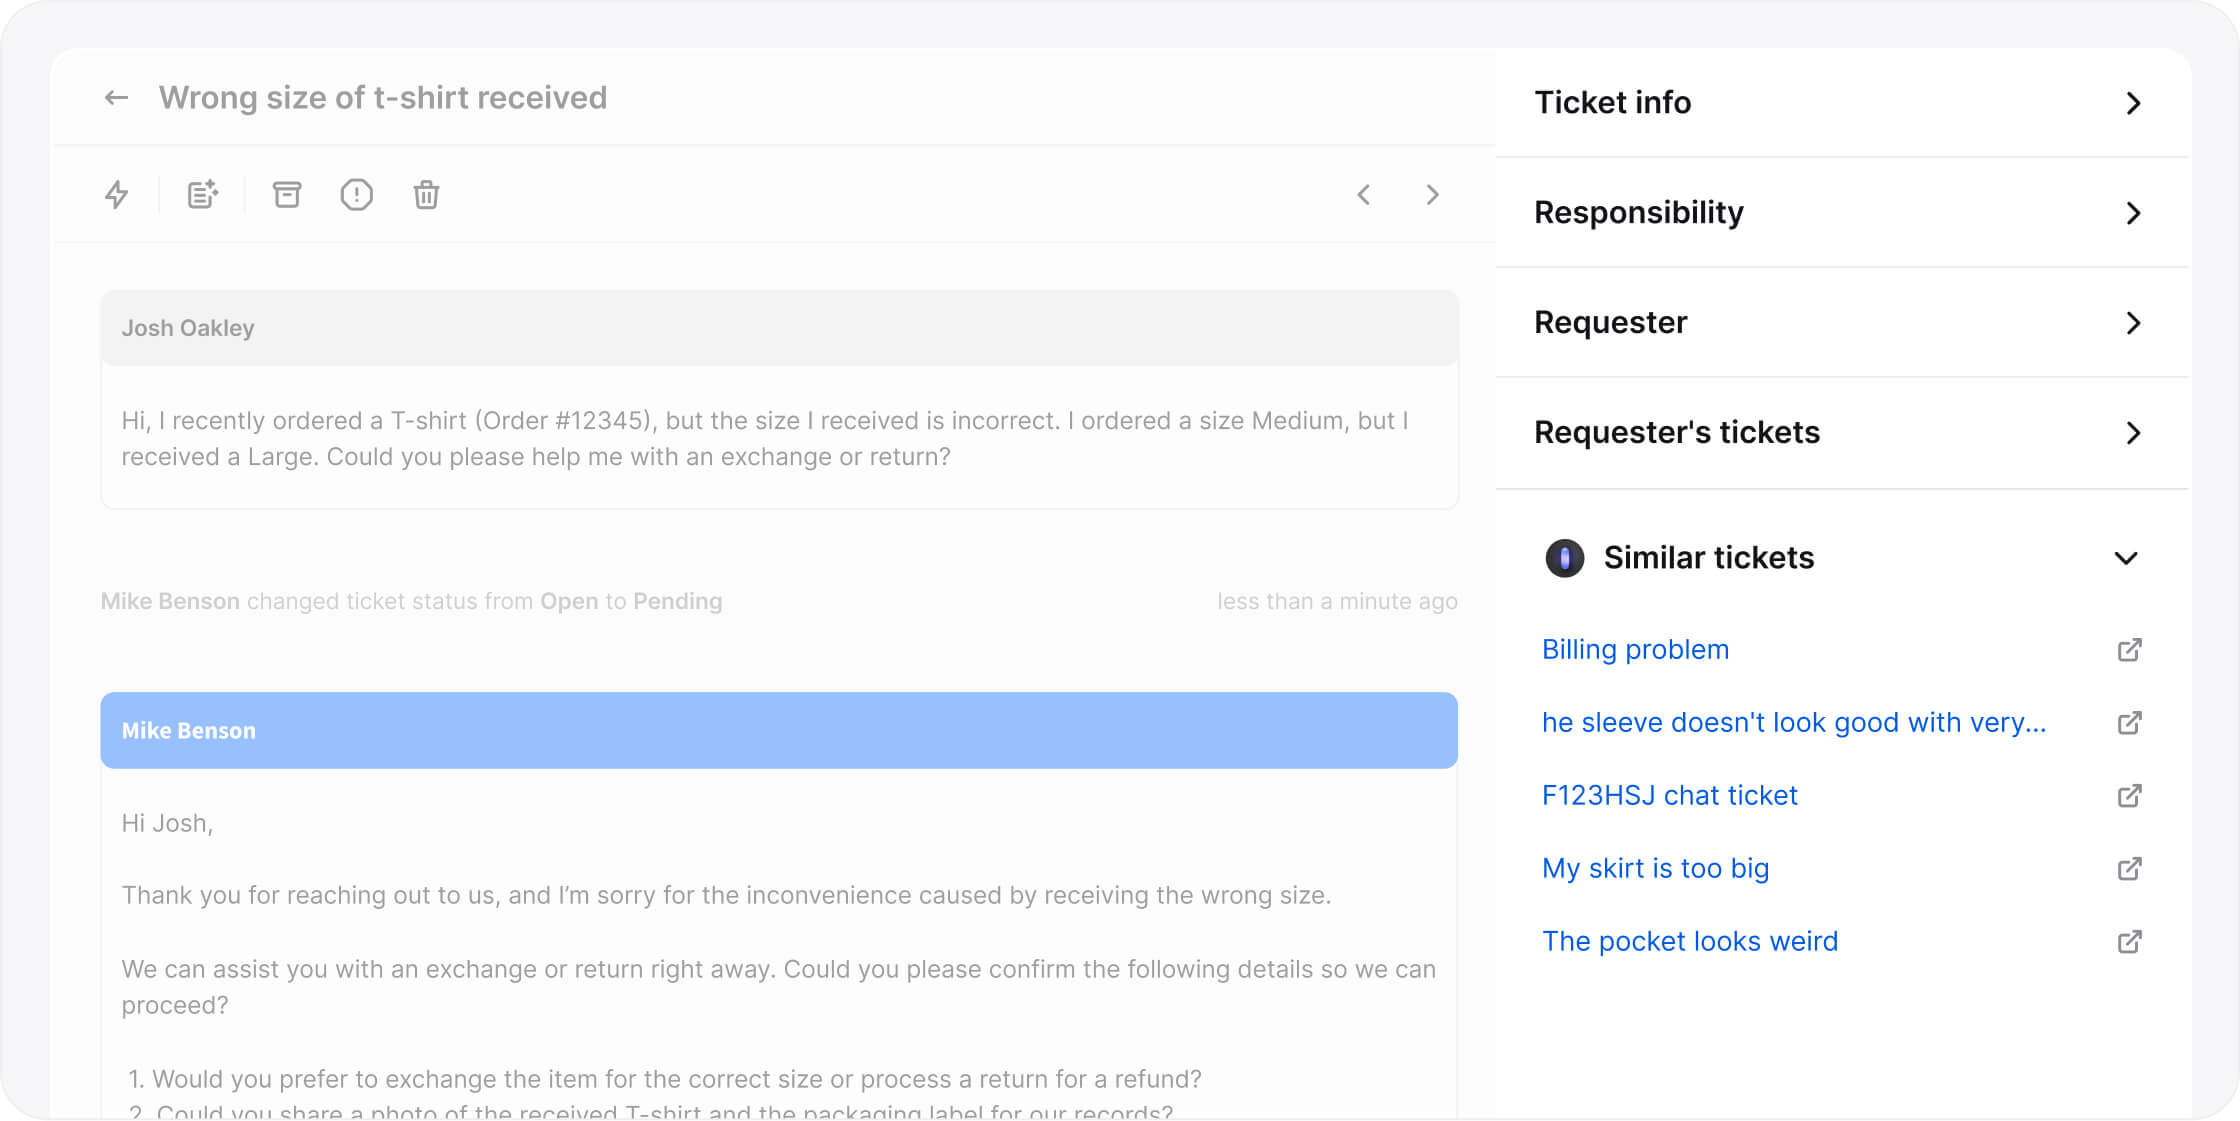
Organize tickets effortlessly with AI-powered tag recommendations. Quickly categorize cases, improve tracking, and speed up resolutions with smart, consistent tagging.
Find out more on tag suggestions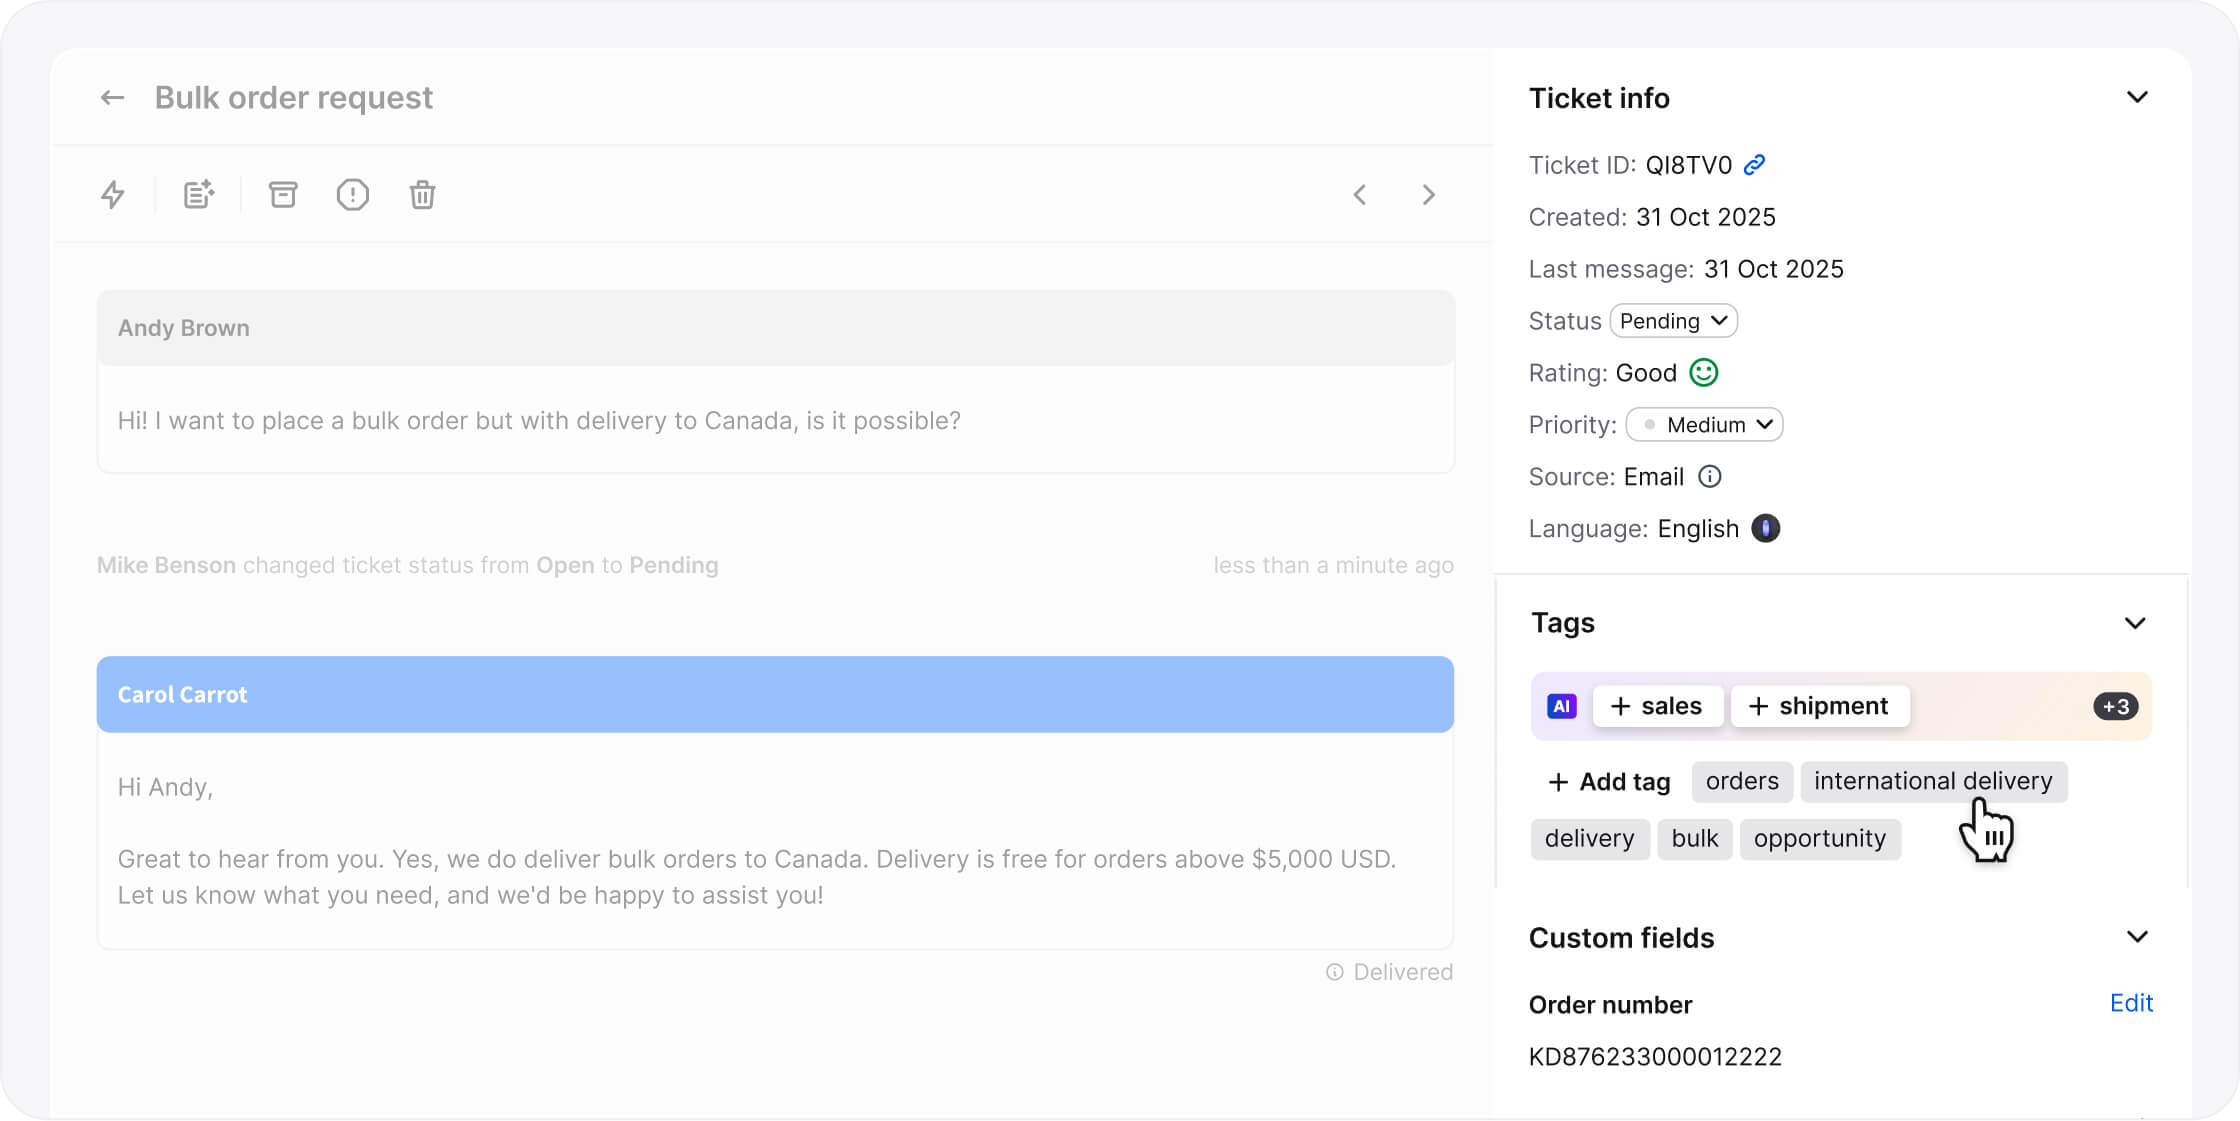
Integrate HelpDesk.com with the apps and tools you use every day to build relationships and serve customers. Grow your HelpDesk.com account with dedicated integrations and exchange data between systems to increase your efficiency.

Create helpful chatbots
If you want to engage your customers from the moment they enter your website, you should try ChatBot.com. This little buddy can serve 24/7 as your first-line support agent and answer all the simple questions for you. Scale up your support services without increasing employee headcount.
Customer support is also about measuring your performance to better yourself. Dive into historical records based on your conversations, available in the "Reports" section, and see if you've met your goals over time.
HelpDesk.com tracks your ticket activity in real time so that you can draw conclusions and improve support. Use the six available reports to follow your customer service progress.
Last 7 days
A summary of the last seven days of ticketing activity.
New tickets
A summary of the number of tickets received in a given time period.
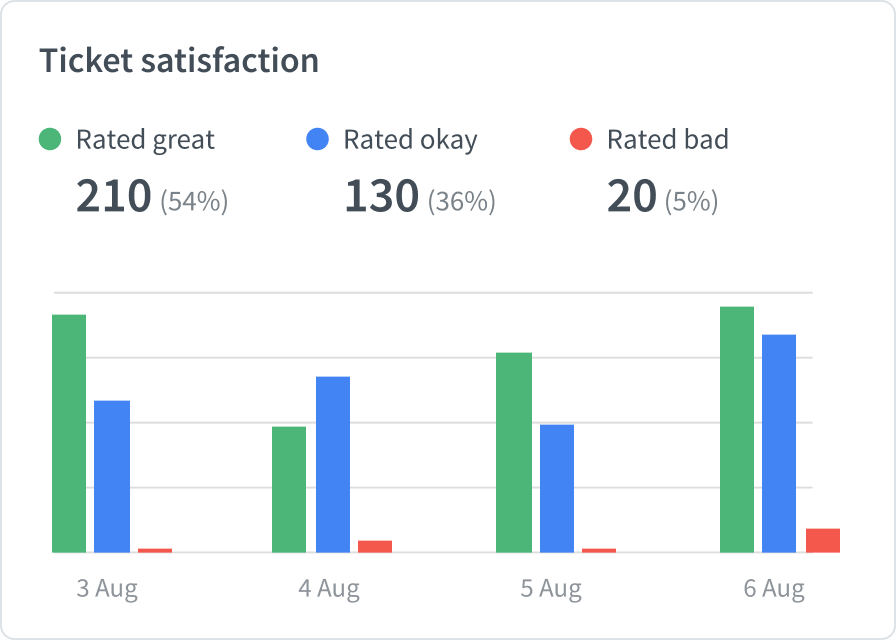
Ticket satisfaction
An overview of the ticket ratings given by your customers.
First response time
An overview of how quickly your customer gets an answer to their question.
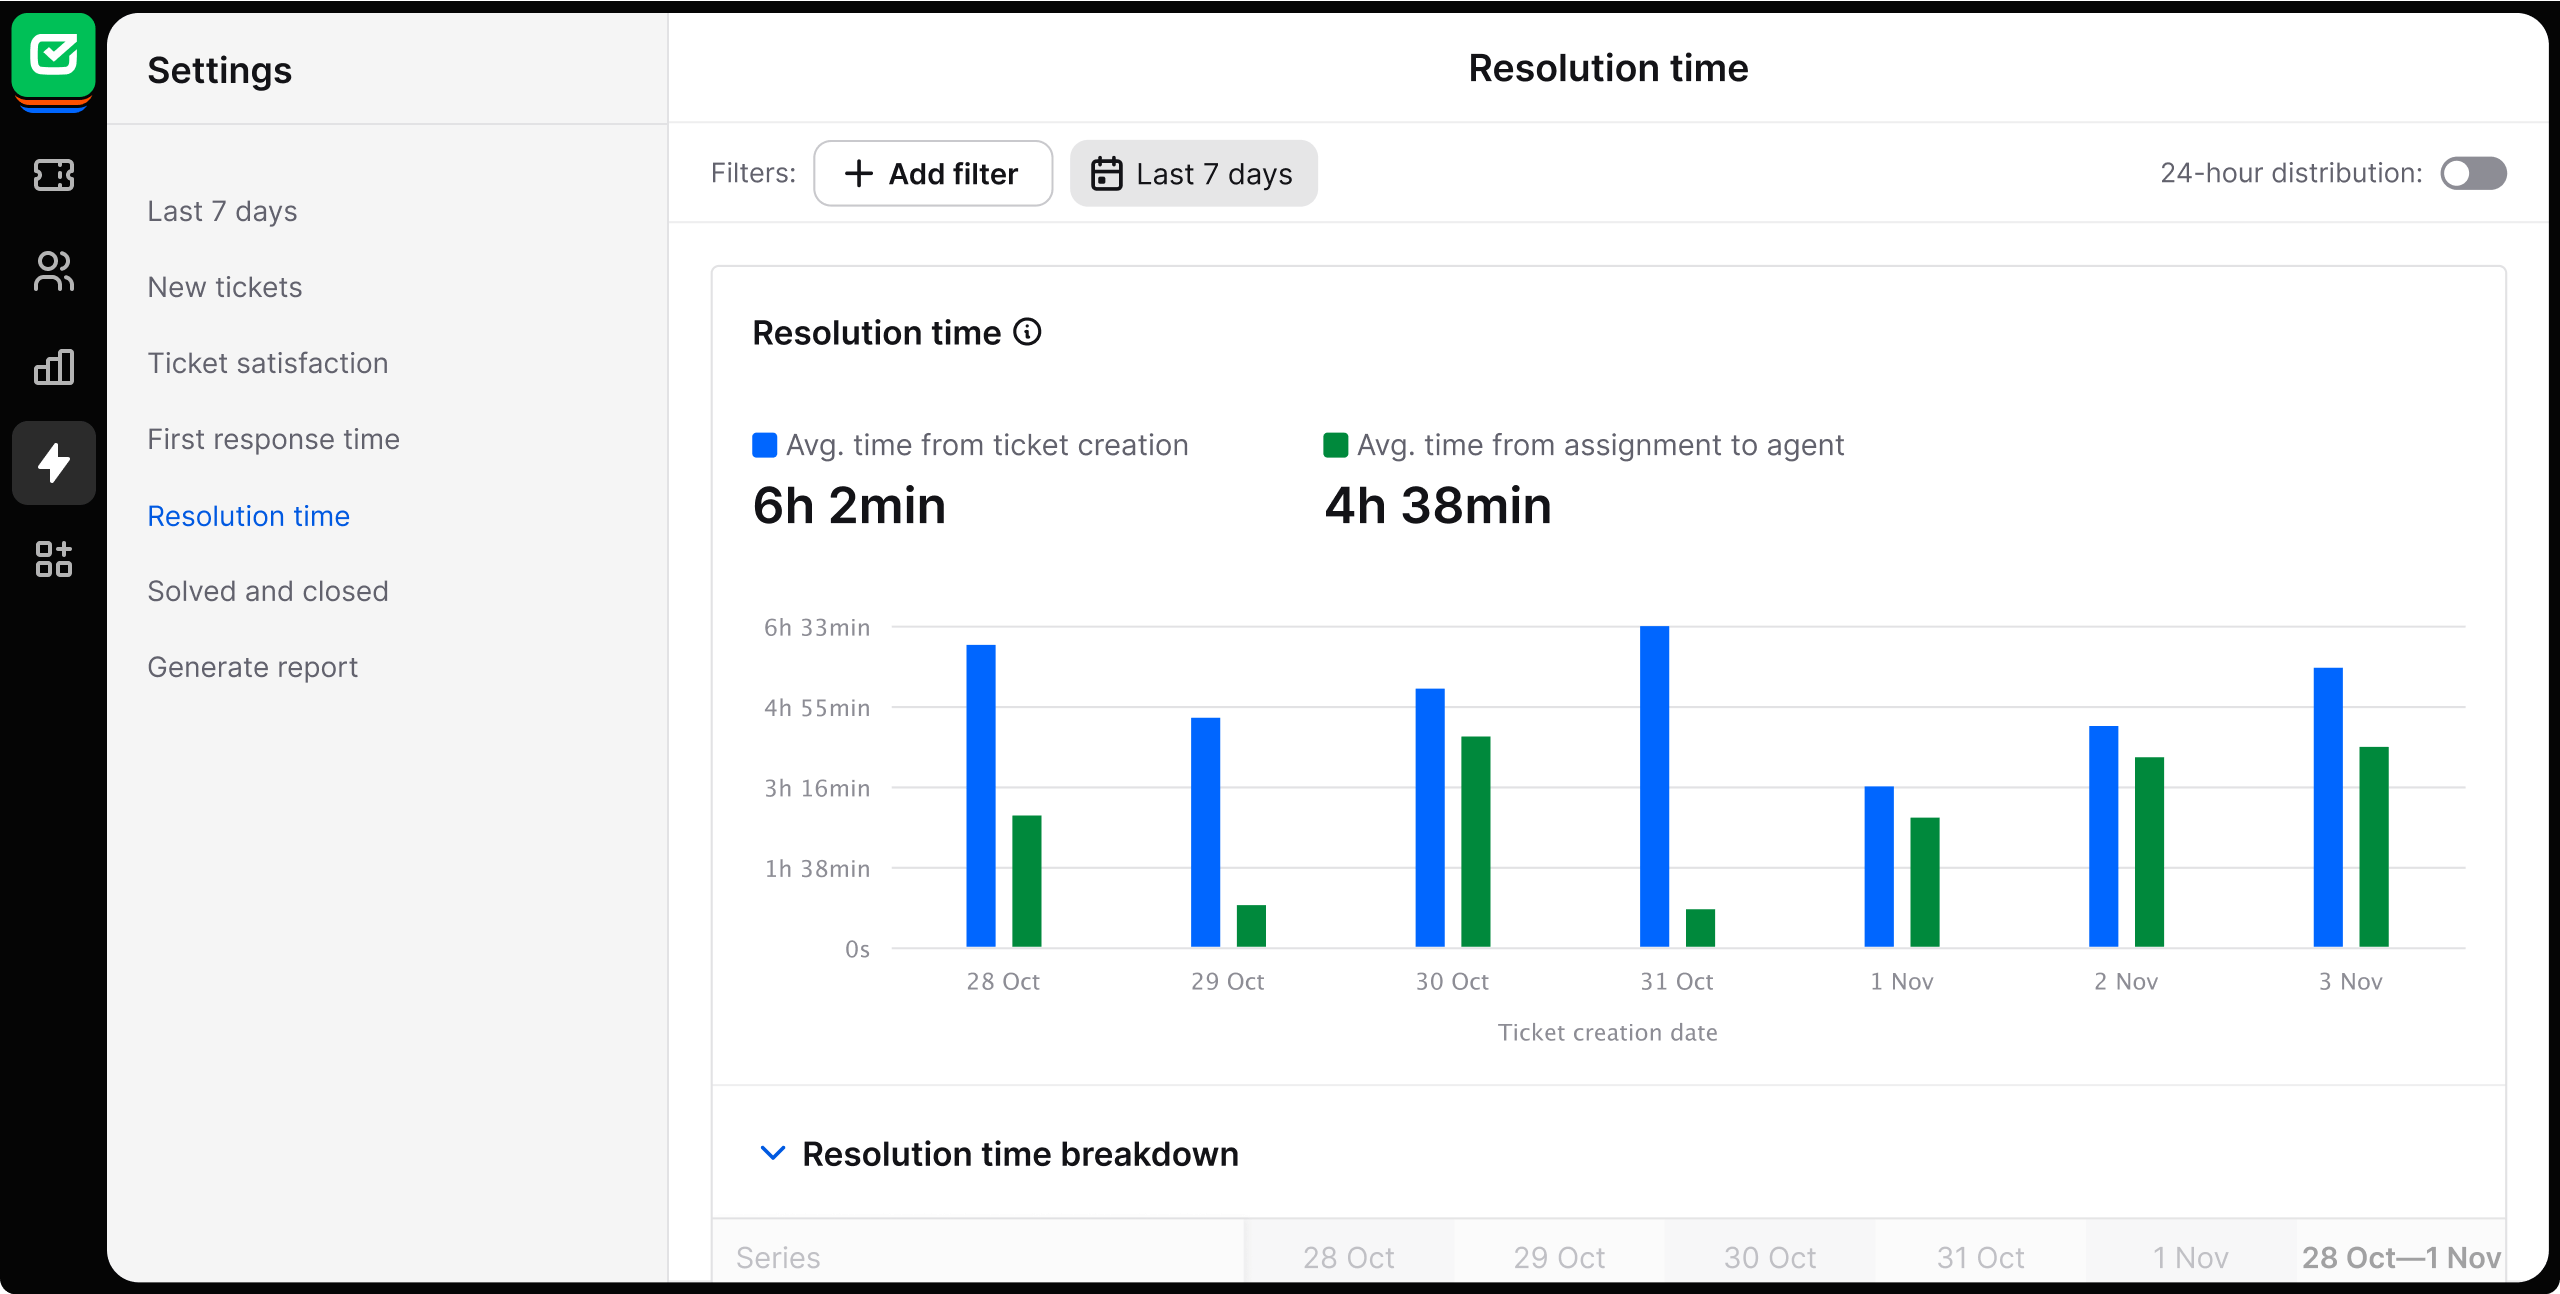
Resolution time
A summary of the average duration from ticket creation to agent assignment.
Solved and closed
A summary of the number of solved and closed tickets.
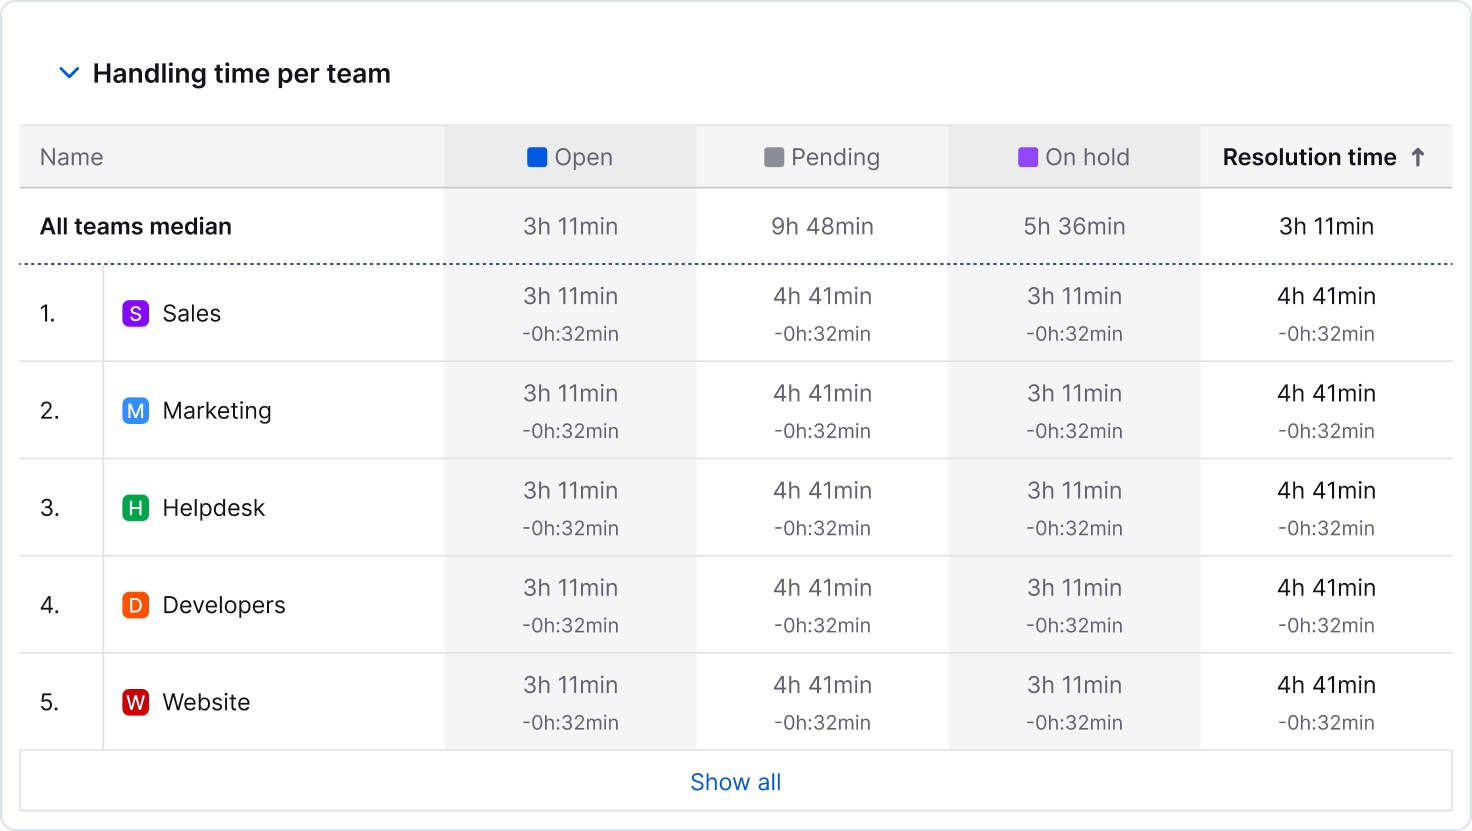
Handling time by status
A summary of the average time tickets spend in each status: Open, Pending, and On hold, before moving forward.
Compare the performance of different agents and teams based on detailed data summarizing their activities. Identify top performers, pinpoint areas for improvement, allocate resources even better, and give targeted support where it’s needed most.
As an admin, you can also export your data to gain in-depth insight into tickets and create custom analytics.

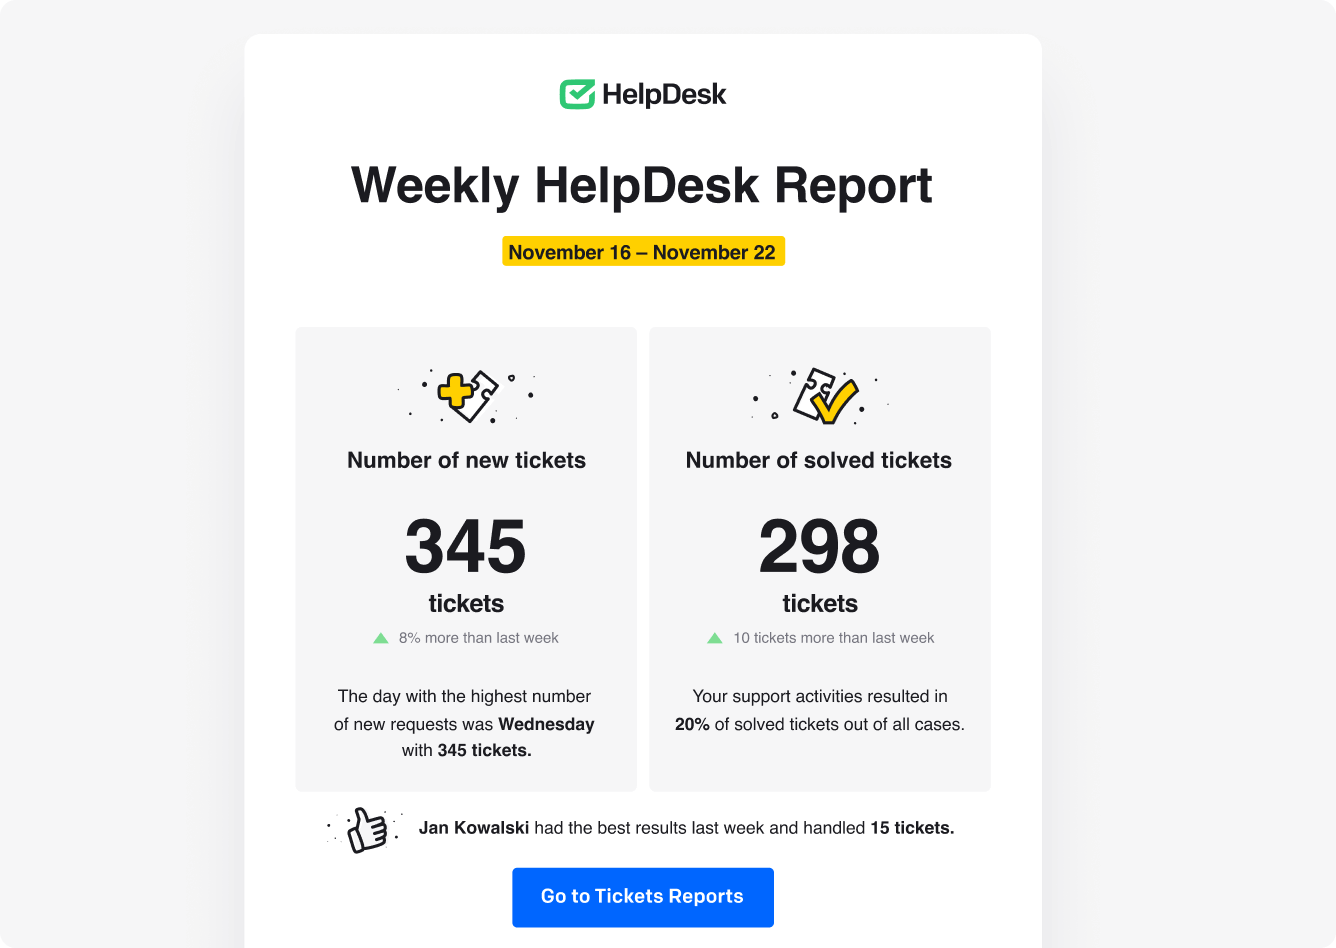
Weekly summary reports
Admins can get a report with an overview of the team's customer service achievements in a single message. You can set this notification in your user profile settings. It's an excellent way to keep track of your weekly efforts and stay up to date.
If your customer ticket ratings leave you unhappy, don't worry. We can help you do better. Improve your ratings in a few simple steps:
Learn from every case
Analyze your results daily and decide what went right or wrong. Get all customer feedback right after the conversation.

Send a follow-up message
Follow up if there has been no activity on a ticket for a long time. Learn how to use follow-up messages effectively.
Listen and gather data
Proactively collect information about the customer case to streamline the troubleshooting process.
Stick to the etiquette
Follow email etiquette and be professional. Learn how to do this by joining Learning Space courses.
Openly ask for help
Bring other professionals into the conversation as needed to make the customer feel cared for.

Be lightning fast
Use pre-made canned responses to speed up your response time. Make sure you have a proper support work plan.
Explore the full list of HelpDesk.com sub-processors, which help us ensure top-quality products and maintain security across all levels: technical, operational, and legal.

Gain in-depth knowledge on how to use HelpDesk.com and get the most out of it.
Go to Help Center ›
Comprehensive courses, helpful guides, and copyable templates.
Visit Learning Space ›
Get an API token, build dedicated integrations, and grow your HelpDesk.com.
Read API docs ›
We're available 24/7
Reach for this handbook whenever you need help or seek inspiration. Chat with us if you need assistance.
Chat with us