 158 29
A macro serves as a pre-set response or action that an agent can manually implement during the ticket creation or update process. It encompasses actions designed to modify ticket details.
Create macros from scratch
If you want to create macros, go to the Automation section and select the Macros category.
Then, click the “Create Macro” button.
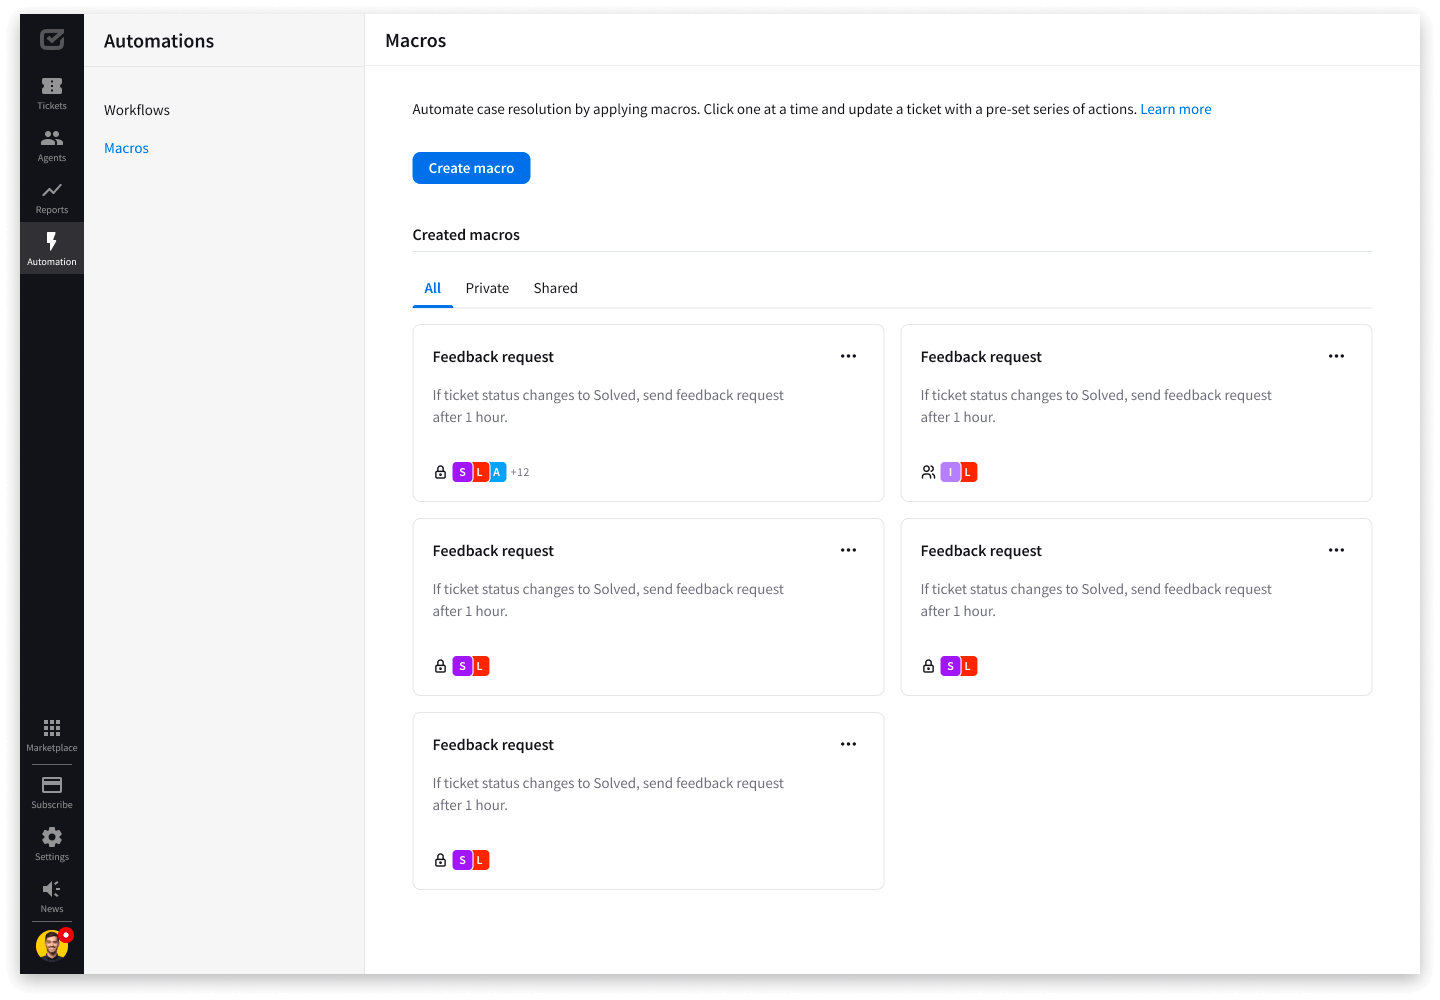
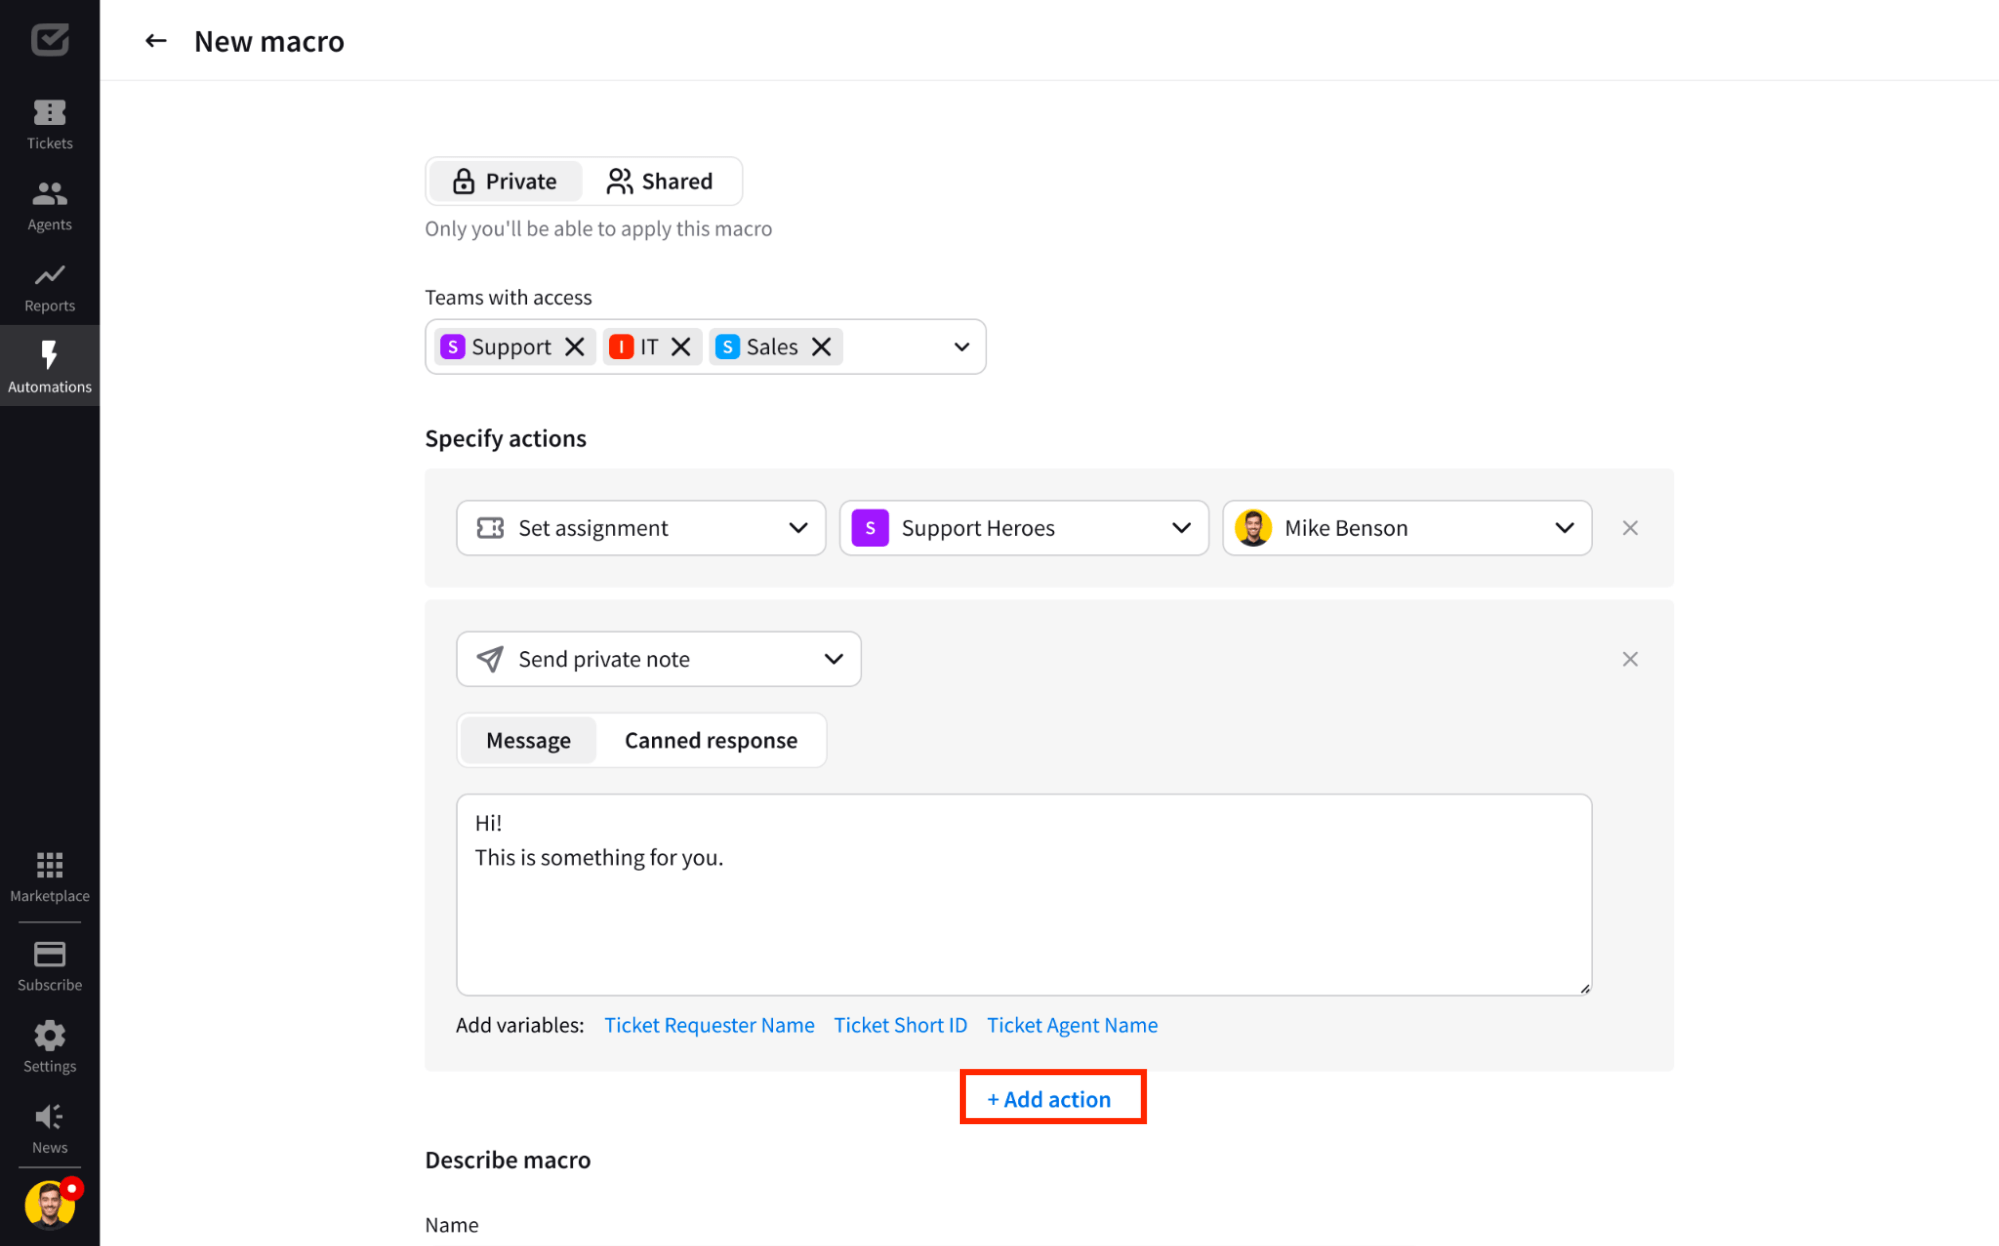
First, choose whether you want to create a private or shared macro.
- Private macros – created by an agent or admin for personal use.
- Shared macros – created by an admin for use by multiple users.
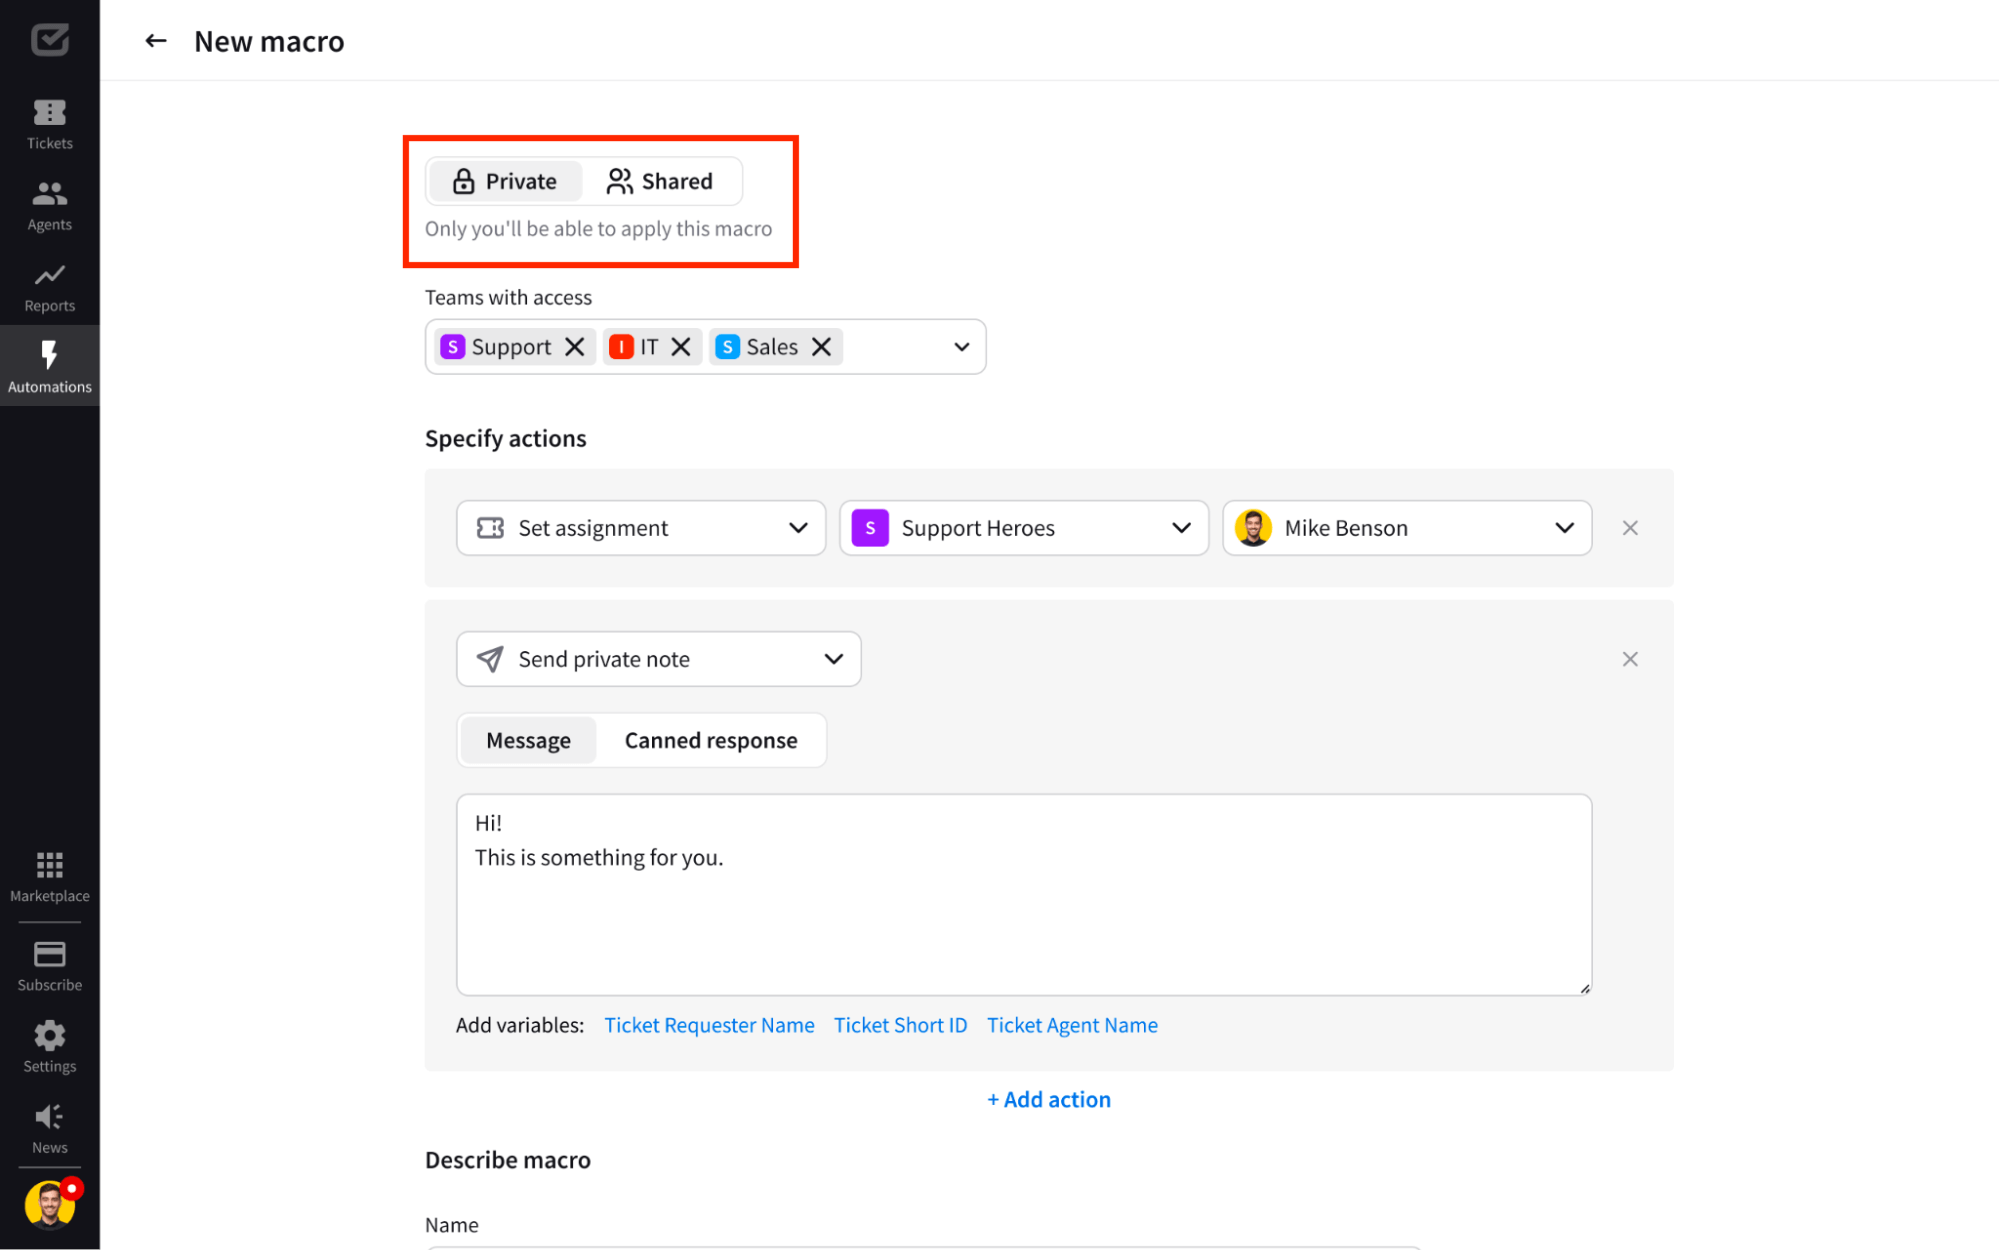
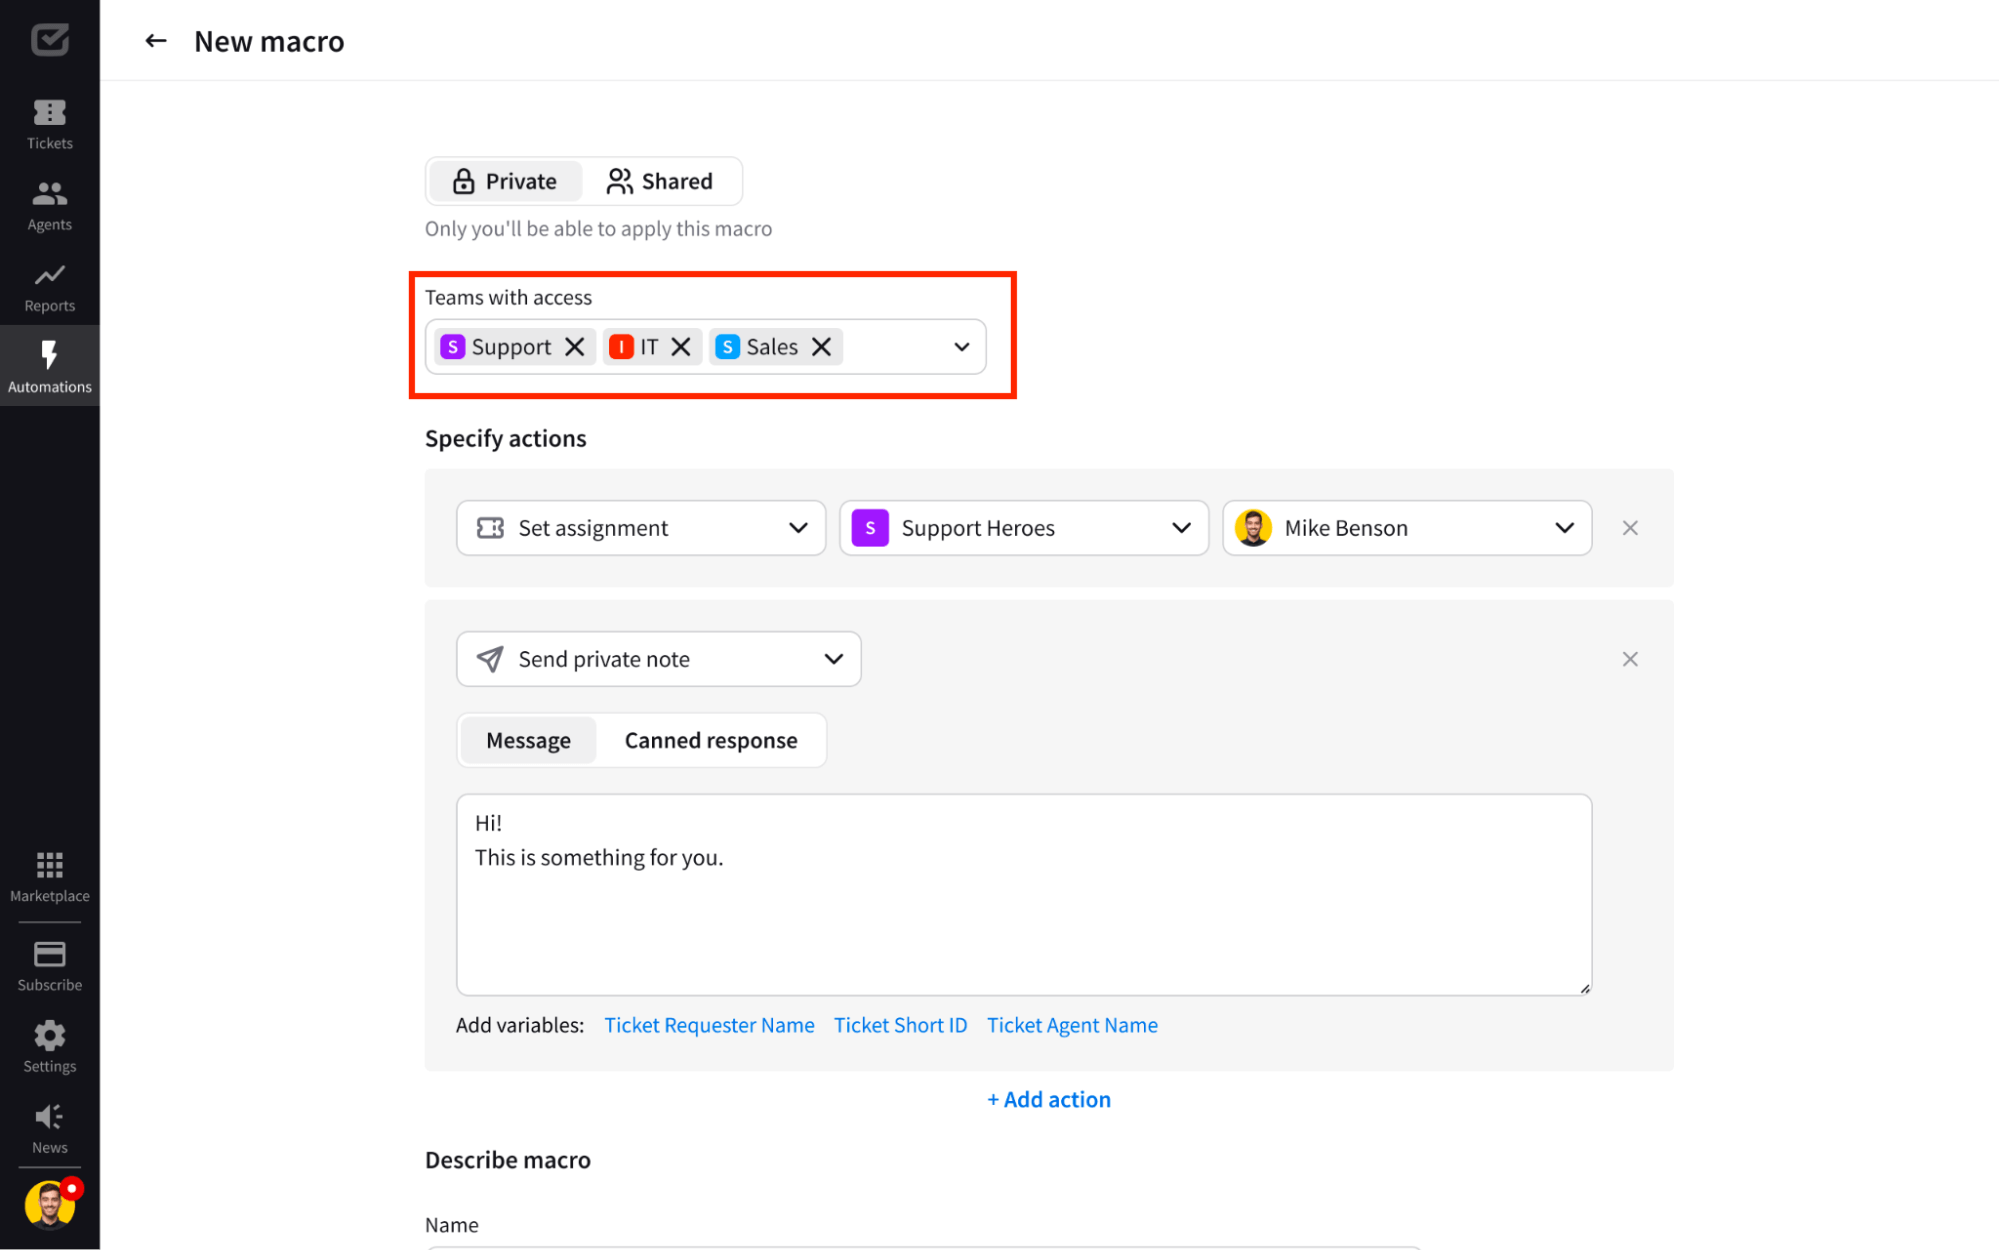
Then, select the teams that can use the macro.
Note on private macros
You can apply private macro only when working on tickets that have been assigned to the teams you’re a member of (Ticket details ➡️ Responsibility ➡️ Team).
Note on private macros
You can apply private macro only when working on tickets that have been assigned to the teams you’re a member of (Ticket details ➡️ Responsibility ➡️ Team).
After that, specify actions performed by macros. Macros are versatile in performing various on-demand tasks for you and your team, such as:
- Set assignment
- Send feedback request
- Send follow-up
- Send message
- Send private note
- Set status
- Set priority
- Add tag
- Remove tag
- Move to Spam
- Move to all recent tickets
- Add followers
- Remove followers

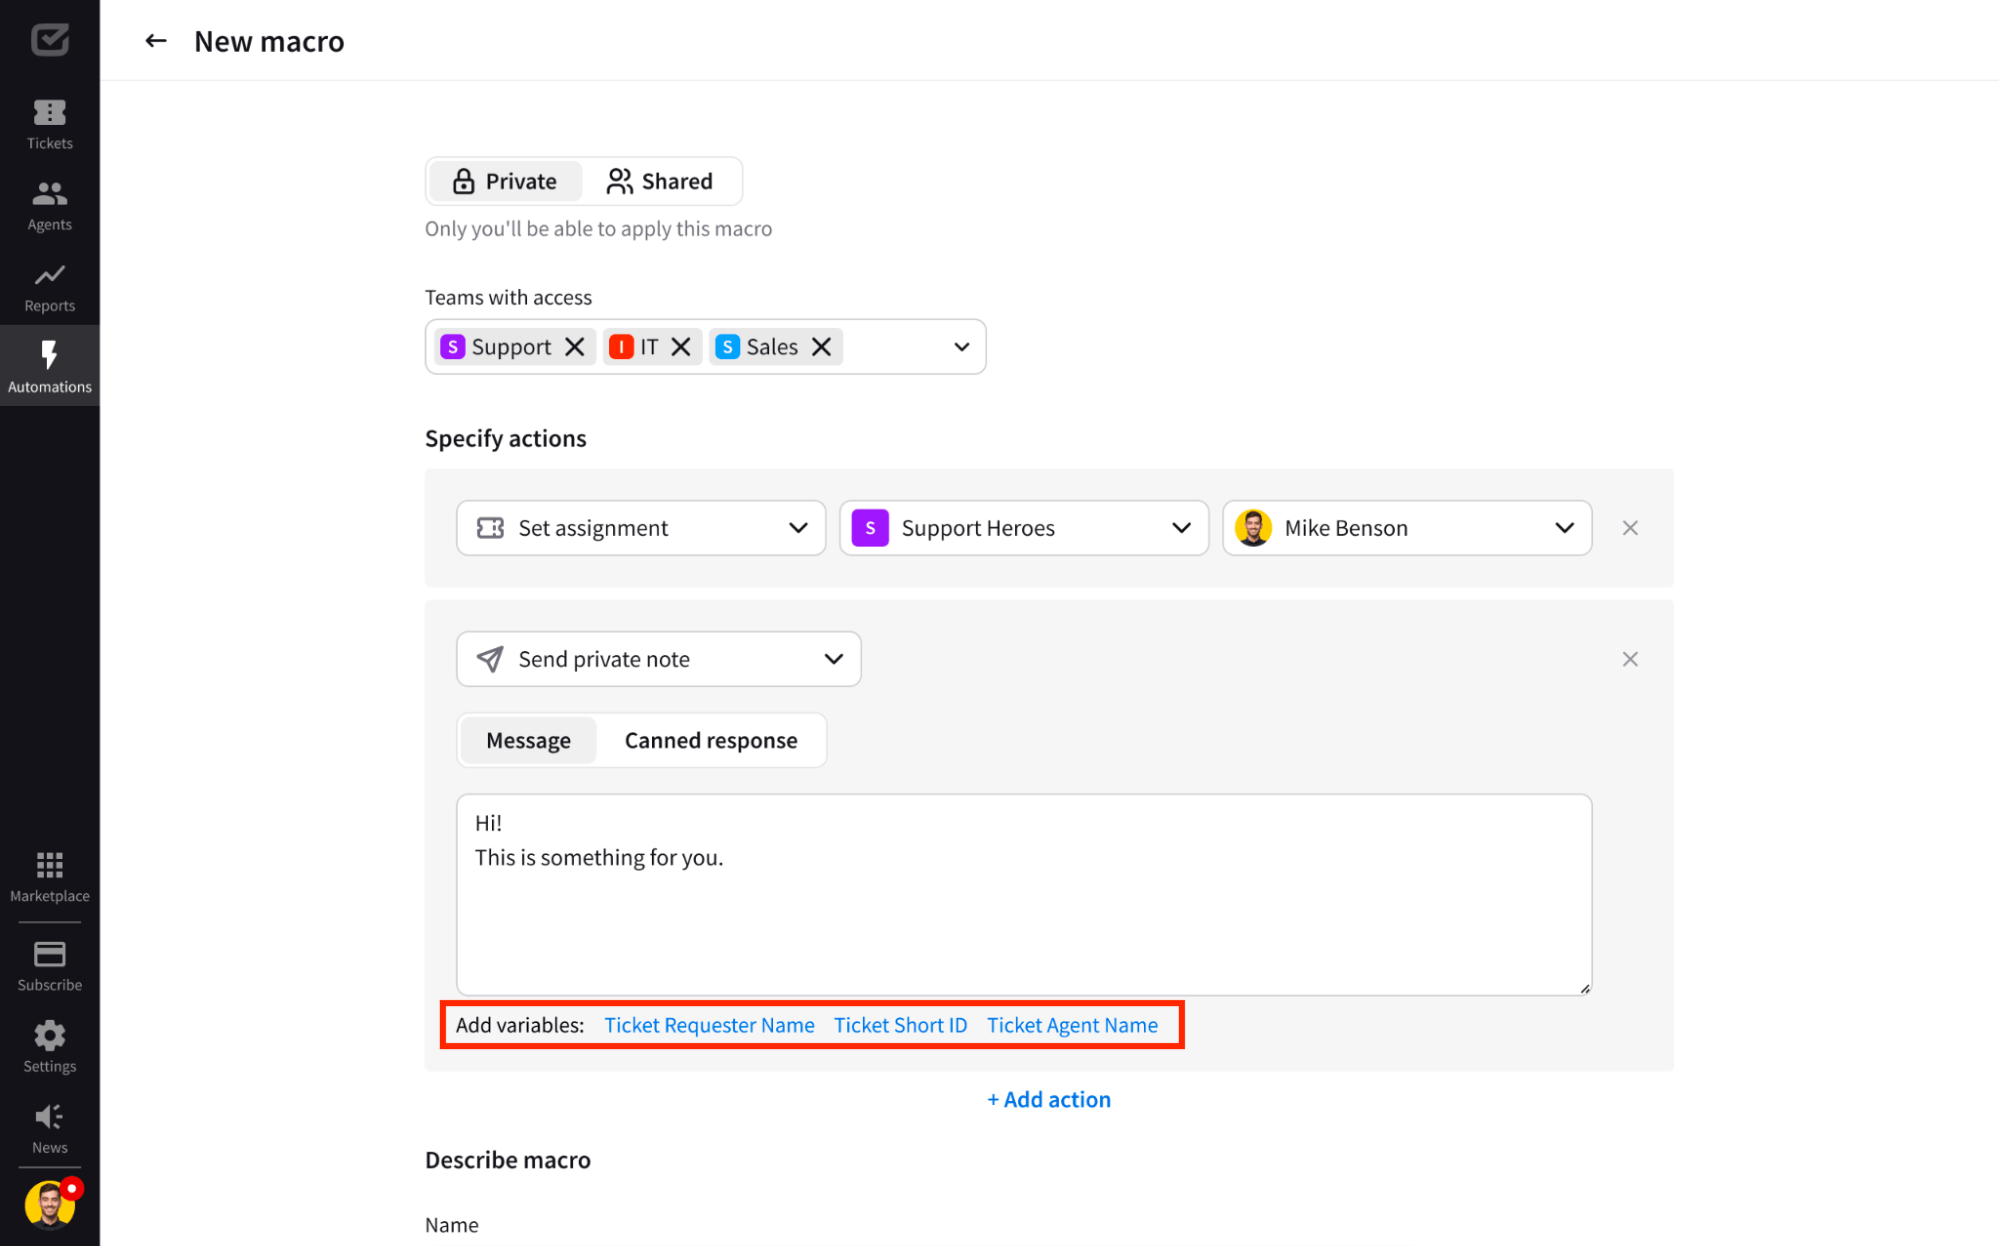
If you choose actions that include sending a text message (message or canned response), you can add variables such as:
- Ticket Requester Name
- Ticket Short ID
- Ticket Agent Name
Note that you can add as many actions as you want by clicking the “Add action” button.
In the last step, name and describe your macro.
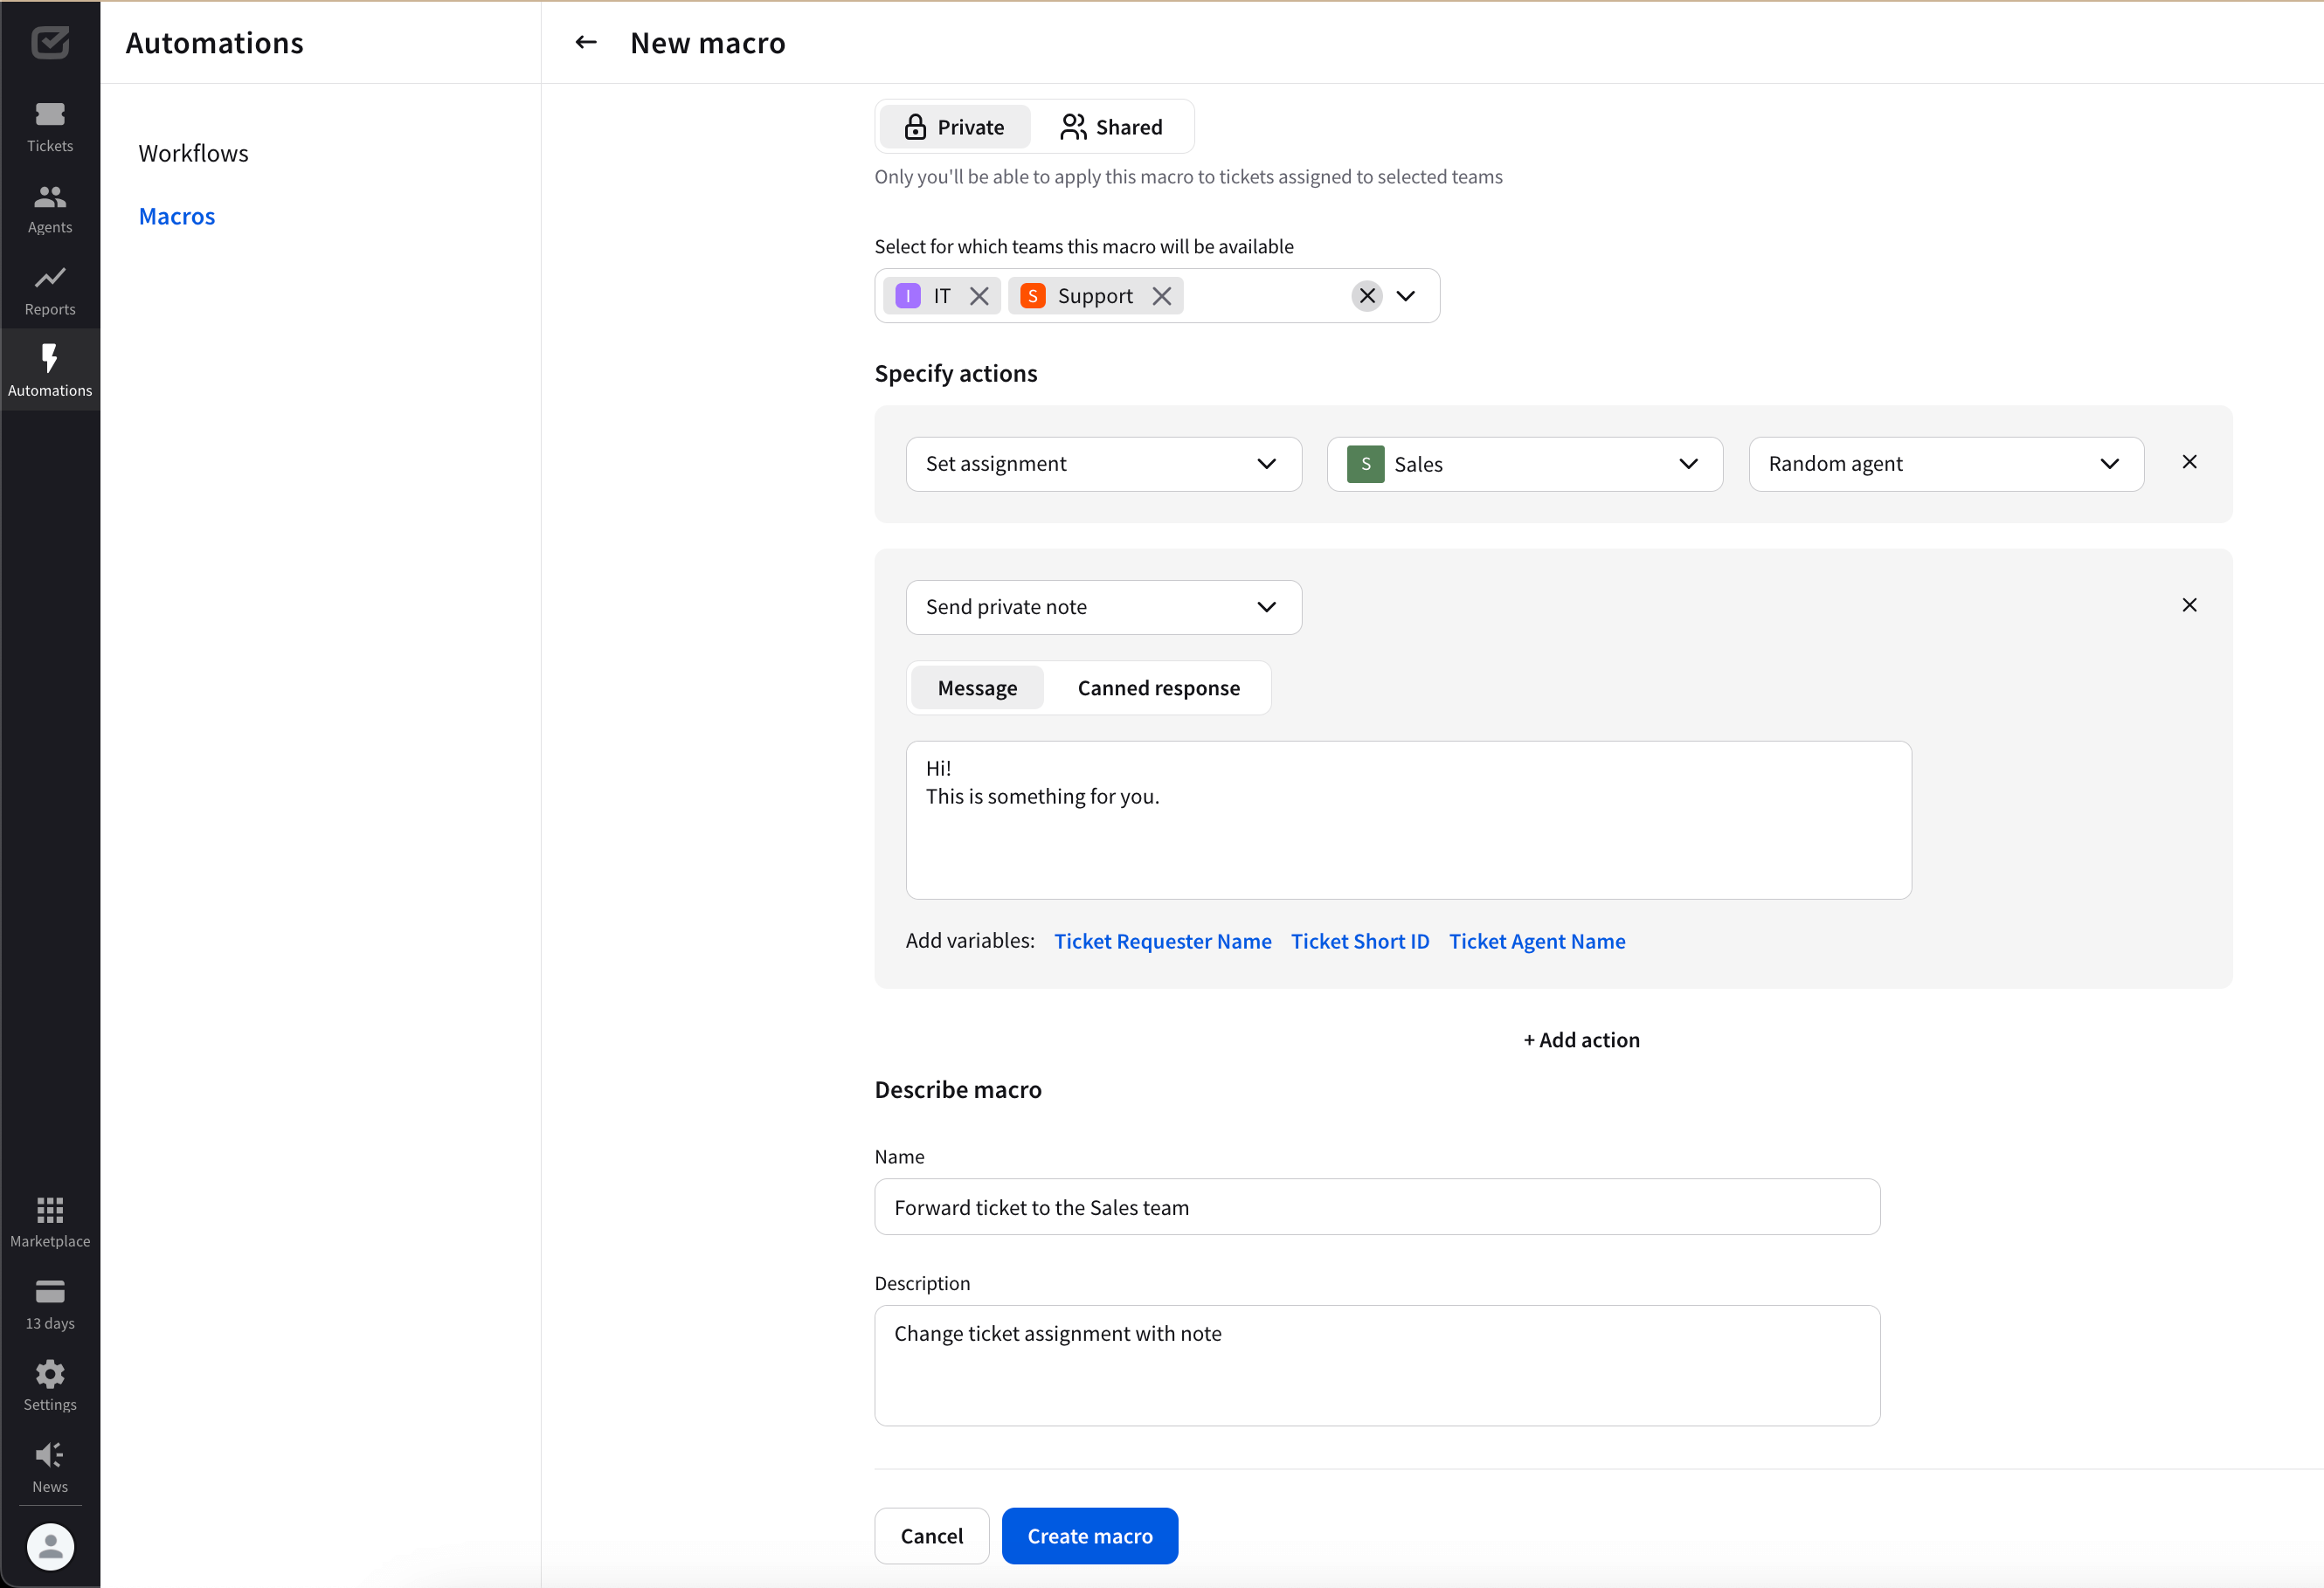
Be sure to clearly name and describe your macro, as these details will appear in the list of macros when solving tickets.
Create macros from templates
Macros templates make ticket handling way easier by letting agents apply ready-made responses and actions in just a few clicks. They help keep things consistent, speed up responses, and make ticket management a breeze.
Each macro template has a clear, easy-to-understand name so agents can quickly find and use the right one:
- New Ticket Confirmation
- General Follow-up
- Feedback Request
- Support Case Follow-up
- Mark as Spam and Close
- Customer Feedback Request
- Escalate to Manager
- Clarification for Customer

These macros are designed to make life easier for agents by handling tickets efficiently with predefined actions and responses. They help:
- Automate routine replies
- Keep customer interactions consistent
- Speed up ticket resolution
- Maintain clear, professional messaging
- Escalate cases when needed
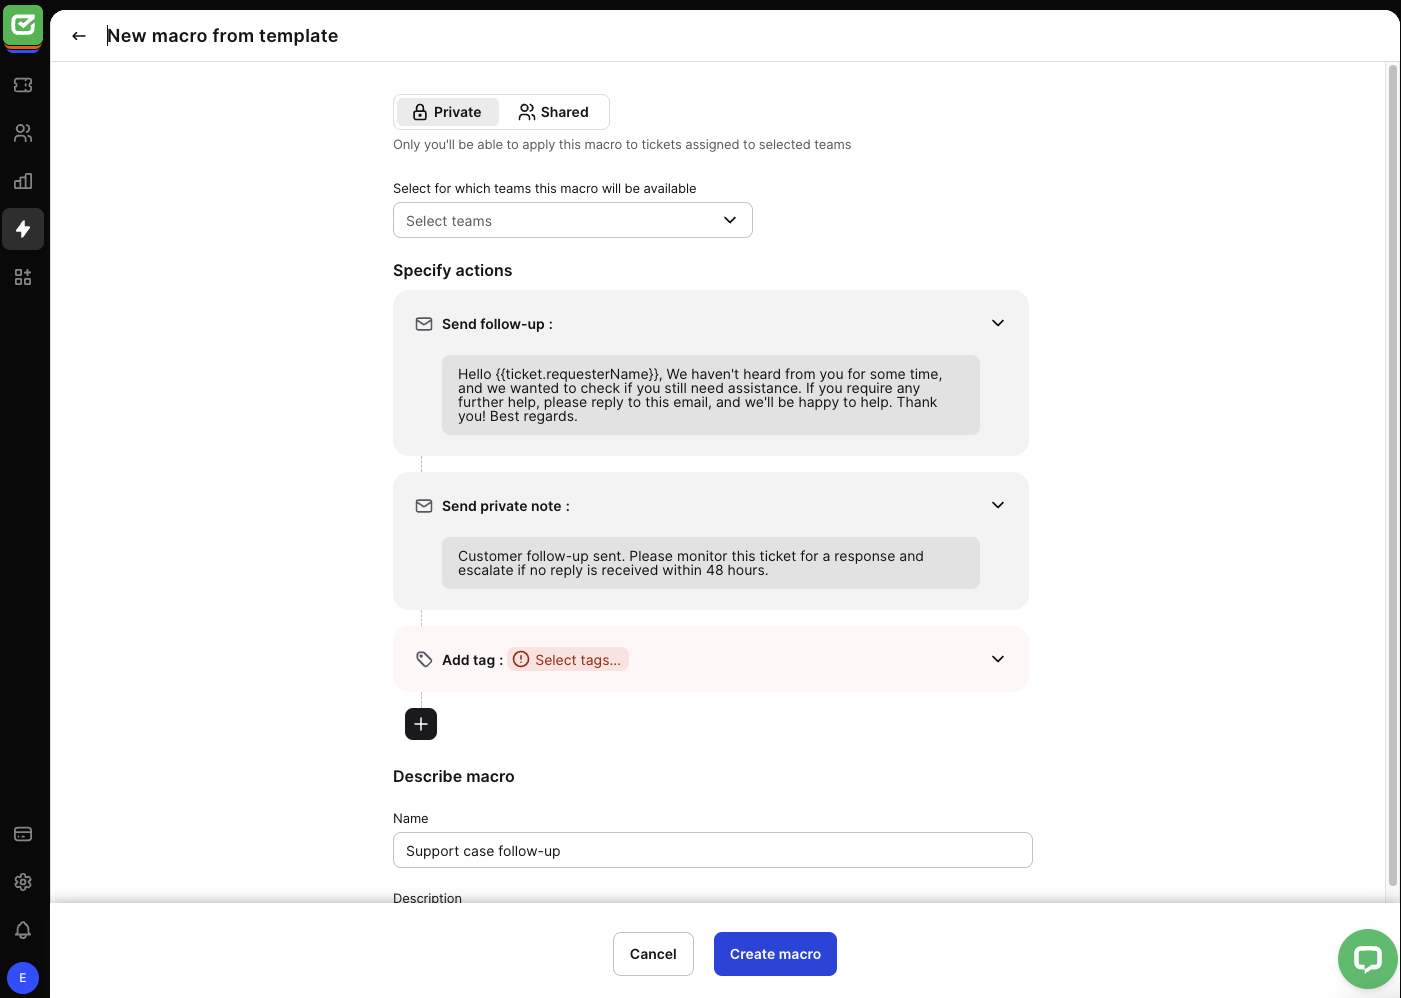
With these templates, agents can work smarter, stay organized, and deliver better customer support without the hassle of writing the same responses over and over.
Apply macros
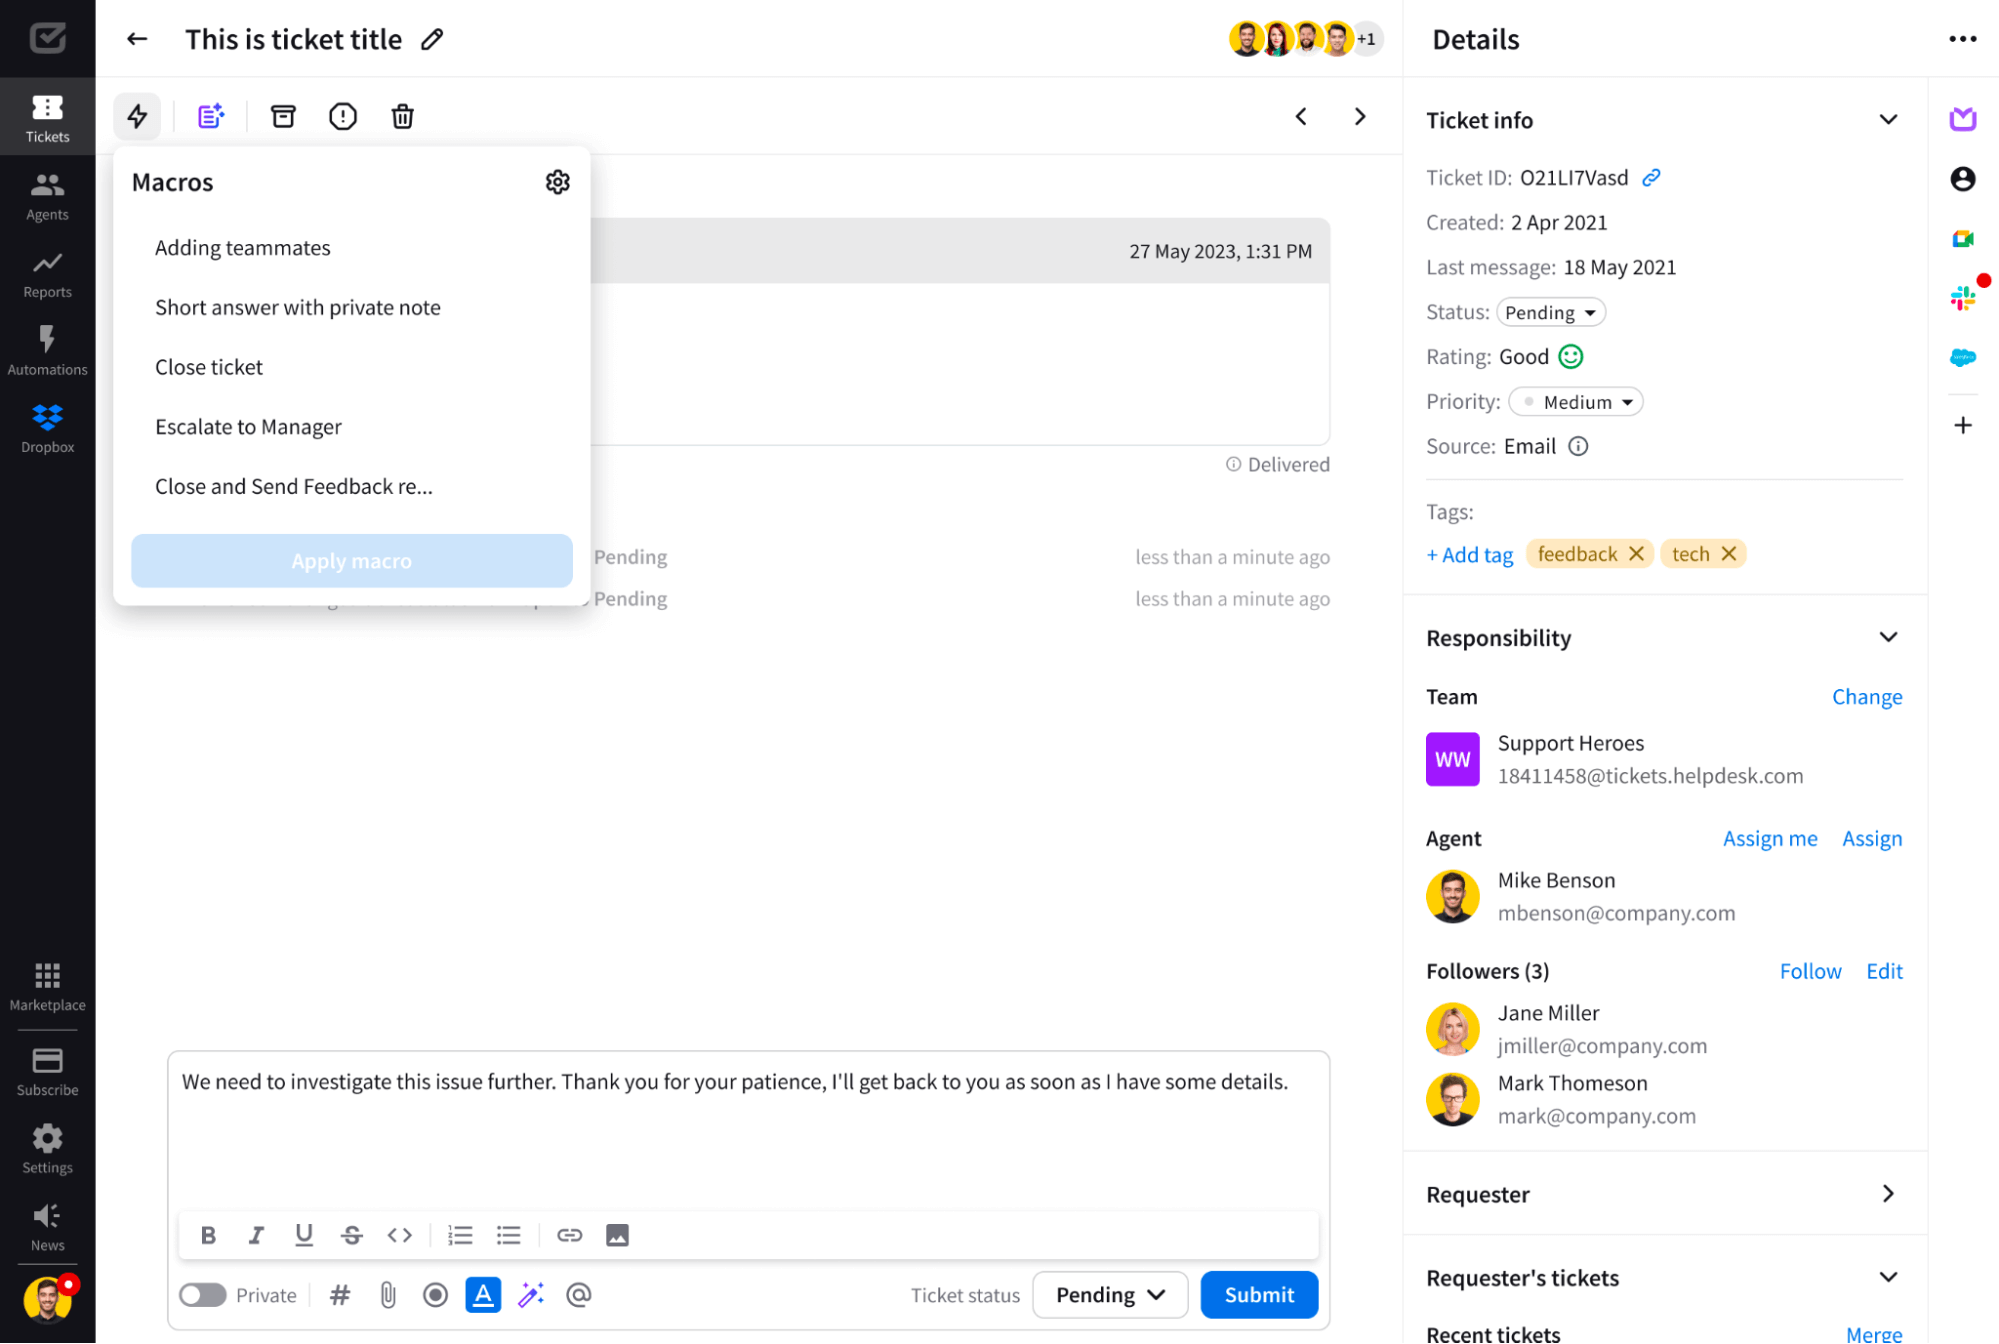
To use a macro while addressing a ticket, follow these steps:
- Open the ticket and locate the toolbar.
- Click on the “Macros” icon in the toolbar.
- Choose the macro that best fits your specific situation.
- Once you’ve selected a macro, a series of predefined actions will be executed within the ticket. These actions will modify the ticket details and include any essential messages set during the macro creation.
In summary, by accessing the Macros icon and selecting an appropriate macro, you can efficiently apply a set of actions to the ticket, streamlining the resolution process and updating ticket information accordingly.
Macros limits
You can create 5 private macros and 20 shared macros per license in the Team plan.
If you need more than that when solving tickets, consider upgrading your subscription to the Enterprise solution.
Automation rules vs macros
Automation rules and macros both aim to automate tasks but differ in their scope, complexity, and applications.
Automation rules are designed for managing intricate business processes with multiple steps, often operating in the background of daily tasks. Users can set conditions using logical operators to trigger swift responses. By selecting actions from a drop-down list, these rules automate repetitive or manual tasks when specified conditions are met, thus saving time. They are flexible and capable of integrating various tasks within an organization.
On the contrary, macros are more focused and simpler, intended for automating repetitive tasks within a specific context. Macros consist solely of actions without accompanying conditions, as there’s no automated ticket assessment to determine their relevance. Agents manually assess tickets and apply macros as needed. Typically created by users, macros prove especially beneficial for enhancing personal or team productivity.
