158 29
Integrate your HelpDesk with Zapier to create custom Zaps and powerful automation. Zapier is an online automation tool that allows you to connect HelpDesk to over 3,000 apps without coding or relying on developers to create integrations.
Sign up to Zapier to mirror your current workflow there and get rid of repetitive tasks. Create HelpDesk tickets straight from your CRM, ERP, or any other online system you use.
How to integrate HelpDesk with Zapier
If you’re already logged into your HelpDesk account, go to the “Integrations” section in HelpDesk, and click on the “Open Zapier” button.

First, you need to give permission to connect HelpDesk and Zapier. This is a fully secure and reversible process.

Then, you can start creating your new Zaps dedicated to working with HelpDesk. There are many options for new integrations, but let’s start with one of the basic ones to show you the main idea.
So, let’s say you want to categorize tickets from our support team by adding the tag “product update.”
Go to your Zapier account and create a new Zap.
First, remember to name your Zap according to the context and its purpose. Here, I’ll name it “New Ticket from HelpDesk Support.”

Choosing the trigger
After naming your Zap, choose the app where, when something happens, it’ll trigger the Zap. Select HelpDesk from the list or type its name in the field.


Select the trigger event from the drop-down list. You have many triggers to select from, and they are:
-
New Ticket. Triggers when a new ticket is created.
-
Ticket Status Changed. Triggers when the status is changed in a ticket.
-
New Message in a Ticket. Triggers when there’s a new message in a ticket.
-
Ticket Tags Changed. Triggers when tags are changed in a ticket.
-
Ticket Followers Changed. Triggers when followers are changed in a ticket.
-
Ticket Assignment Changed. Triggers when the assignment is changed in a ticket.
-
Ticket Priority Changed. Triggers when the priority is changed in a ticket.
In this case, let’s select the “New Ticket” trigger.

Next, you need to select the HelpDesk account you want to automate using the new Zap. Click “Continue” to accept your selection.

Then, you need to test your trigger. In this test, Zapier will find some tickets in the selected HelpDesk account to confirm that the correct account is connected and the trigger is configured properly. Click on the “Test trigger” button.

If the process is successful, you’ll be notified that Zapier has found the ticket in the HelpDesk account, and you can proceed by clicking the “Continue” button.

Choosing the action
Before you get to the main action of assigning tags, you need to first filter the data in HelpDesk. Select “Filter by Zapier” from the list or type it in the field.

Set the conditions within the filtering, that is:
Only continue if:
Ticket.requester - (Text) Contains - support@helpdesk.com

After that, add another action by clicking the “+” button.

Now, you need to choose the exact app where the action will be performed. Select HelpDesk from the list or type its name in the field.

Select the action that will be automatically performed with your new Zap. You have many actions to select from, and they are:
-
Create Ticket. Create a new ticket.
-
Update Ticket/Send Reply. Change ticket properties or send a reply.
-
Add Tags to Ticket. Add tags to an existing ticket.
-
Add Followers to Ticket. Add followers to an existing ticket.
-
Create Upload Transaction. Start an upload transaction to enable the upload of attachments.
-
Upload Attachment During Transaction. Upload attachment during an open transaction.
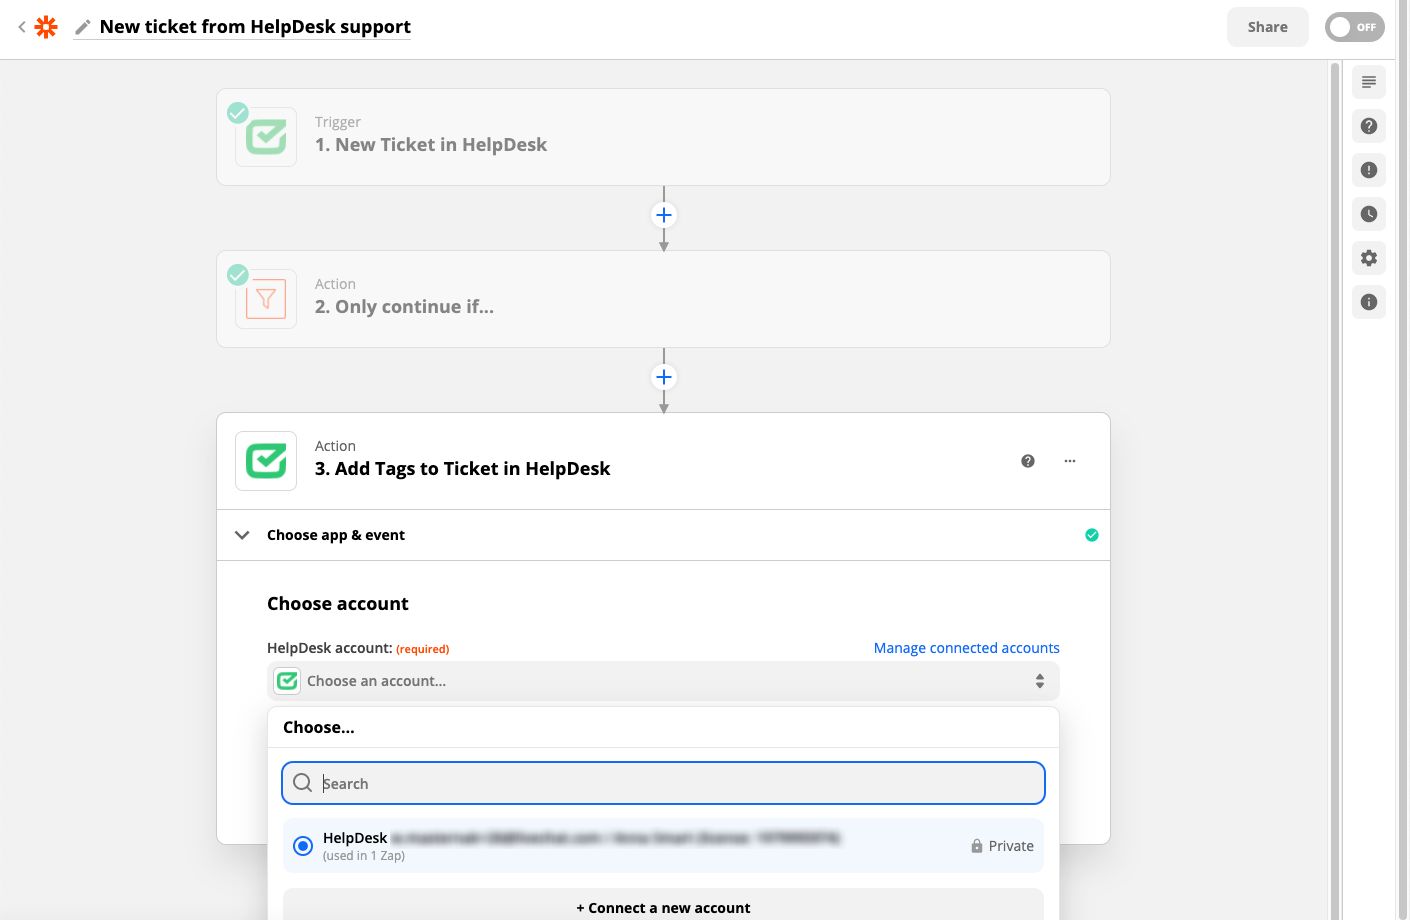
Let’s select the “Add Tags to Ticket” action and click “Continue.”


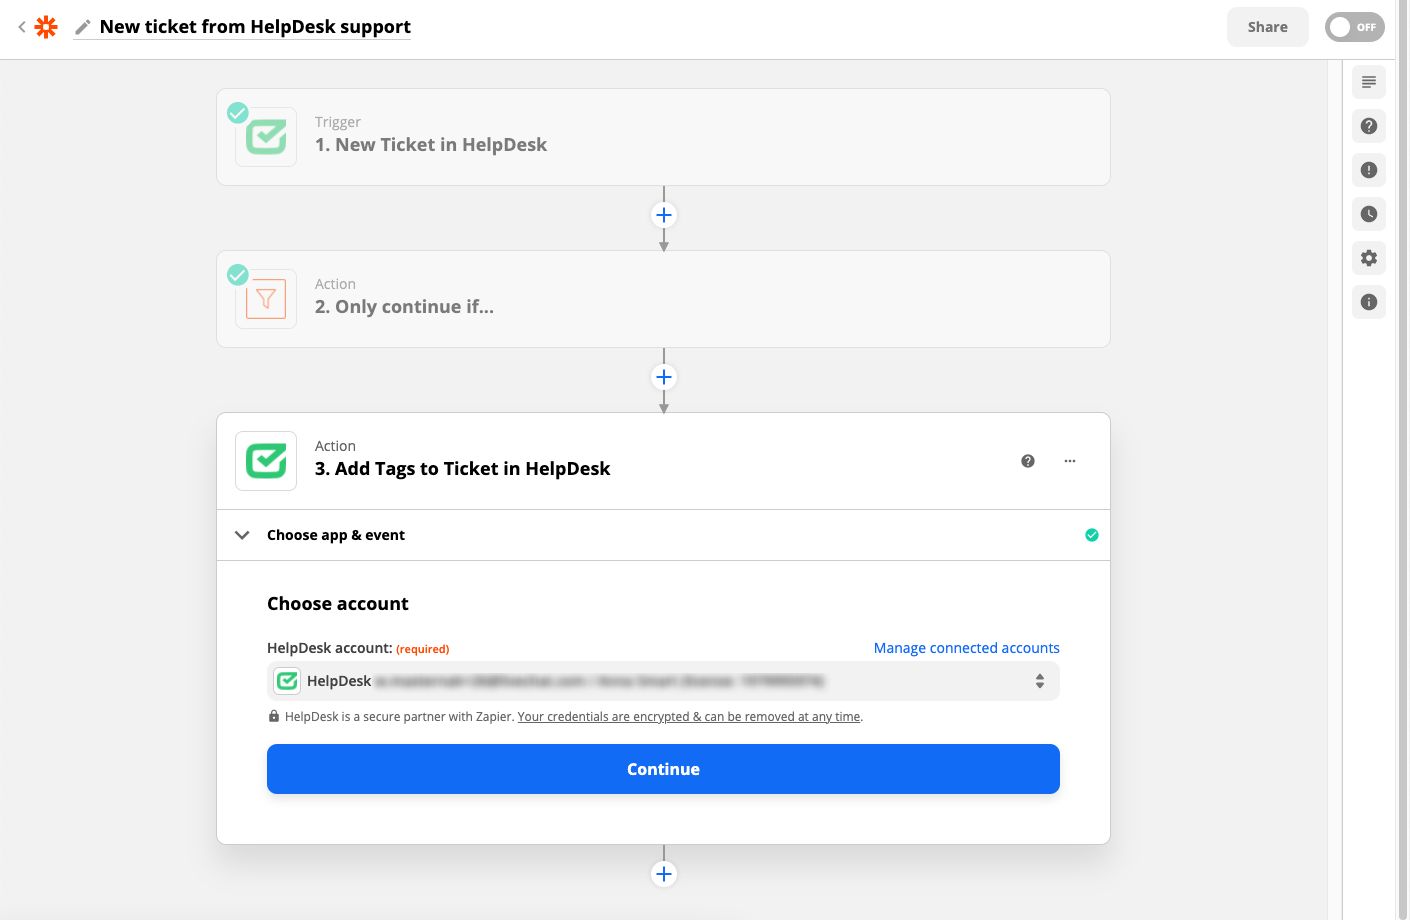
You need to select the HelpDesk account where the actions will be performed.
After selecting the required account, you can proceed to the next step by clicking the “Continue” button.
Next, choose HelpDesk as the app whose data you want to use.

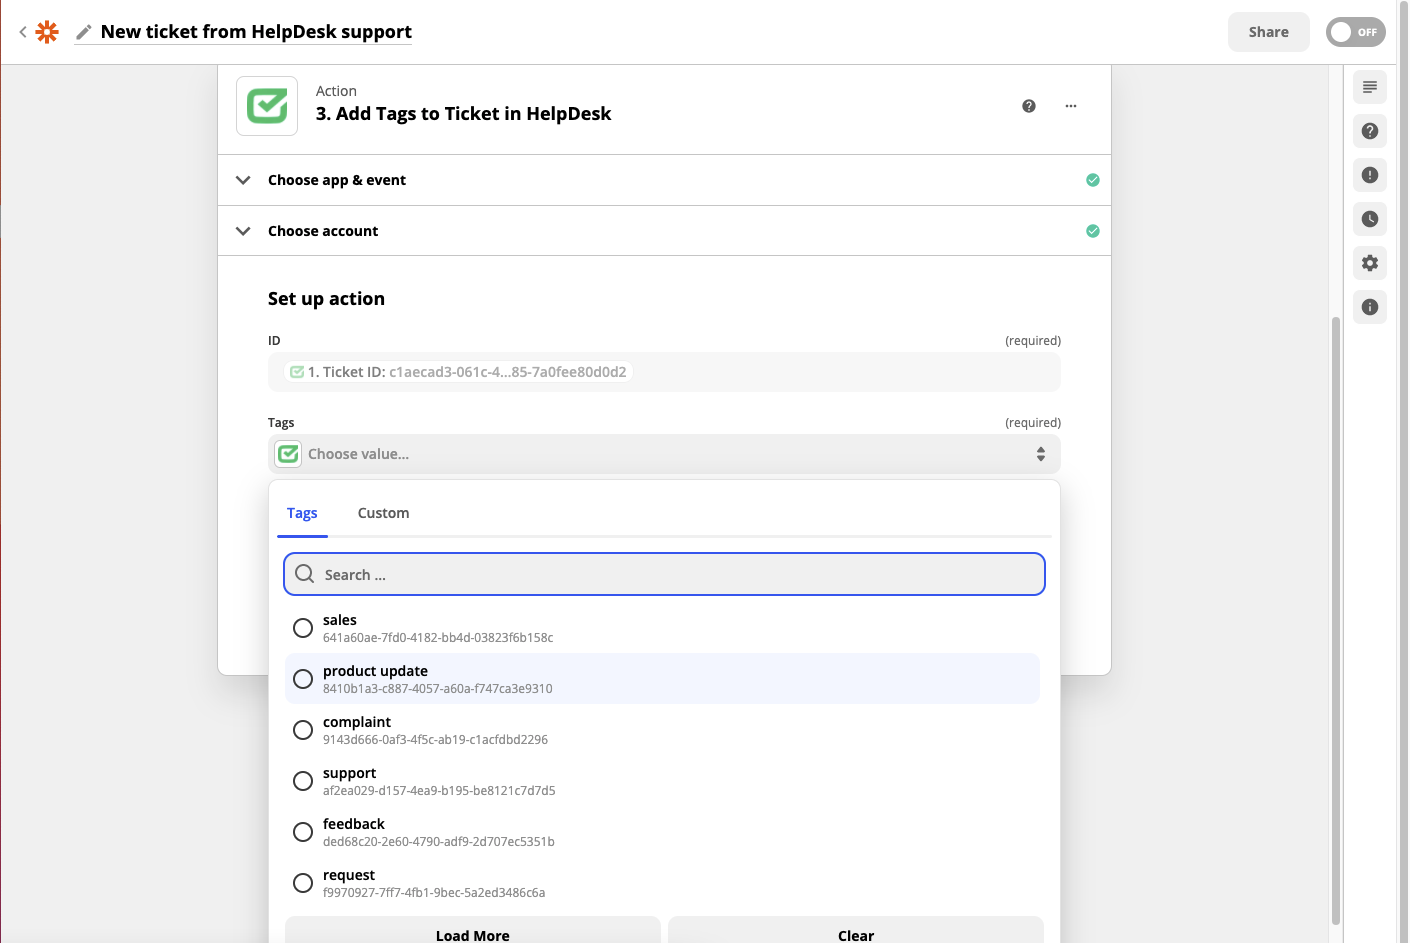
After that, you’ll need to specify the details of your action and map the information. Set the action ID by selecting the correct field option from the list.
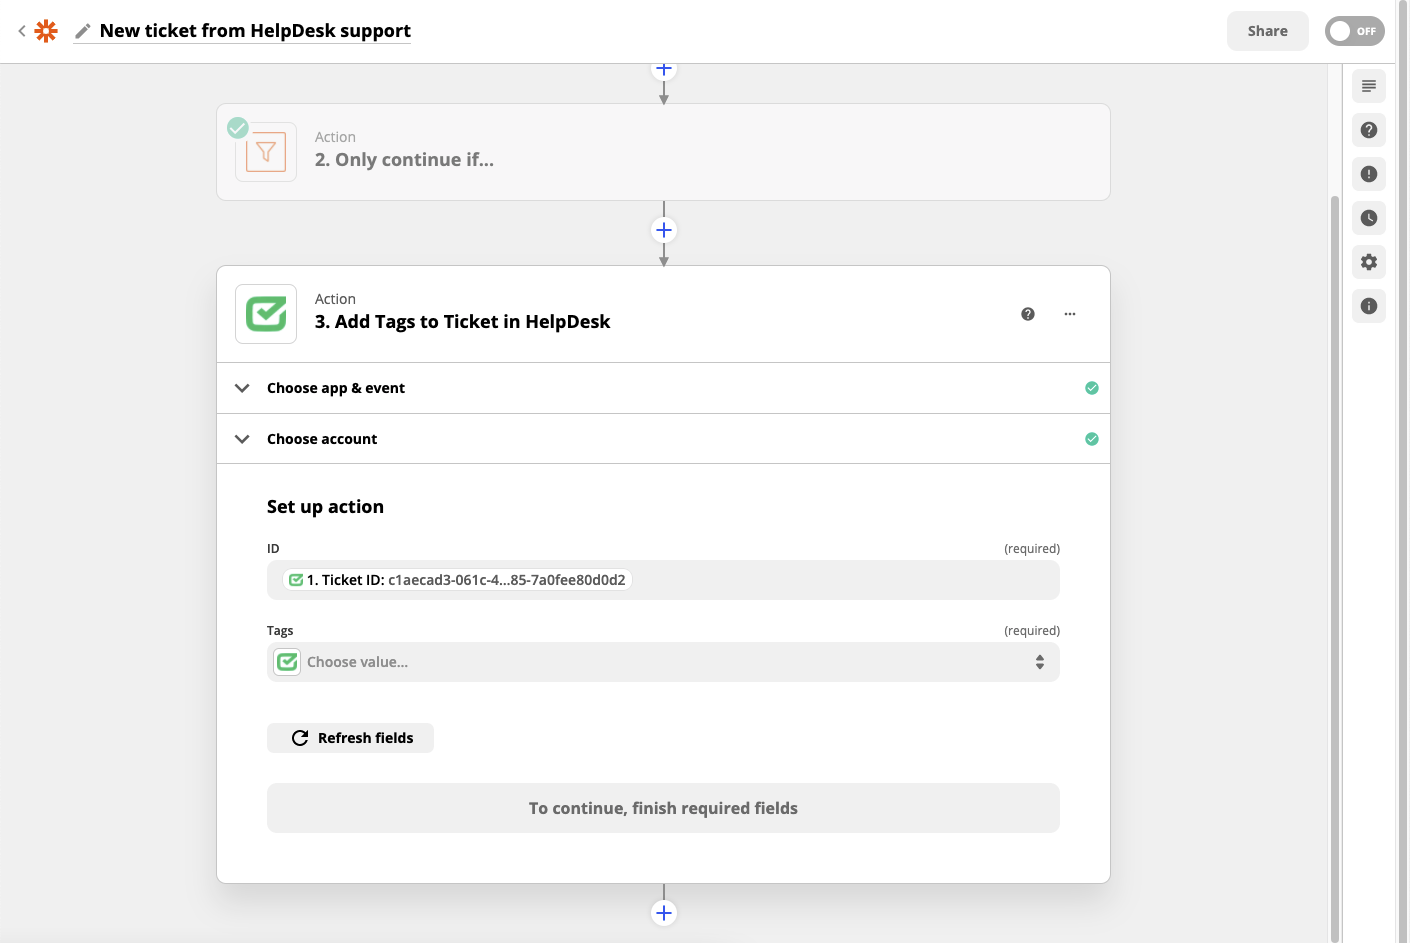
As you can see, the field names are linked to the ticket data. Since the goal is to categorize tickets from our support team, you need to select the “Ticket ID” option. This way, Zapier will know which ticket to update, and it’ll detect every email from support@helpdesk.com to perform the appropriate action within it.
Then, pick the relevant tag from the list to be automatically added to the selected tickets.
You can see the final confirmation and summary of the settings. Test your new Zap to continue.

After a successful test, you can turn your Zap on.


You can see your new Zap on the main Zapier list along with the other Zaps you’ve created so far.

You can find more info about the HelpDesk and Zapier integration in the API docs. Also, the API is extended with new helpful webhooks that you can try:
-
Tickets.events.status
-
Tickets.events.priority
-
Tickets.events.message
-
Tickets.events.tags
-
Tickets.events.followers
-
Tickets.events.assignment
Adding attachments
You can also create your own Zap for adding attachments in different formats to your tickets, such as PDFs or URLs. Use it to include forms, applications, or other documents in your messaging. You can create this Zap in three steps:

- Select action “Create an upload transaction.”

- Upload the files to the action details.

- Add the “Transaction ID” in the created ticket or update ticket actions.

Filtering by tag
You can also create a Zap to filter tickets by tag. To do this, use the “Filter by Zapier” action and set the conditions this way:
Only continue if:
1. Tag lds.0 - (Text) Contains - [a unique URL part of the selected tag]

If you want to get the unique URL part of your tag, go to HelpDesk and filter tickets by tag. Then, you’ll see the necessary part of the URL that you need to paste into the field mentioned above.

This Zap was just an example where we made changes only to HelpDesk. You can discover Zapier’s true potential by combining it with different apps. On the Zapier website, you’ll find a search box where you can see all of the possible connections to your favorite applications.
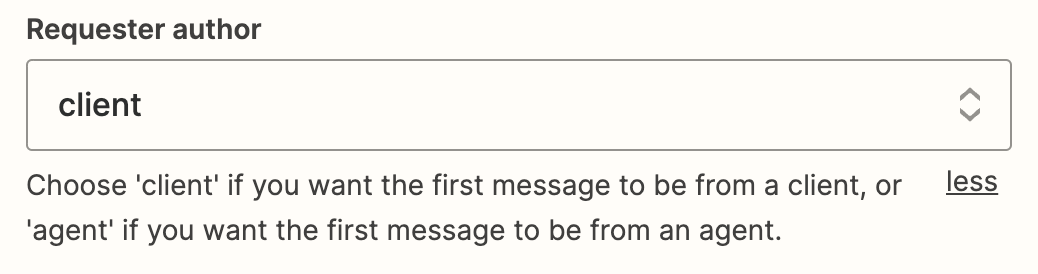
How to include the customer as a requester in tickets created with Zapier?
When you use Zapier to create a support ticket, the first message usually looks like it’s from an agent. But if you want it to show that it’s coming from a customer instead, you can set it up in Zapier. This way, the first message will appear as if the customer sent it, including their name (requester’s name), not the agent’s.
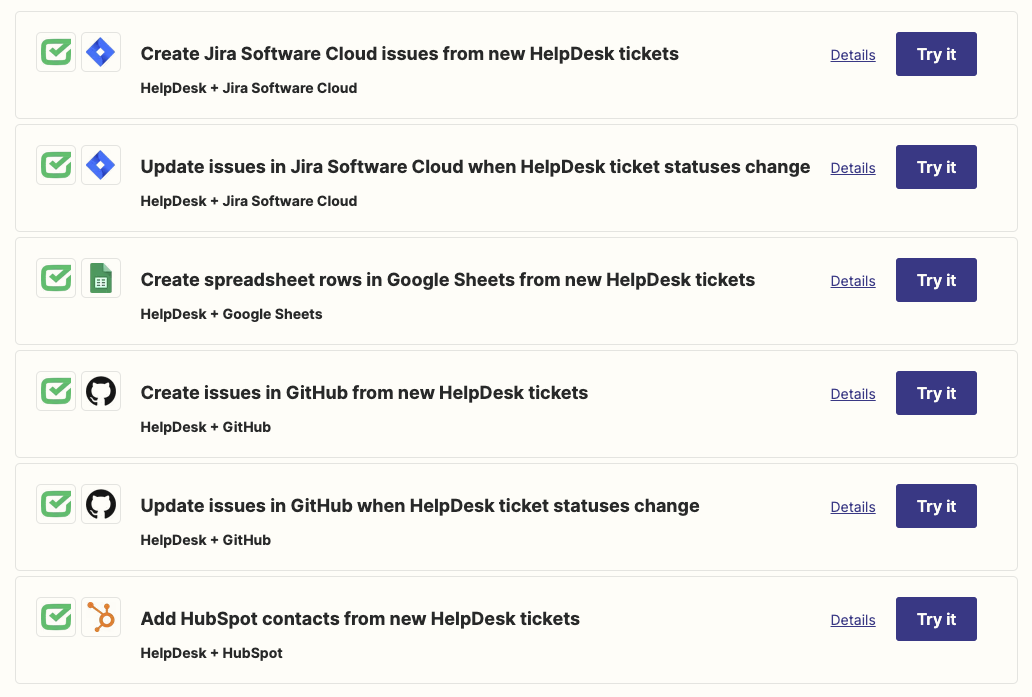
Using popular Zaps and Zapier’s templates
Get inspired and see the possibilities of HelpDesk and Zapier integration. Browse the list of the most popular Zaps.

Also, feel free to automate HelpDesk integrations with Zapier’s templates.