 158 29
In this article, we’ll show you how to set up forwarding in Gmail/Google Workspace.
We also covered some additional options that you might find useful.
Here’s a list of all the topics that you’ll find:
- Setting up forwarding in Google Gmail (Google Workspace)
- Forwarding just a part of your emails (creating a filter)
- Transferring emails from the “Spam” folder
- Forwarding using Google Groups
Setting up forwarding in Gmail/Google Workspace
-
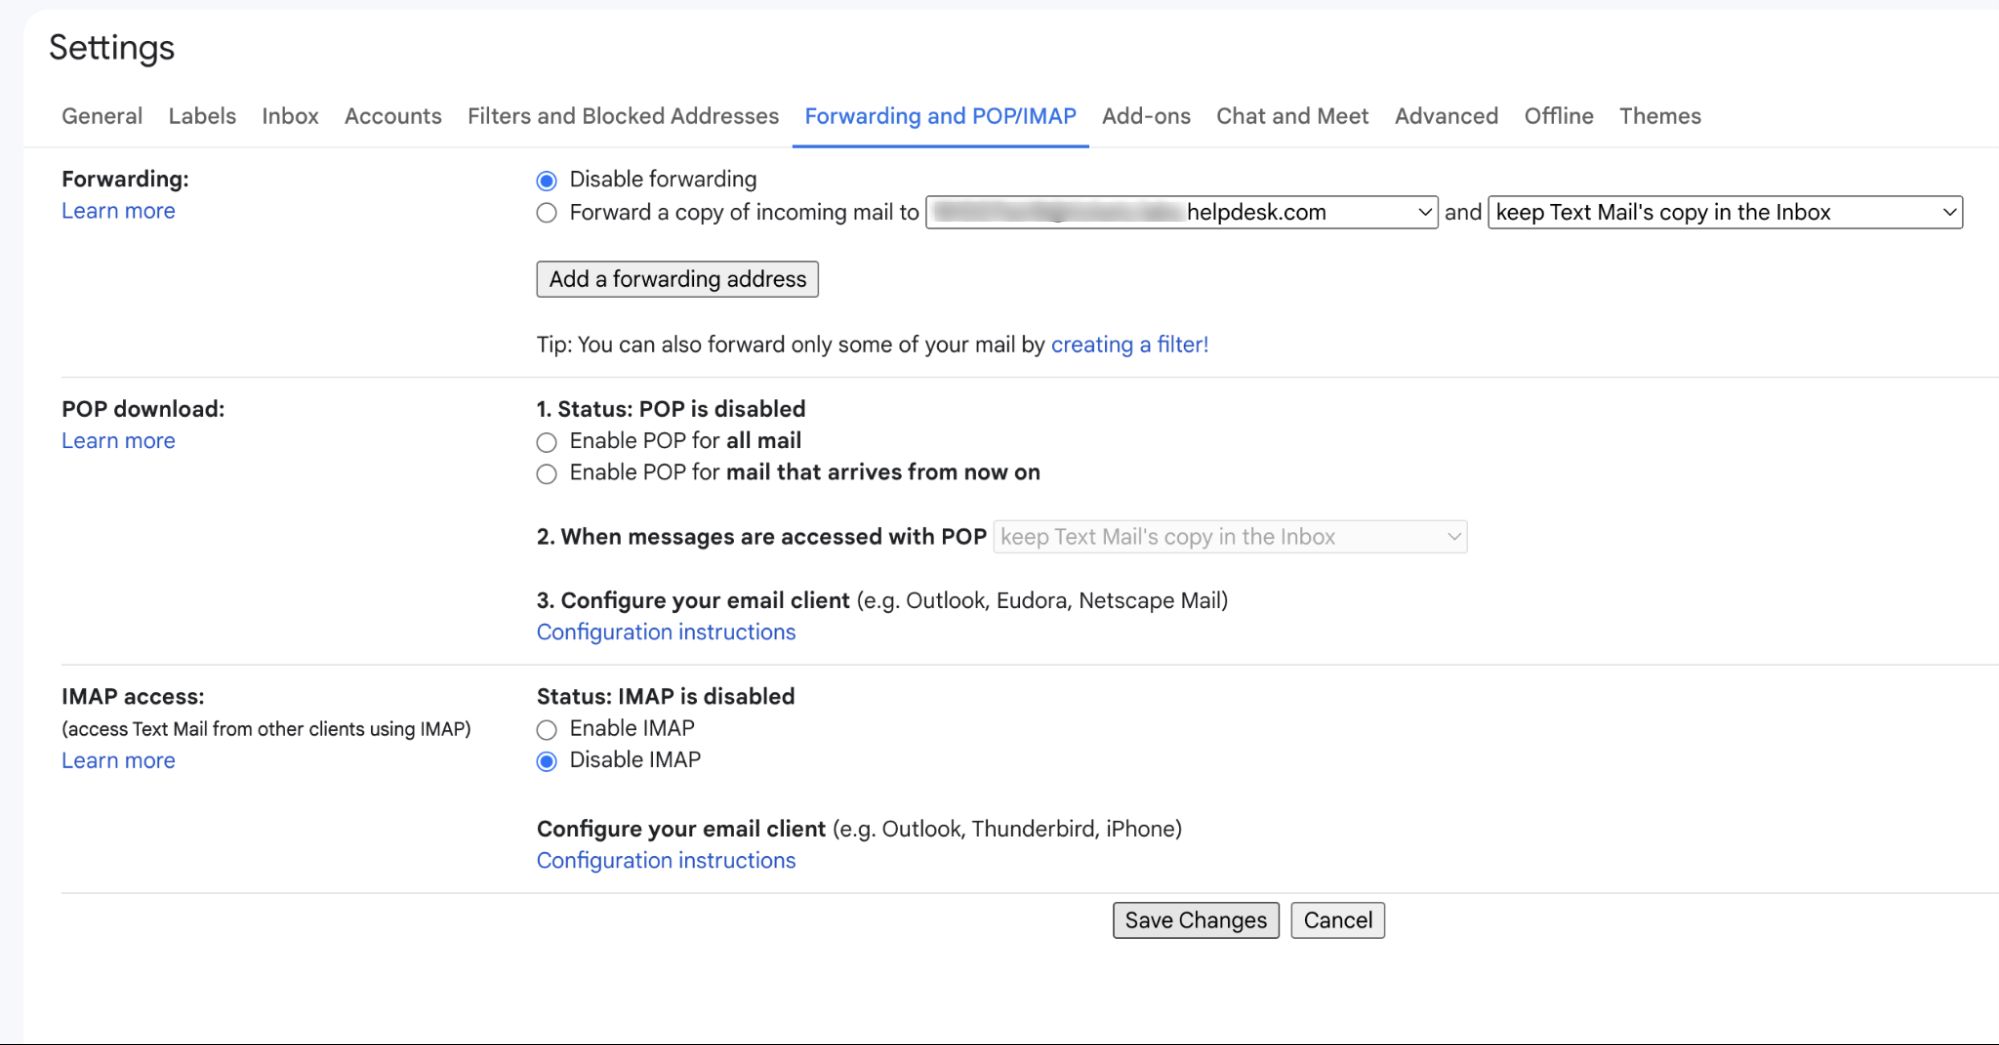
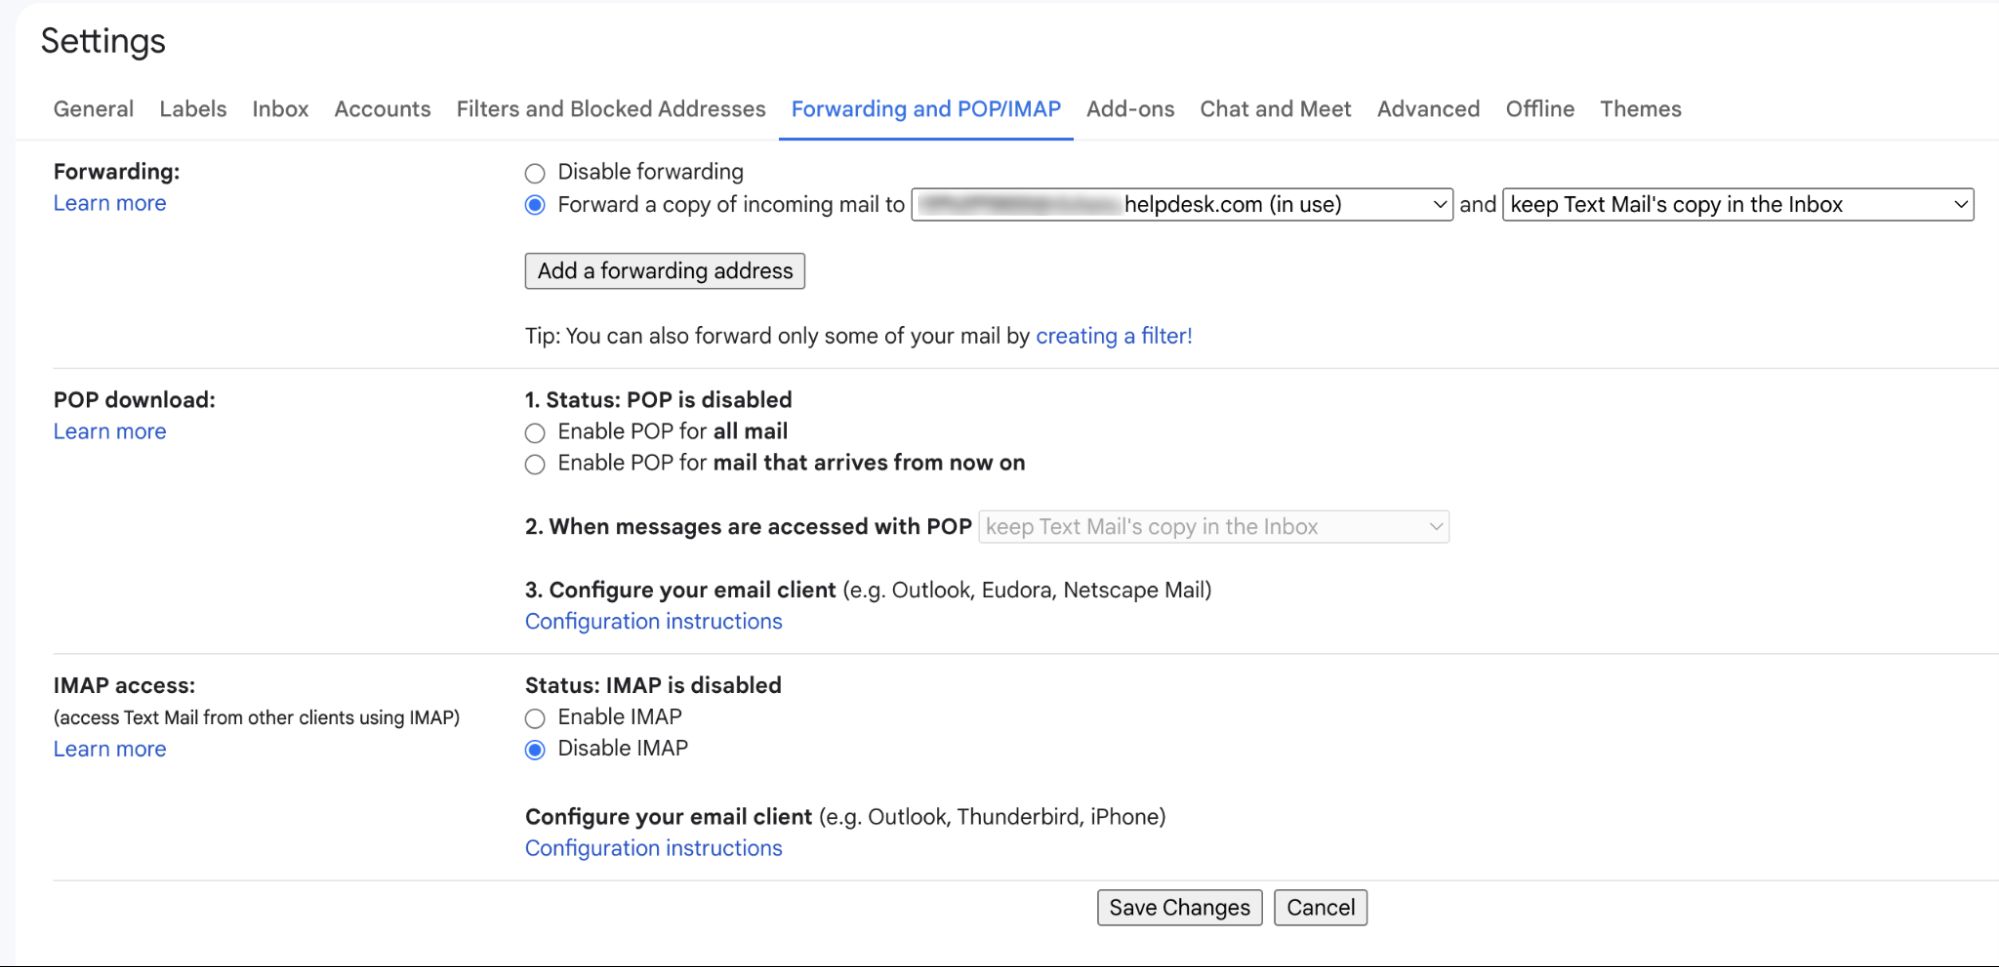
Access Gmail’s Forwarding and POP/IMAP settings.
-
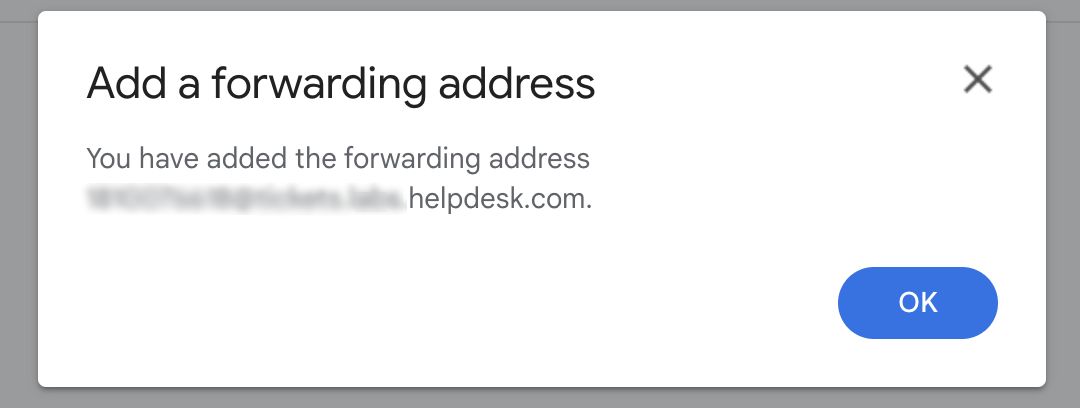
Select “Add a forwarding address,” enter HelpDesk’s forwarding address, and complete the verification process as instructed by Google.
Here you can find your HelpDesk forwarding address.


- After verification, select “Proceed” and “OK” to finalize adding the forwarding address.

- Go to HelpDesk and activate the verification link sent as a ticket to confirm email forwarding.


- Revisit Gmail’s forwarding settings, select “Forward a copy of incoming mail to” to the added HelpDesk forwarding address, and save changes
Forwarding just a part of your inbox (specific emails)
If you want to forward just a part of your messages, you can create a filter. It’s useful, for example, when you want to forward messages from a specific email address or those with a chosen keyword in the subject.
To do this, follow these steps:
- Open the Gmail application and click the gear icon in your inbox. Choose “See all settings.”

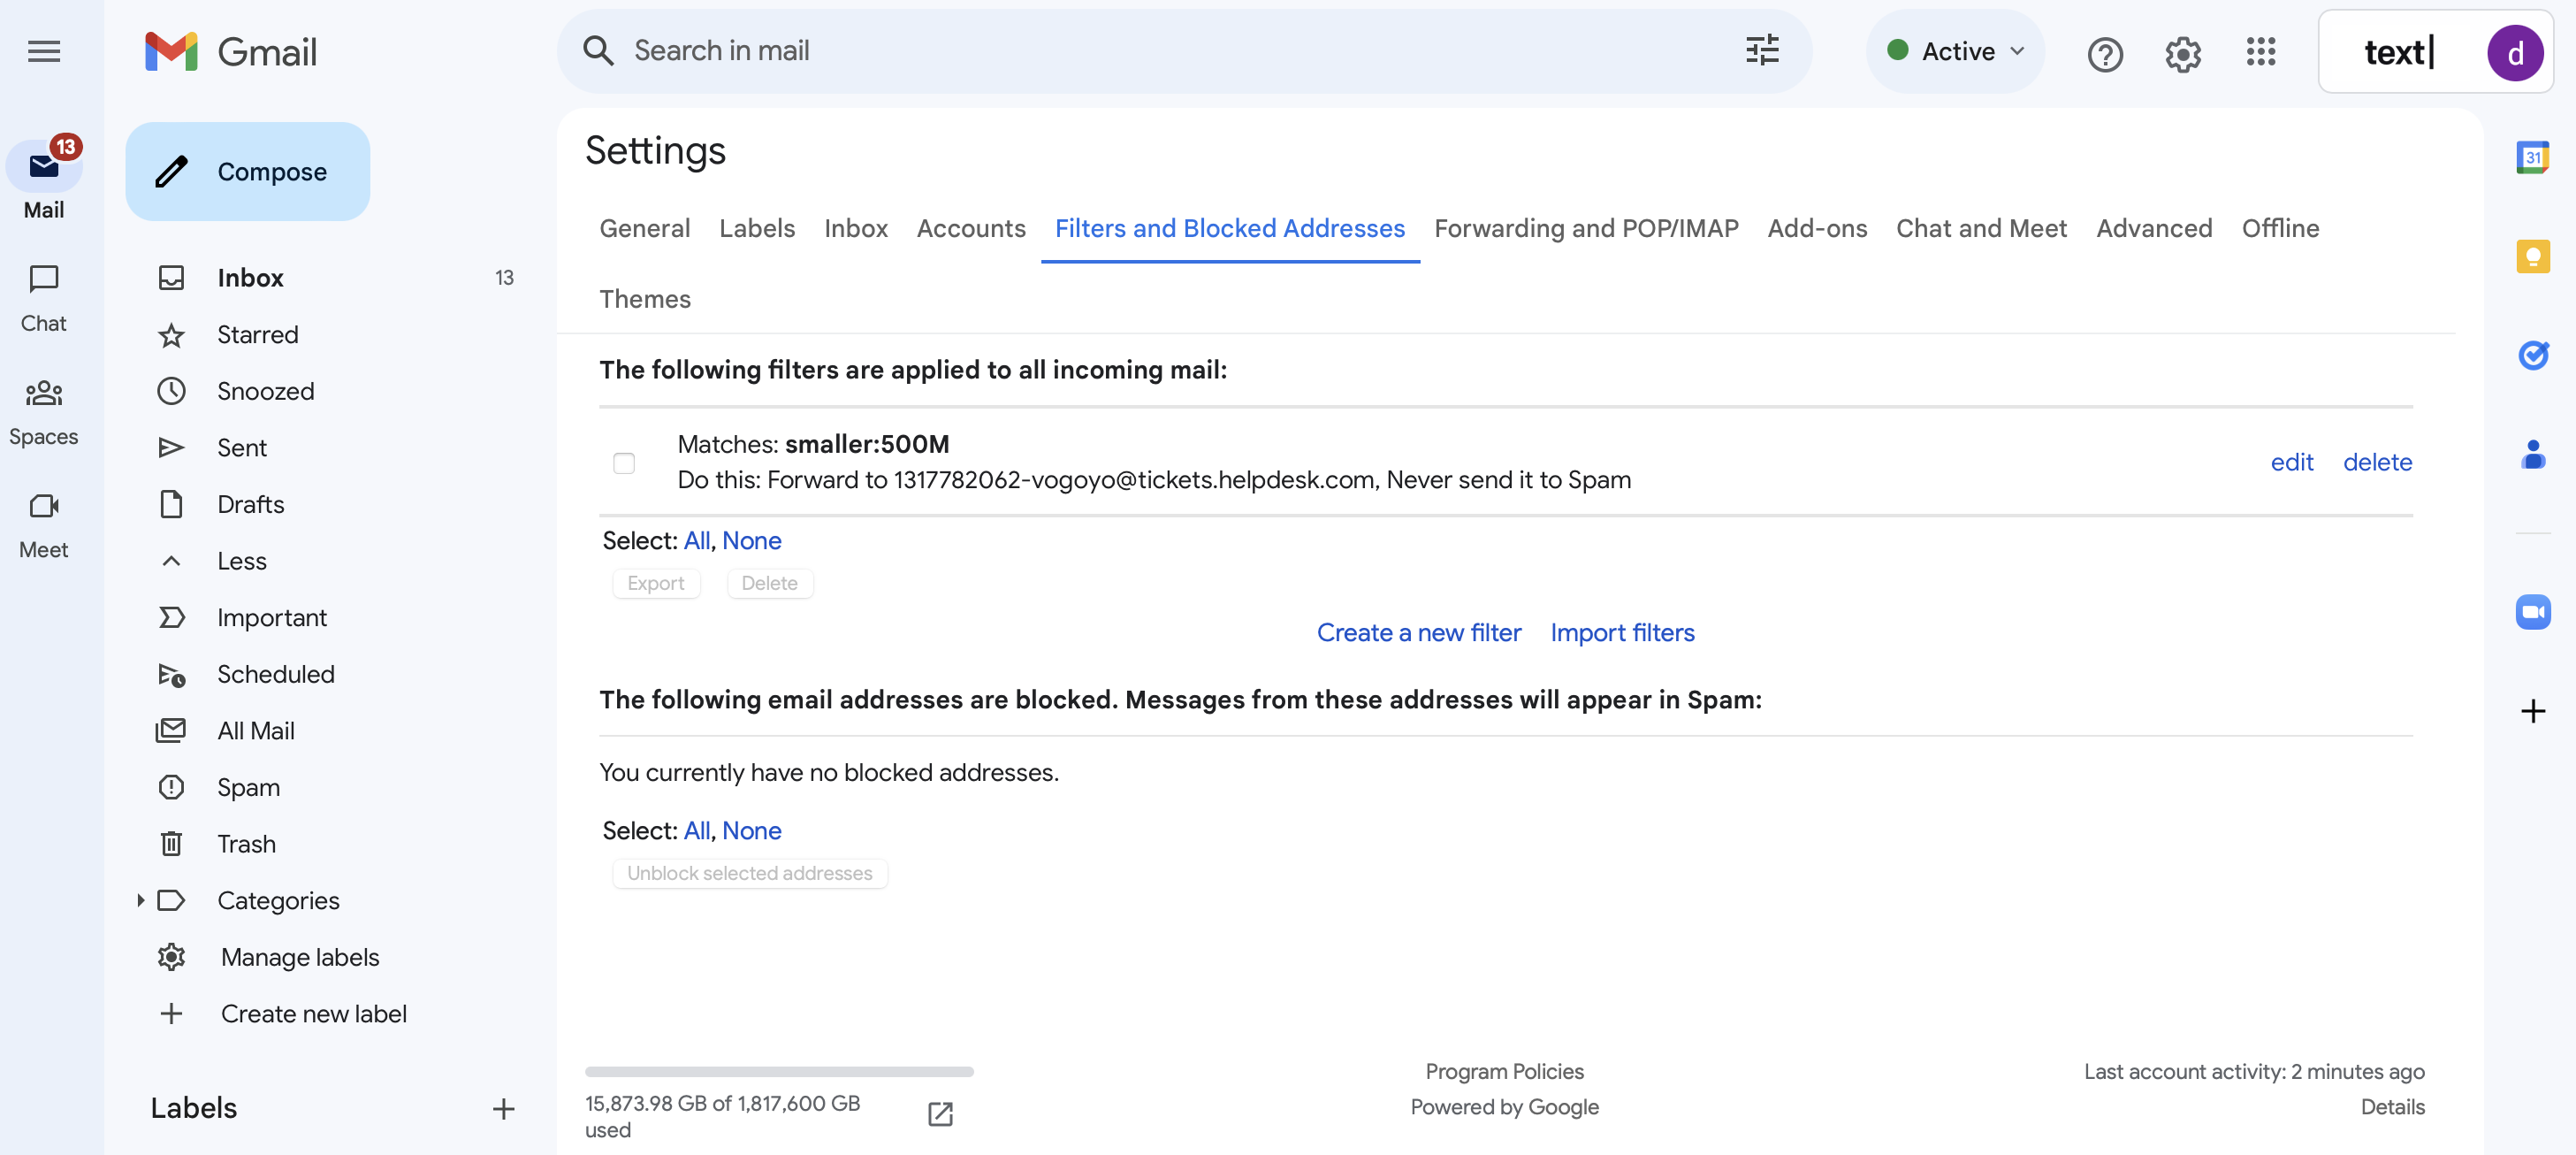
- Choose the “Filters and Blocked Addresses” tab.
- Click “Create a new filter.”

- Now, you need to create your filter. You can use multiple options. There are eight main criteria to choose from:
- From whom the message came
- To whom the message is addressed
- The subject of the message
- Has the words (messages with specific words)
- Doesn’t have (messages without specific words)
- Size of the messages
- If the message has an attachment
- Don’t include chats
 Choose your filter criteria and click on “Create filter.”
- Select “Forward it to” and choose your dedicated HelpDesk email address, which you can find in HelpDesk Settings > Email addresses Click “Create filter,” and you’re ready.

From now on, all messages that meet the selected conditions will be forwarded to HelpDesk.
Prevent emails from going to Spam
Sometimes Gmail considers the HelpDesk forwarding address as spam and doesn’t forward messages to our system.
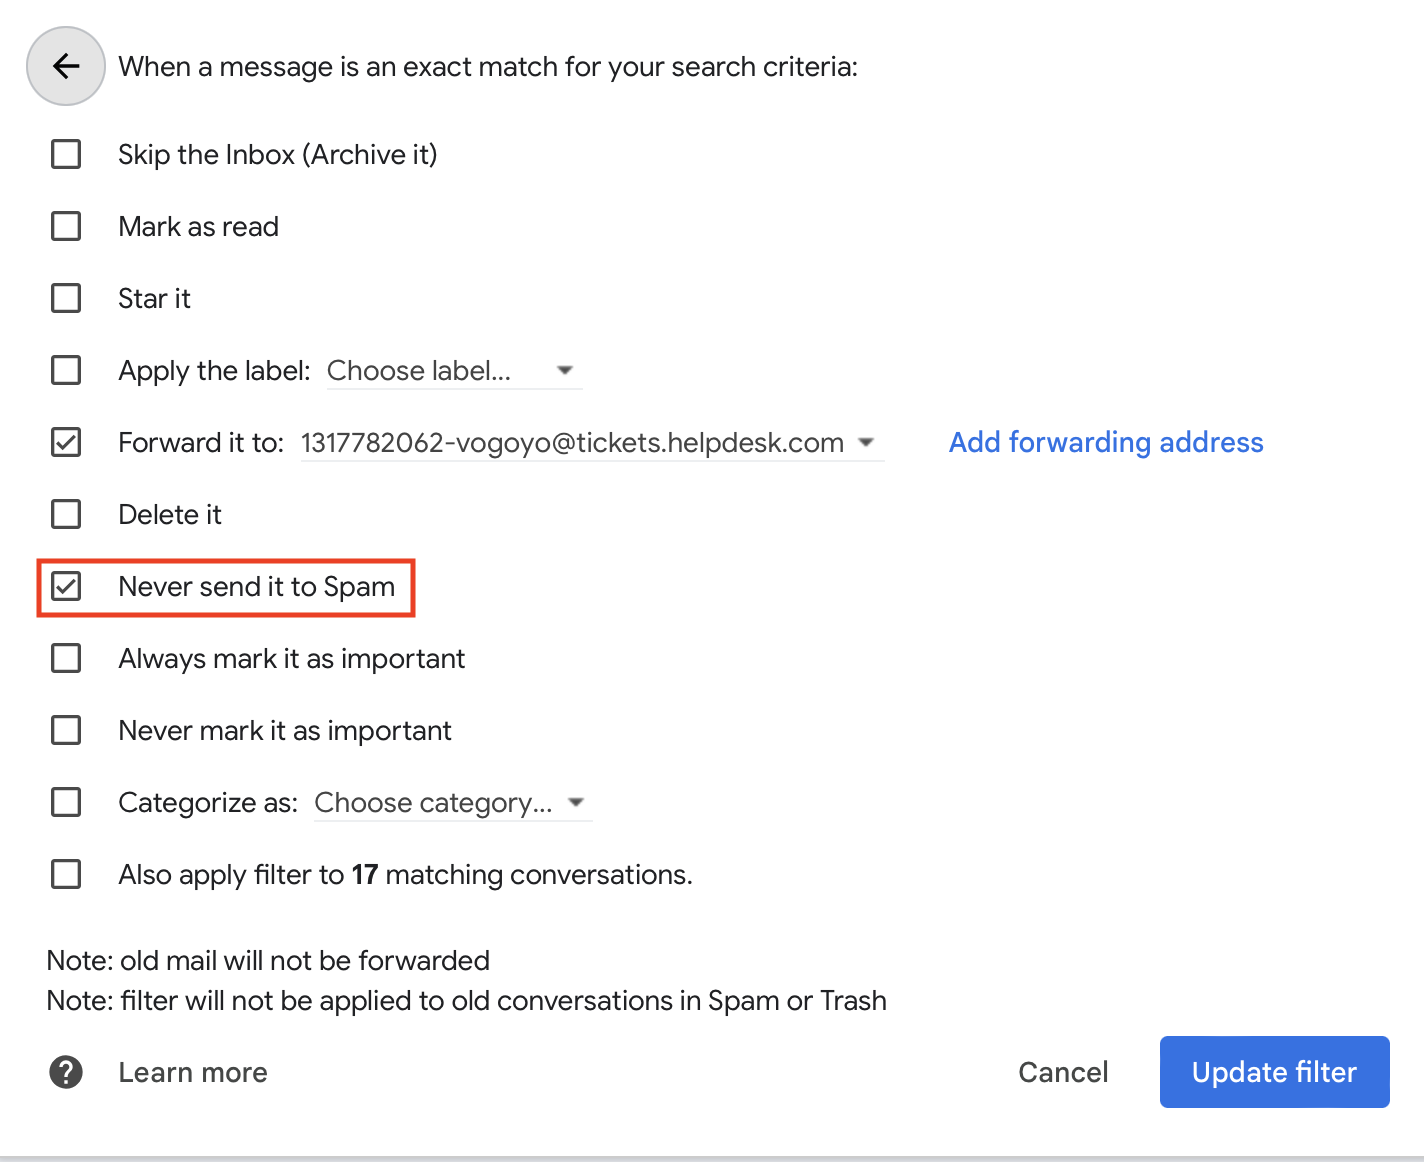
To ensure that emails NEVER go to spam, we recommend additionally checking the “Never send to Spam” option in the Gmail filtering options.
Transfer emails from the “Spam” folder
By default, Gmail doesn’t forward emails that are marked as spam. You may find that you need to take care of these emails as well. If, for example, one of your customer’s email addresses will accidentally be flagged as spam.
But there’s a simple way to forward all the messages from your “Spam” folder.
First, disable forwarding if you’re already using it to redirect messages.
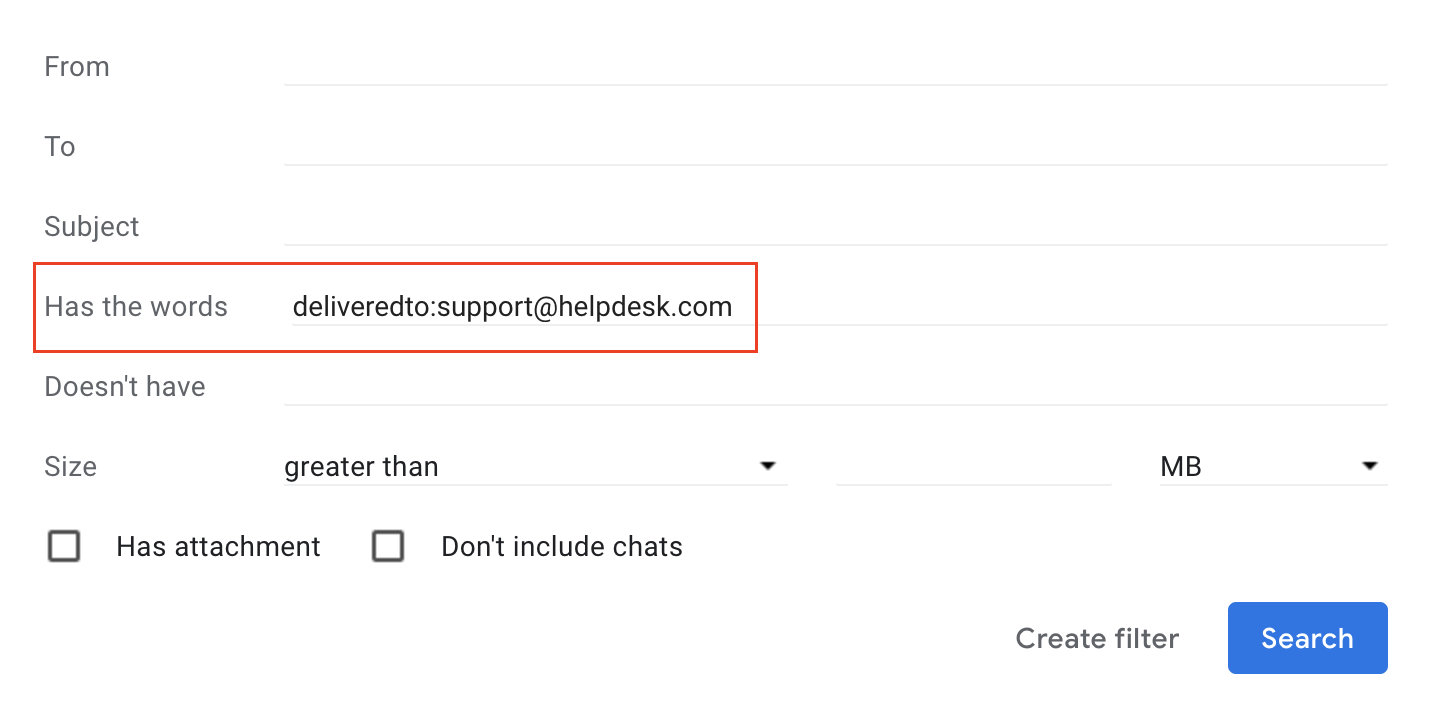
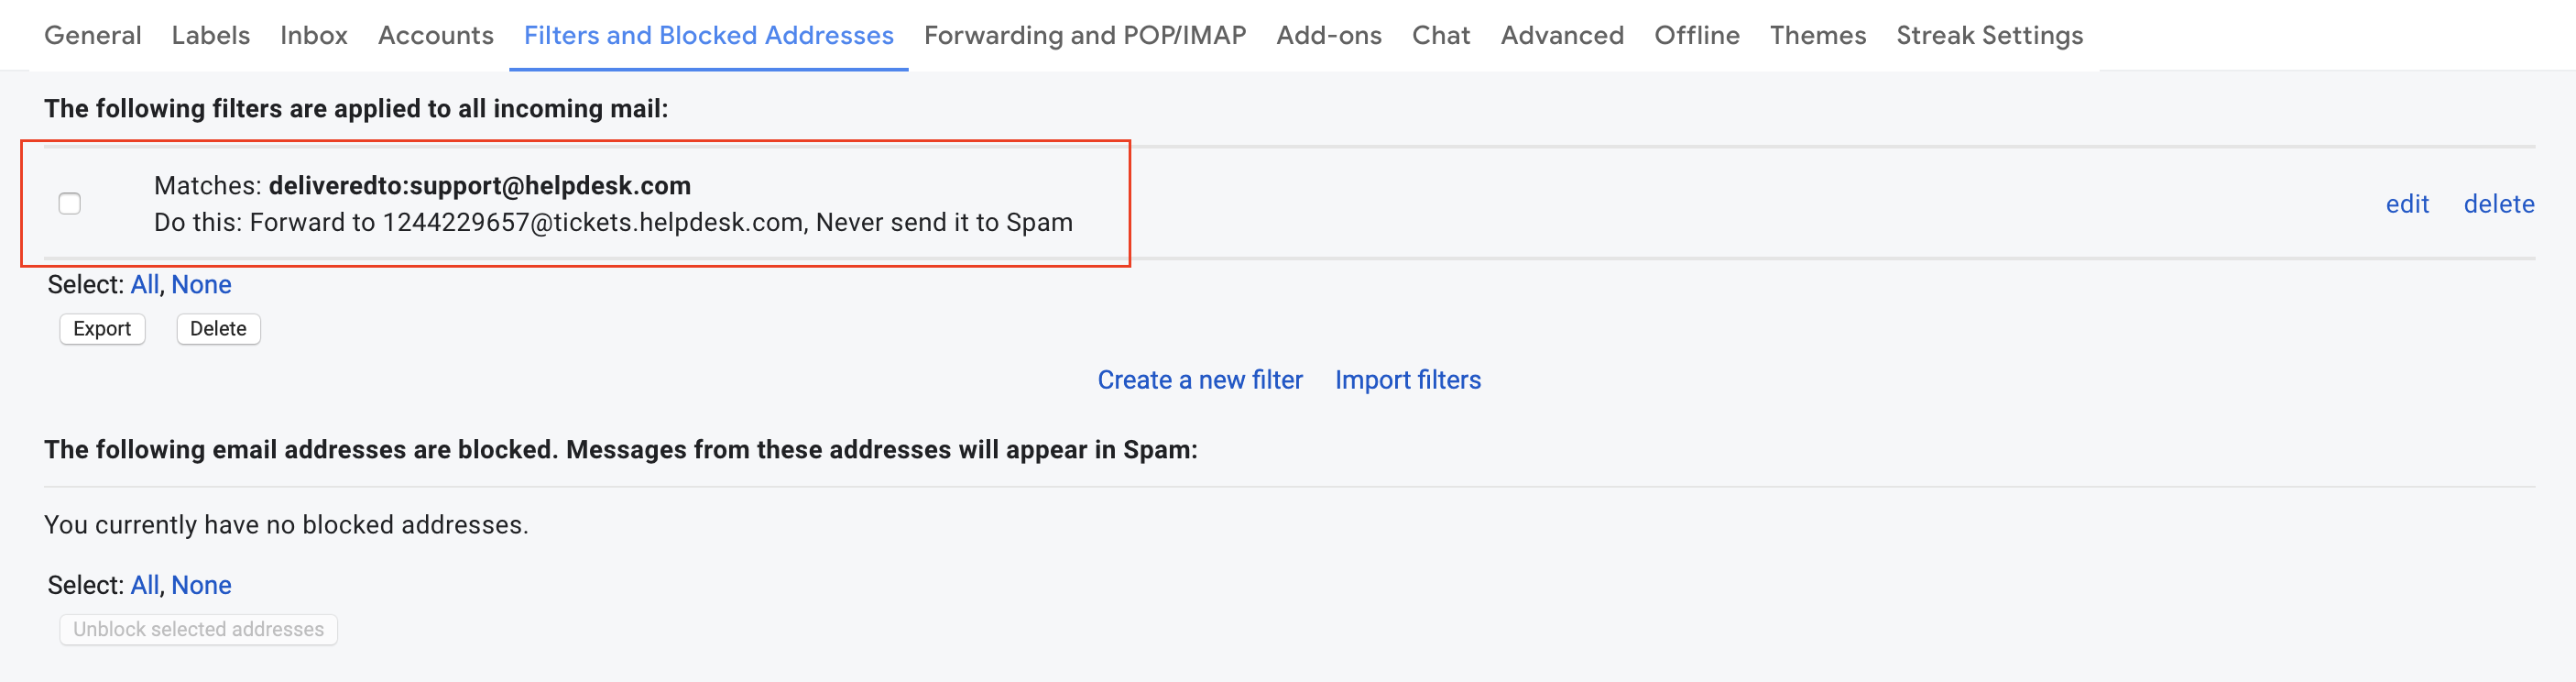
Then, create a Gmail filter. To do this, click the sprocket icon and go to Settings > Filters and Blocked Addresses.
Click “Create a new filter.”

In the “Has the words” section, put “deliveredto:youremail@address.com”
Click “Create filter.”
In the next step, you’ll be asked what to do with these messages.
In the “Forward it to:” section, enter your HelpDesk’s forwarding address. You’ll find it in the “Email address” settings.
The last thing you need to do is to select “Never send it to Spam” and click “Create filter.”
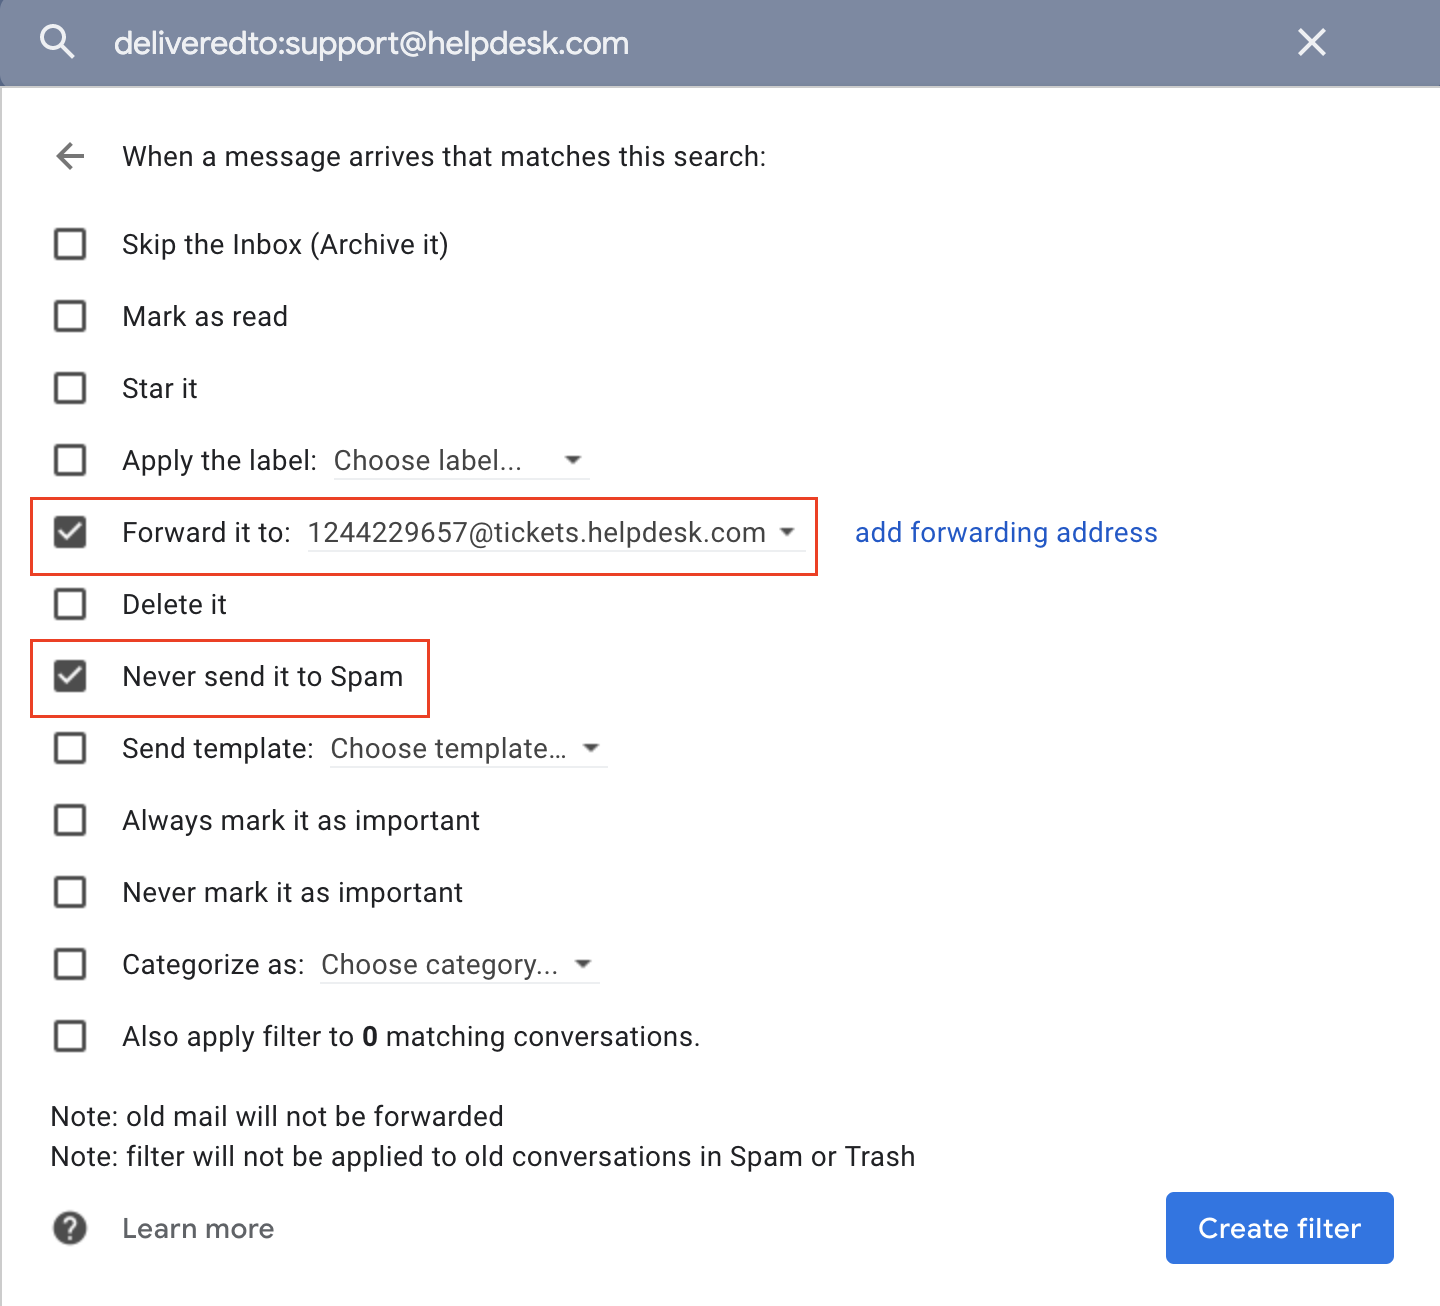
You’ll see a warning informing you that this filter will forward Spam.
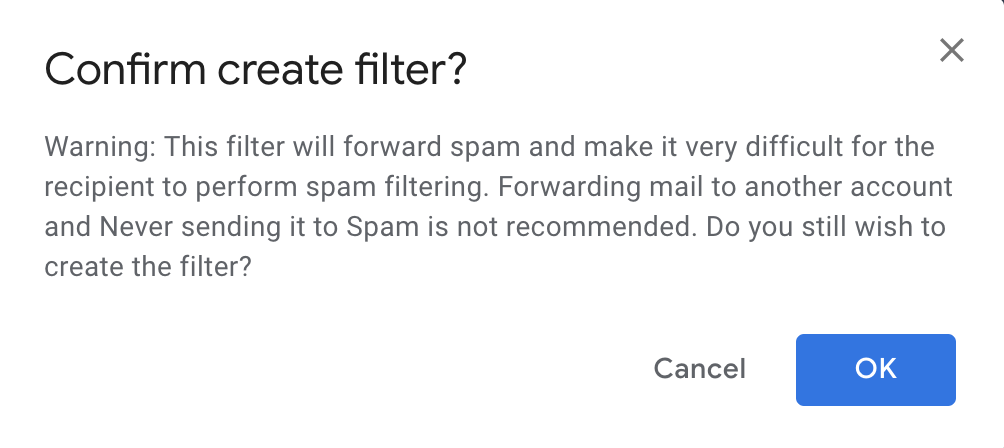
After submitting, you’ll see the filter that allows you to forward all messages with Spam to HelpDesk.
Forwarding using Google Groups (only for Google Workspace users)
If you’re using Groups in Google Workspace, you can add HelpDesk’s forwarding address as one of the email addresses in your group.
Firstly, open the Google Workspace administrator console. Remember that only the admin of the domain can access this setting.
Choose Groups.

You’ll see all your Google Groups.
Select the group in which you want to place HelpDesk’s forwarding address, which you can find in HelpDesk Settings > Email addresses.

Open the “Members” section.
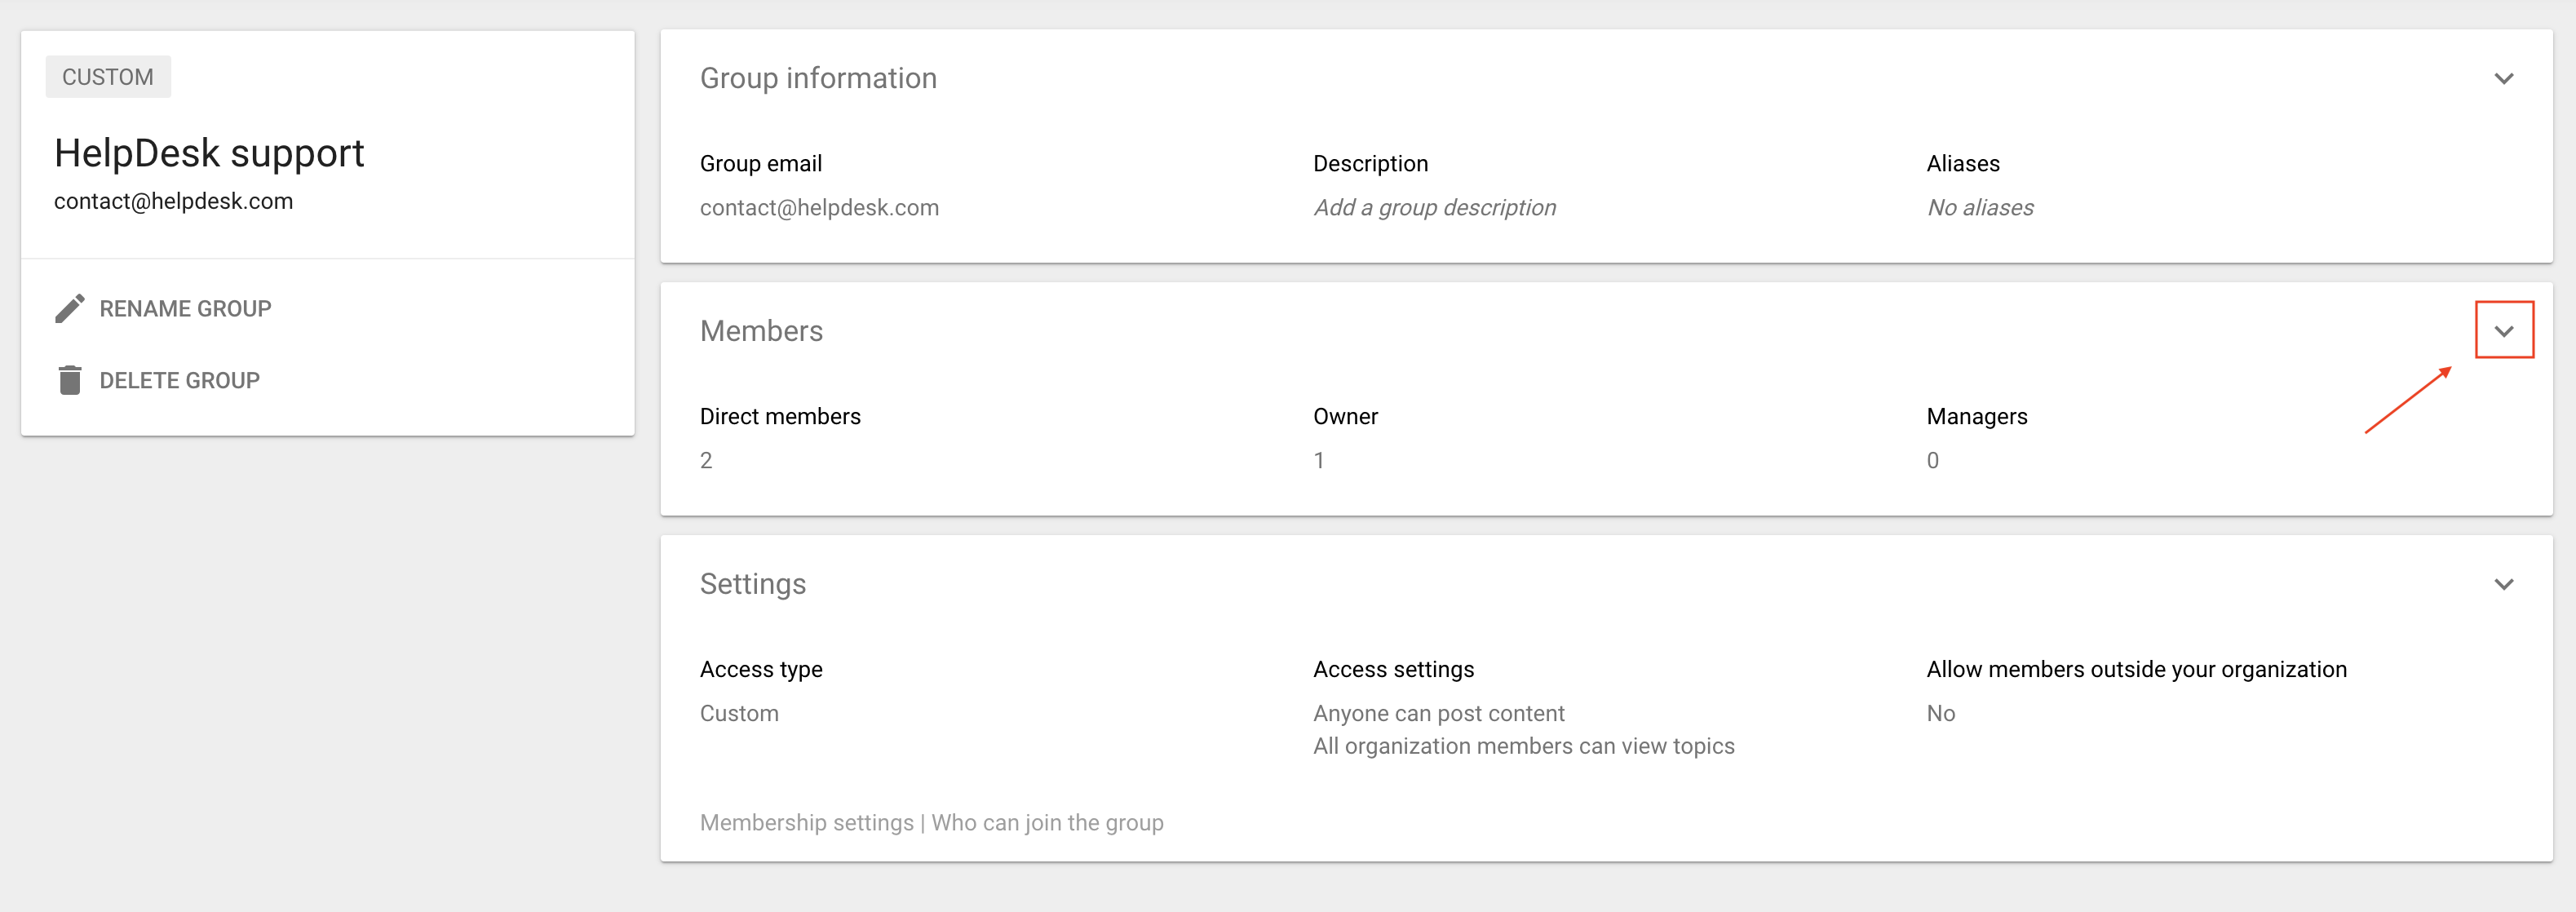
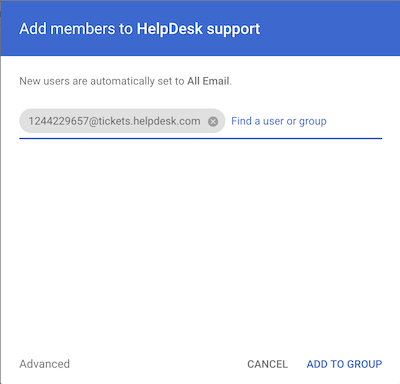
Click on a yellow button with “+” and “Add members.”

Here you need to fill in your HelpDesk’s forwarding address and click on “Add to group.”
You can find your dedicated HelpDesk forwarding address in the “Email address” settings.
Now you’ll see a new address added to your Google Group, and the process is complete.

The whole process of adding a HelpDesk address to your Google Group looks like this:

Creating a new Google Group
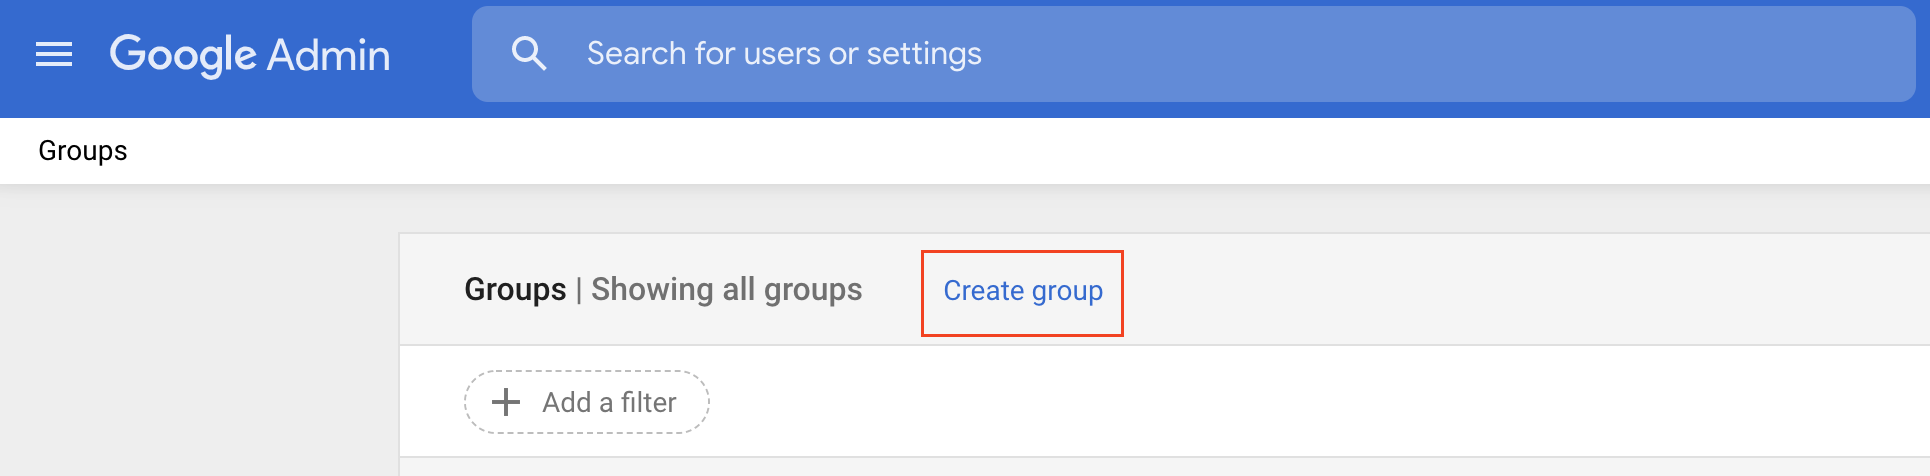
If you don’t have a Google Group created, you can do it in a few simple steps.
First, go to the Google Groups list and click on “Create group.”
Fill in Group details such as Name and Group email. You’ll also have to choose a group owner.

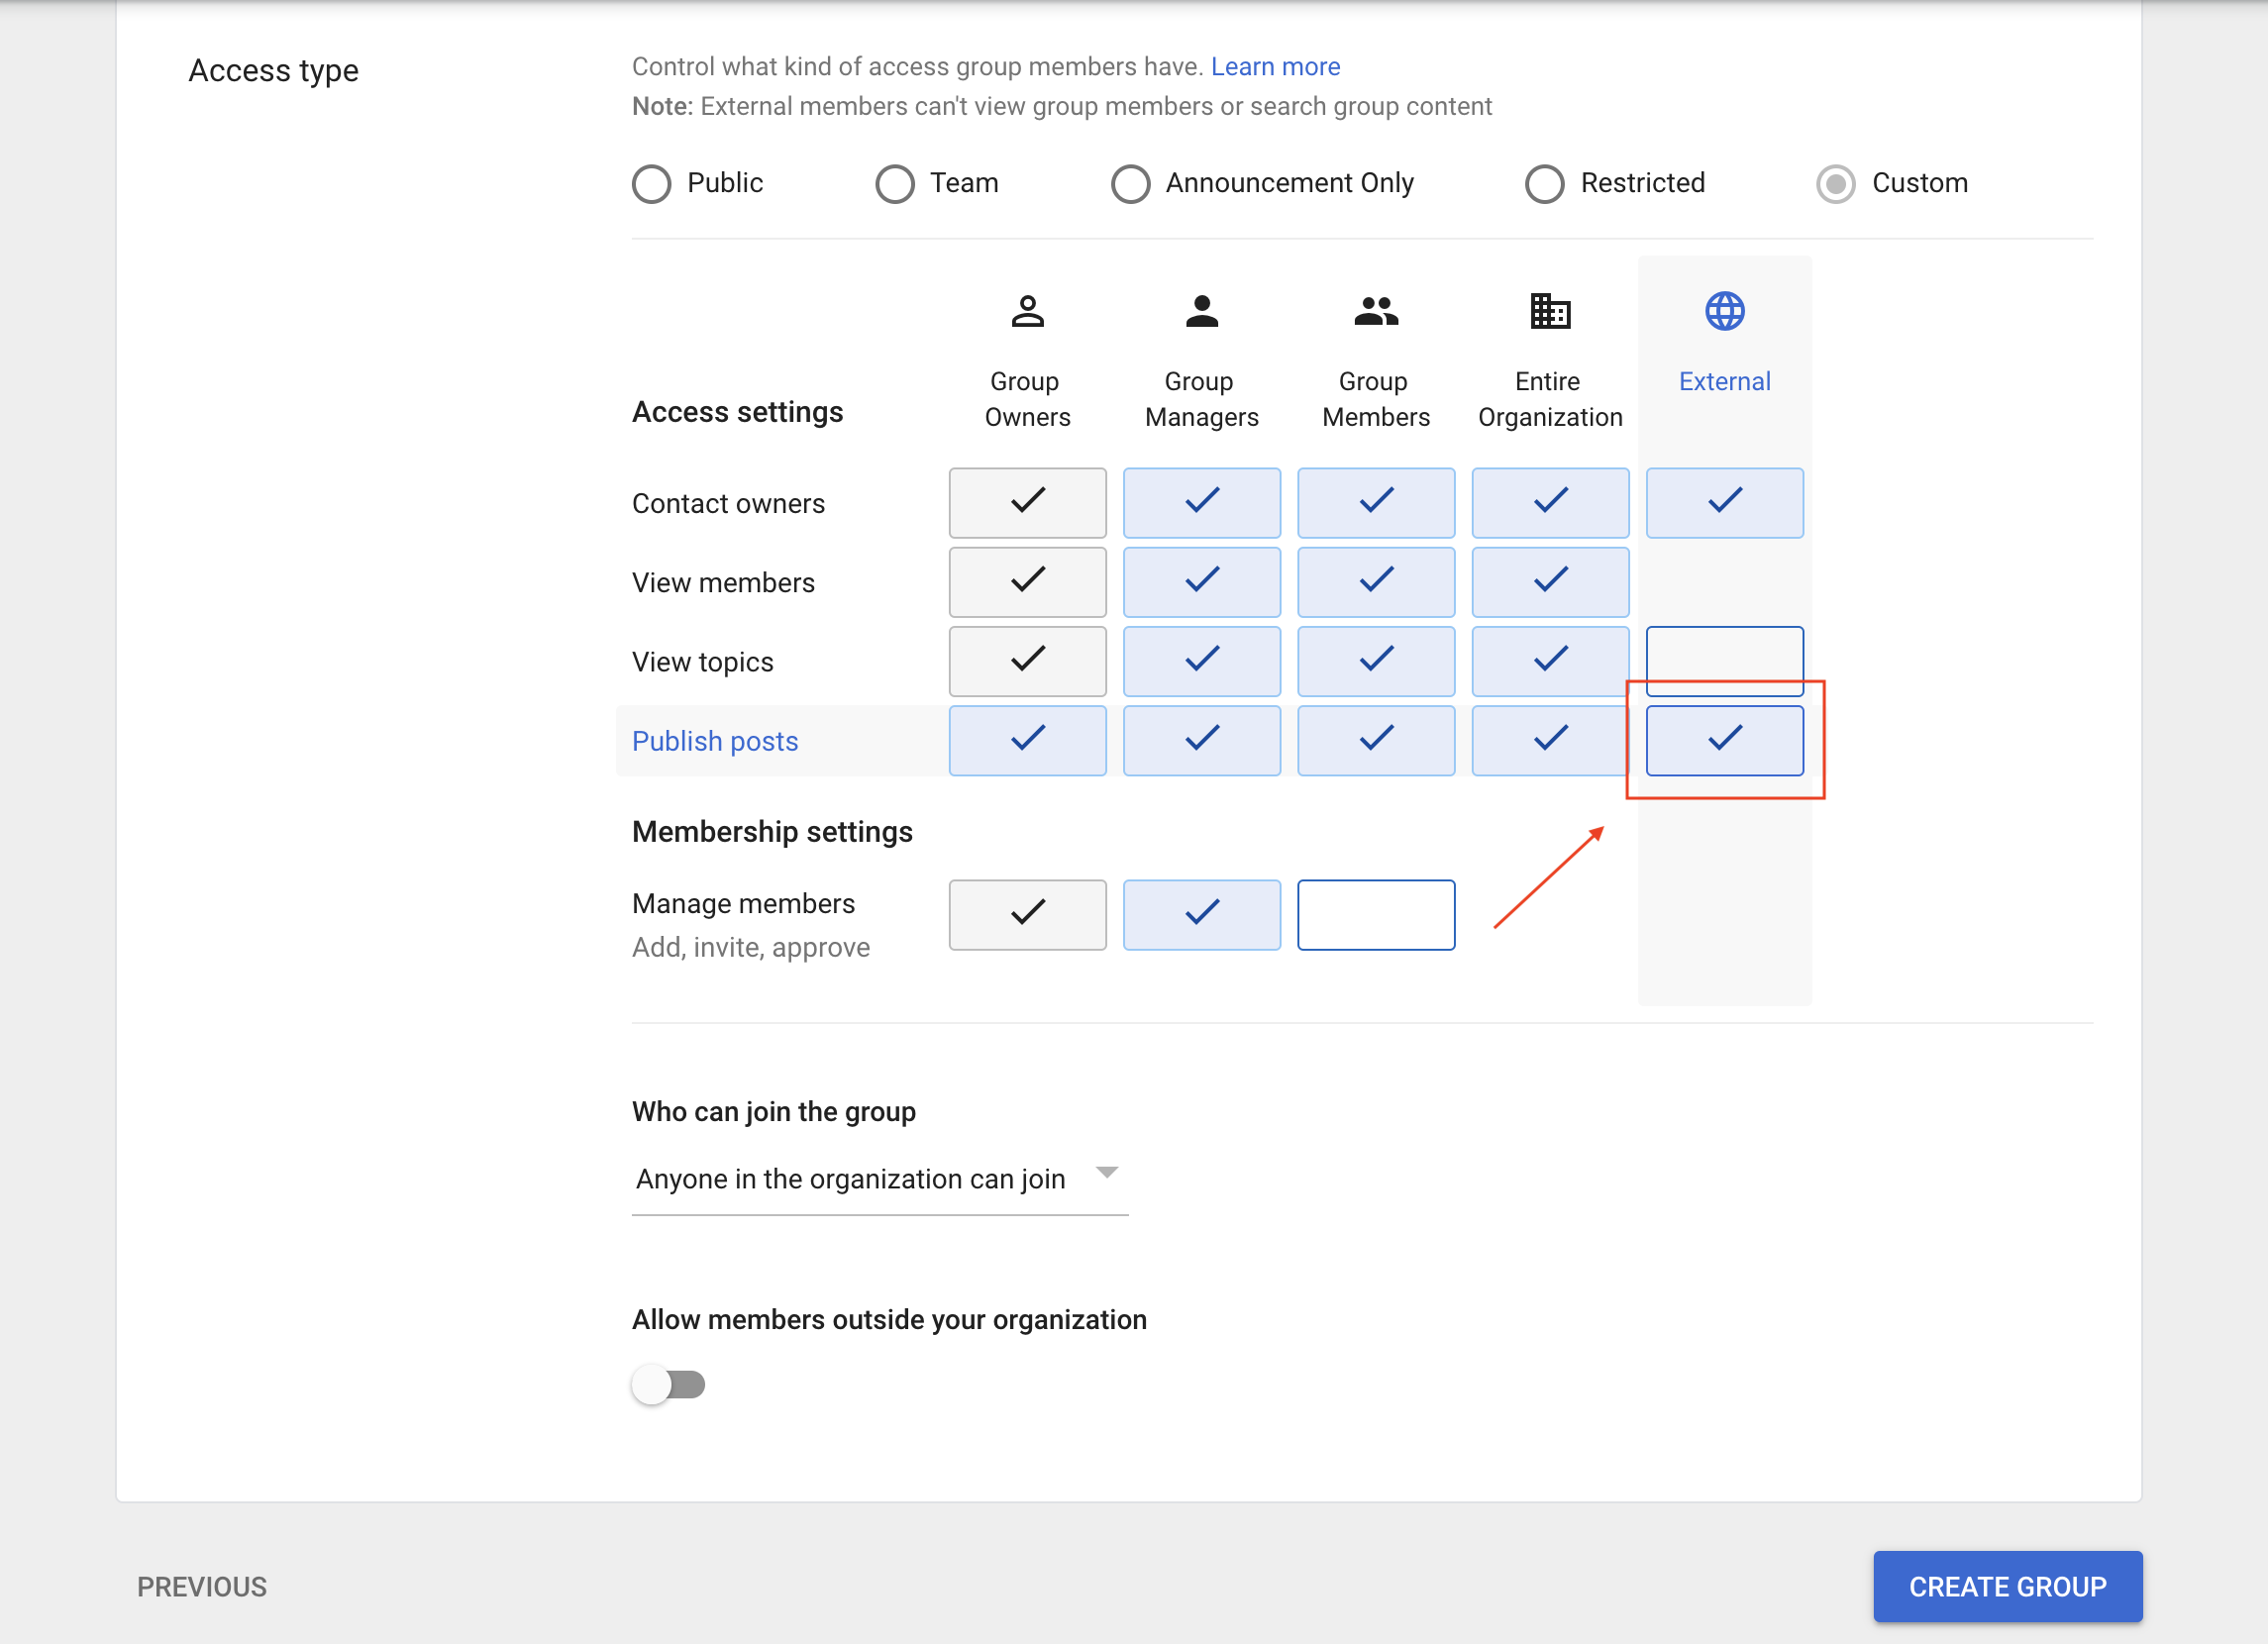
Then, it’s important to enable External “Publish posts.” Otherwise, you won’t be able to receive any messages from outside your organization. After that, click on “Create Group.”
The last screen shows you a summary of your new group. Click “Done,” and you can now start adding HelpDesk’s email address to this group as we described above.

To learn more about the email forwarding process, visit the Gmail help center.
Do you need any other help? Chat with us! We’re available 24/7.
