 158 29
In this article, we’ll walk you through these steps:
-
Installing the WPForms plugin.
-
Creating your HelpDesk WordPress form.
-
Submitting a test entry.
-
Connecting WPForms to Zapier.
-
Connecting HelpDesk to Zapier.
Let’s get started by installing an easy form builder plugin.
Step 1: Install the WPForms Plugin
The first thing you need to do is install the WPForms plugin.
WPForms lets you easily make different kinds of forms for your website and put them on your site without needing to code.
If you need help installing WPForms on your site, there’s a simple guide on how to install a plugin on WordPress. Make sure to turn the plugin on in your WordPress site.
You also need to get the Zapier addon to connect your form with HelpDesk. To do this, go to WPForms » Addons.
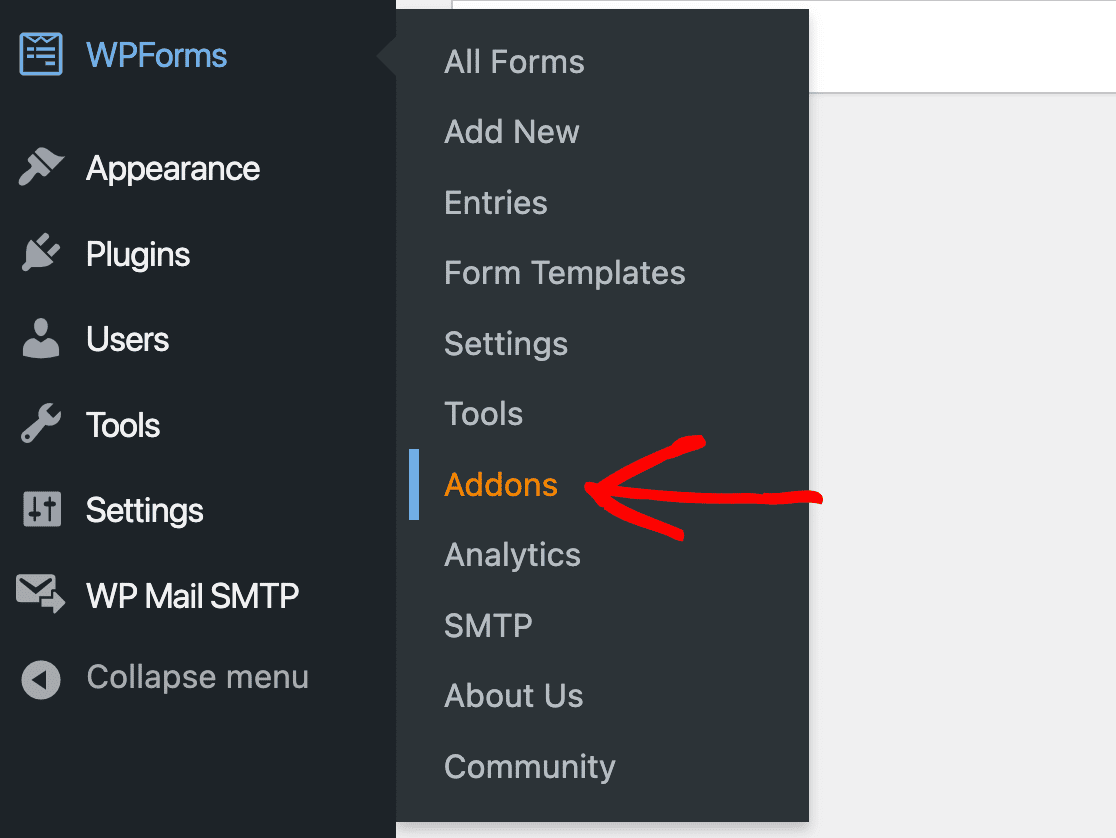
Then, find the Zapier addon and click Install Addon.

You’re now ready to create your first form.
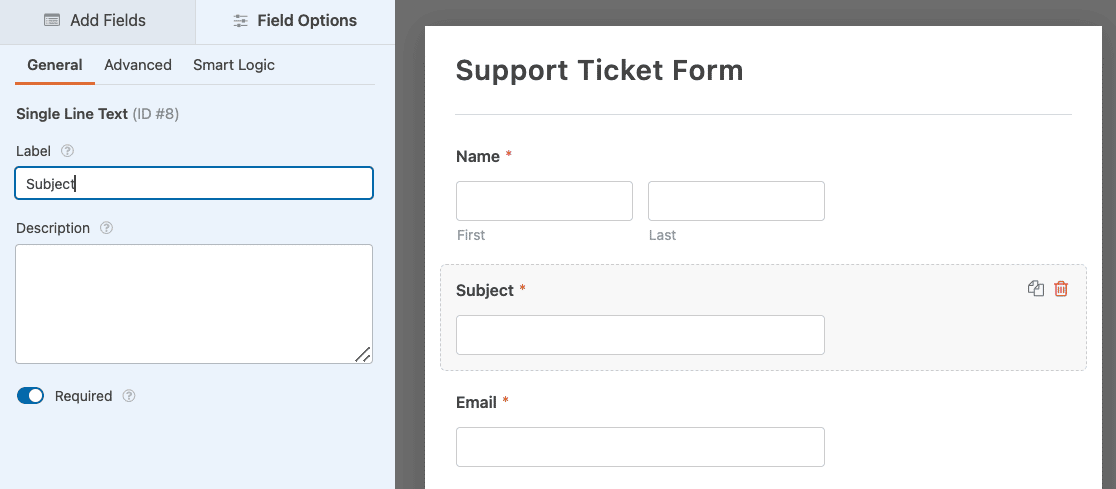
Step 2: Create Your HelpDesk WordPress Form
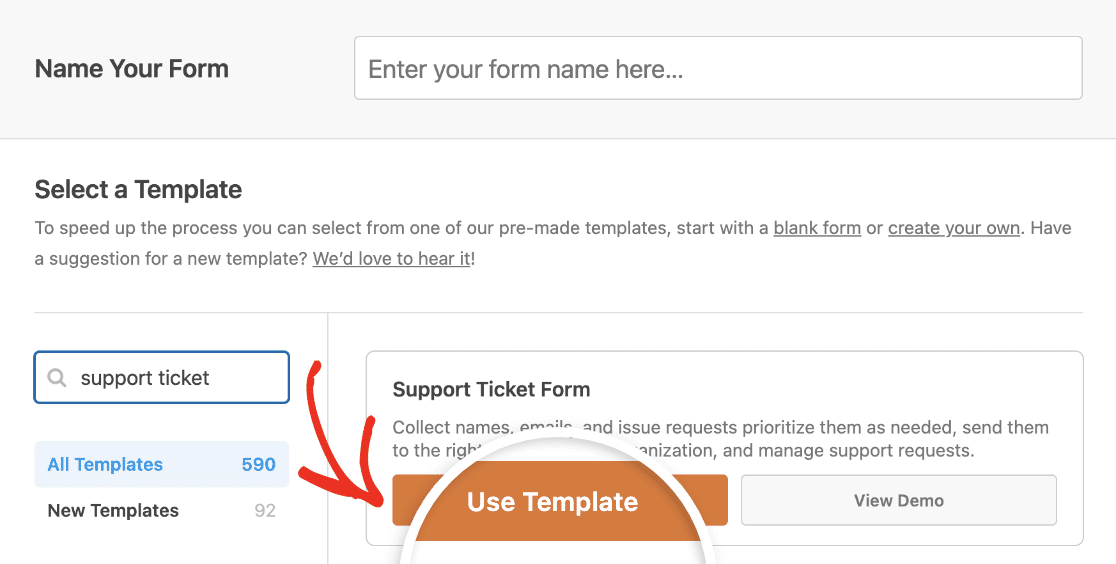
WPForms has over 1,400 ready-to-use form templates for WordPress that you can easily change. To create our HelpDesk form, we’ll pick the Support Ticket Form design.
Go to your WordPress control panel, find WPForms, and click on Add New.
Next, choose the design you’d like to use.
This template will open in the form builder, where you can make changes to fit your business.
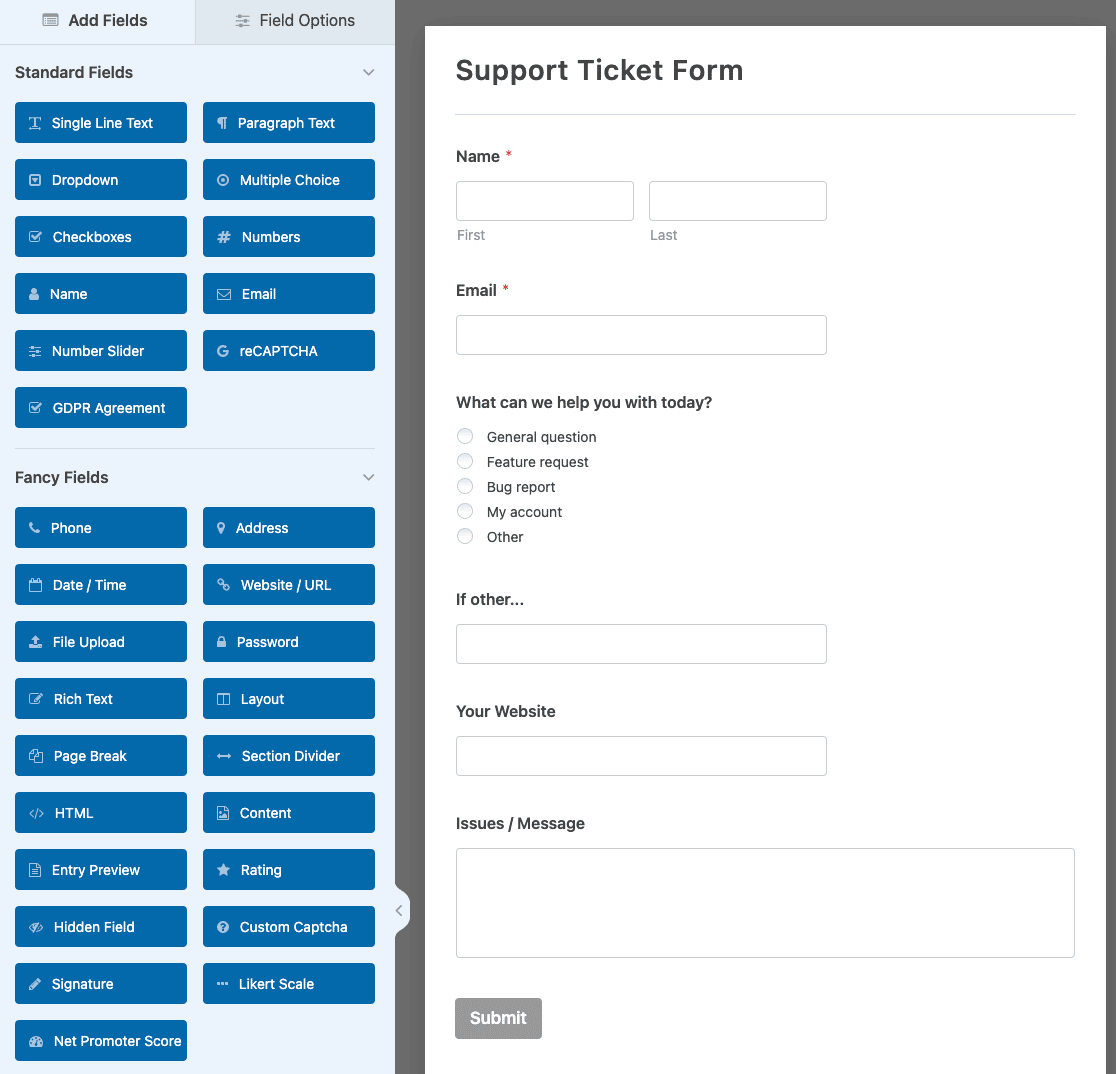
For our example, we need to change a few things to add the parts needed by HelpDesk, like:
-
Subject
-
Email
-
Message
You can use fields that are already for most of these, but we’ll put in a “Single Line Text” field for the Subject. Putting in a field is easy – just drag and drop it onto your form.
You can put more fields on your form, too. For instance, you can upload files or get more details. Just keep in mind that these extra fields will show up in email notifications, but they won’t be saved in HelpDesk.
Look at our support form tutorial for more advice on customizing your form. And remember, when you like how your form looks, make sure to save it.

Step 3: Submit a Test Entry
After you finish creating your form, you must submit a test entry. This step is key to getting Zapier ready, so be sure to do it!
To submit a test entry, click the “Preview” in the form builder.
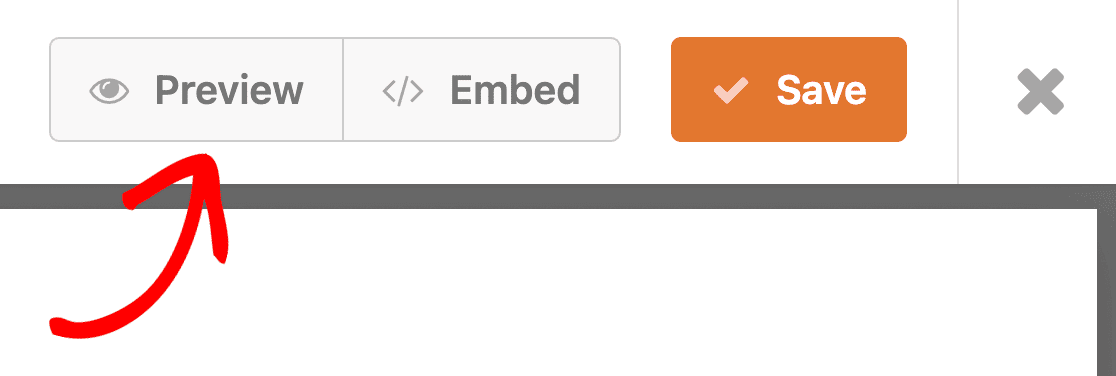
Then, fill out your form and click “Submit.”

Step 4: Connect WPForms to Zapier
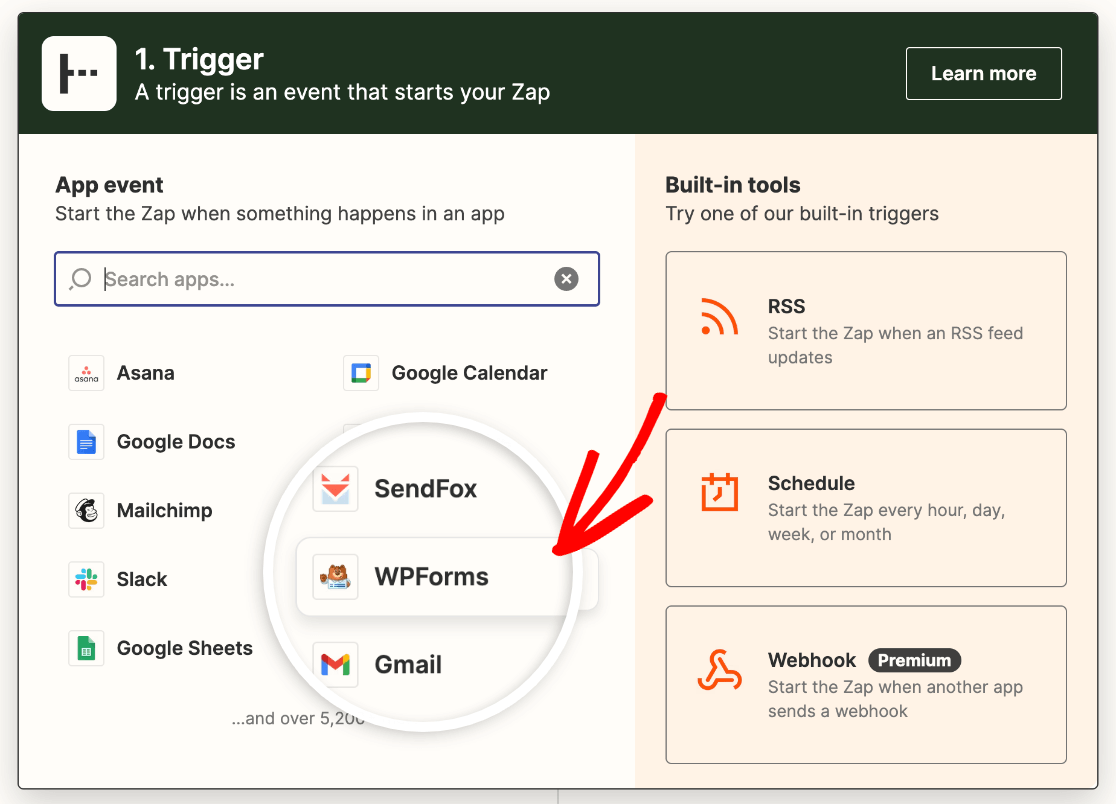
Now, you’re ready to log in to Zapier to create your HelpDesk WordPress integration.
In the top left corner, click “Create Zap.”

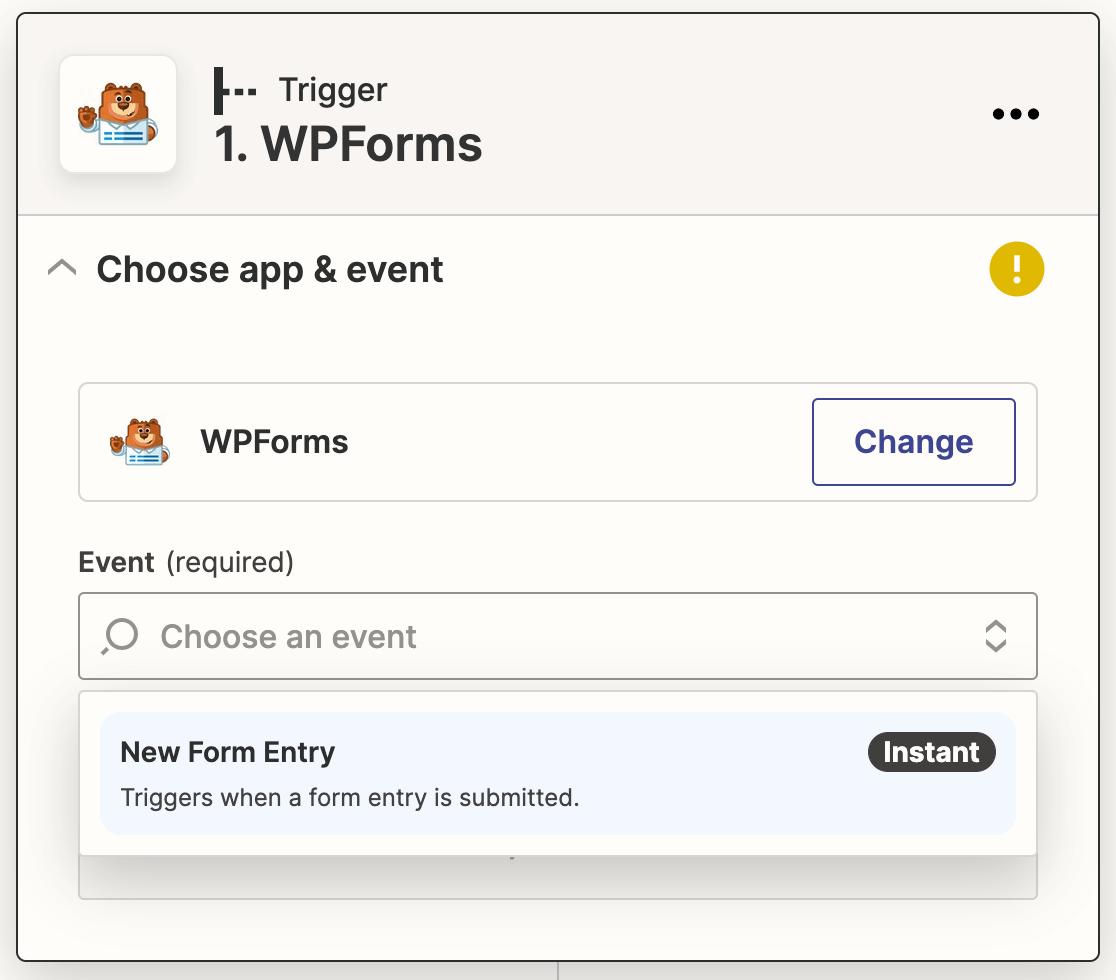
This will start the Zapier setup wizard. First, choose WPForms as your trigger app.
Then, you’ll need to choose a trigger event. The only option for WPForms is “New Form Entry,” so go ahead and select it from the dropdown.
Next up, you need to connect your WPForms account to Zapier.
Click “Sign in.”

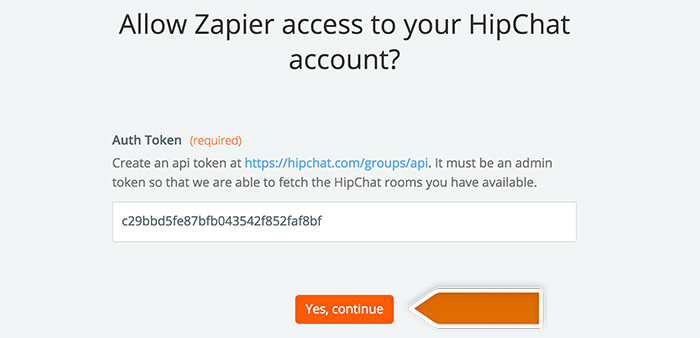
This will show a popup where you must type in your website’s web address and Zapier API key.
To locate your Zapier API key, visit your WordPress control panel and go to WPForms » Settings » Integrations. Next, move down to the Zapier area and open it. You’ll find your API key there, which you can copy and paste into Zapier.

Once you’ve entered all the required information, click “Yes, continue.”
Now, you’ll need to select the support ticket form you created earlier from the dropdown.

Click “Continue” here.
Zapier will now test your connection to WPForms and try to find the test entry you created earlier.
Click “Test trigger” to get started.
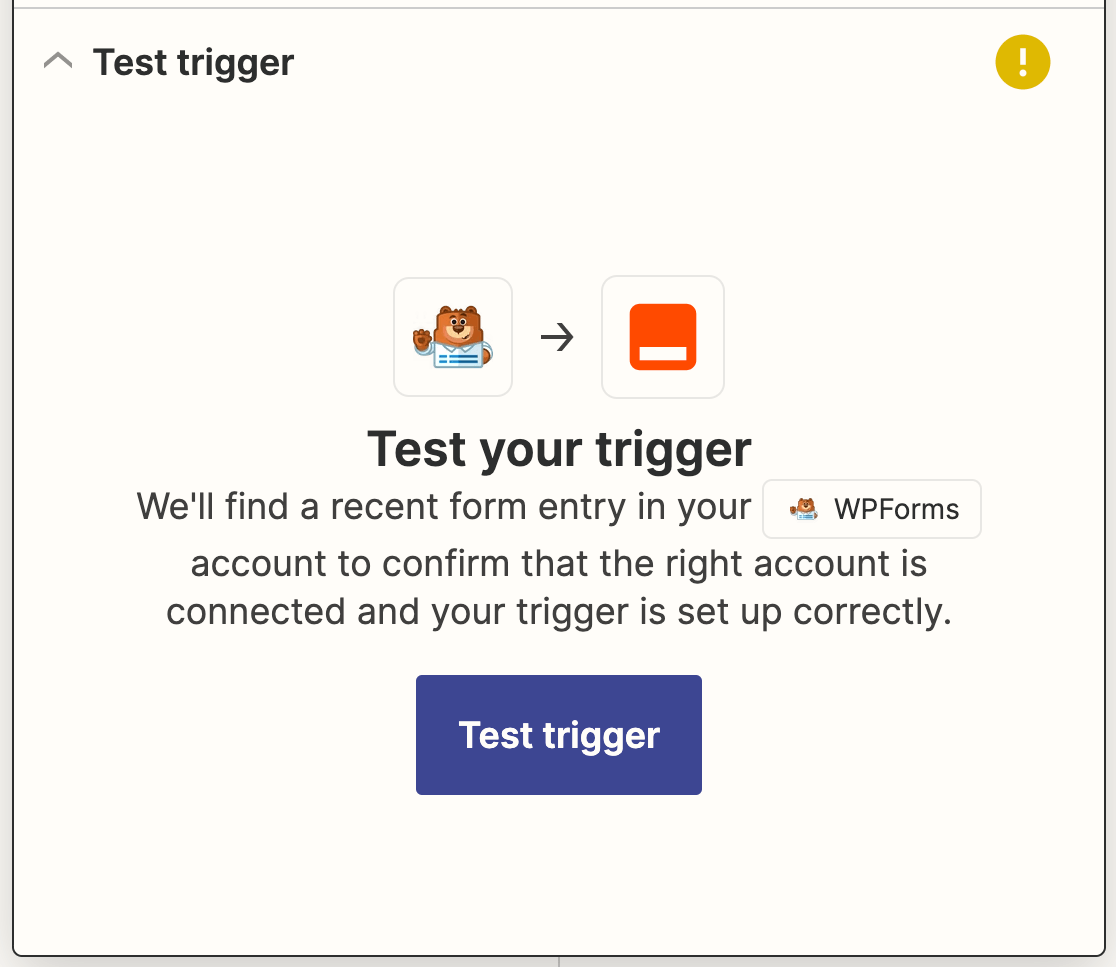
If you’ve done everything right so far, you’ll see a success message and your test entry.

Now, you can connect Zapier to HelpDesk. Click “Continue” again to proceed to the next step.
Step 5: Connect HelpDesk to Zapier
The second part of your Zap uses the action app, which is HelpDesk. Look for it and choose it from the list of apps.

Next, select an action event. In this example, we want to create a new HelpDesk support ticket whenever the form is submitted, so let’s choose “Create Ticket” from the dropdown.

Click “Continue.”
The next step is to log in to your HelpDesk account. Click “Sign in.”

This will open a pop-up window where you should log in to HelpDesk.

If you don’t have an account yet, you can sign up here.
Once logged in, click “Continue.”

Now, you need to prepare your support ticket template by connecting fields from your form to HelpDesk. We discussed the necessary fields before customizing the support ticket form in WPForms.

Set up your support ticket template, and then click “Continue” again.
The last step is to test the HelpDesk connection, just like you did for HelpDesk.
Click “Test action” to get started.

If everything is working correctly, you’ll see a success message.

A new ticket should also be visible in HelpDesk:

Great! Now you’ve connected WordPress to HelpDesk.
Be sure to publish your Zap and embed your form on your website so that users can find it.
