 158 29
Since you may have multiple teams with different goals and daily tasks, such as sales, marketing, customer service, finance, legal, and tech — you may want to customize their messaging process independently. And in HelpDesk you can, thanks to multiple email templates. In addition, you can easily create them with a visual and code-free email template builder.
What is an email template?
An email template is one of the most important ways to personalize your communication with your recipients. It gives your HelpDesk messages an aesthetic and branded look that enhances your credibility.
Enriching your emails with a logo or personalized custom variables like subject can affect how customers perceive your business.
Note that email templates only affect the visual appearance of your messages. The content of the message will be the same as your responses sent using HelpDesk. If you want to create pre-defined messages to save your time on sending similar answers, read about canned responses.
You can find an email template in the “Settings” section in the “Email template” category.
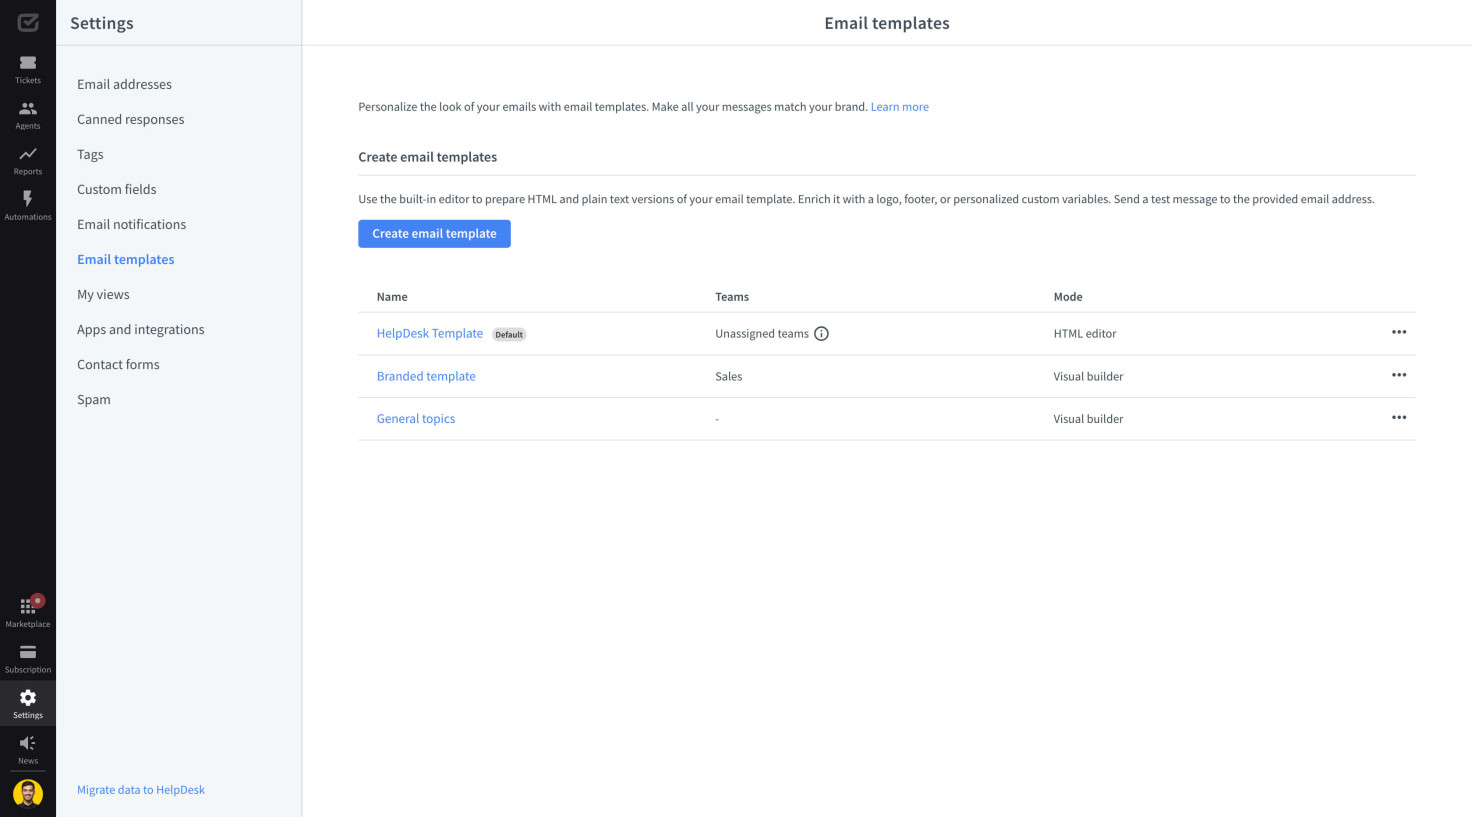
Here, you can use four actions within the email template:
-
Edit - allowing you to edit the selected email template.
-
Duplicate - allowing you to duplicate the selected email template.
-
Set as default - allowing you to set the selected email template as the default. All teams without a specific email template assigned will use this email template during the reply process.
-
Delete - allowing you to delete the selected email template.

Creating an email template
To create your email template, click on the “Create email template” button. Next, choose whether you want to create your email template using visual builder or HTML editor.

1. Using the visual builder
If you choose the visual builder to create your email template, you’ll see an intuitive and clickable builder that allows you to create your own email template without writing a single line of code.

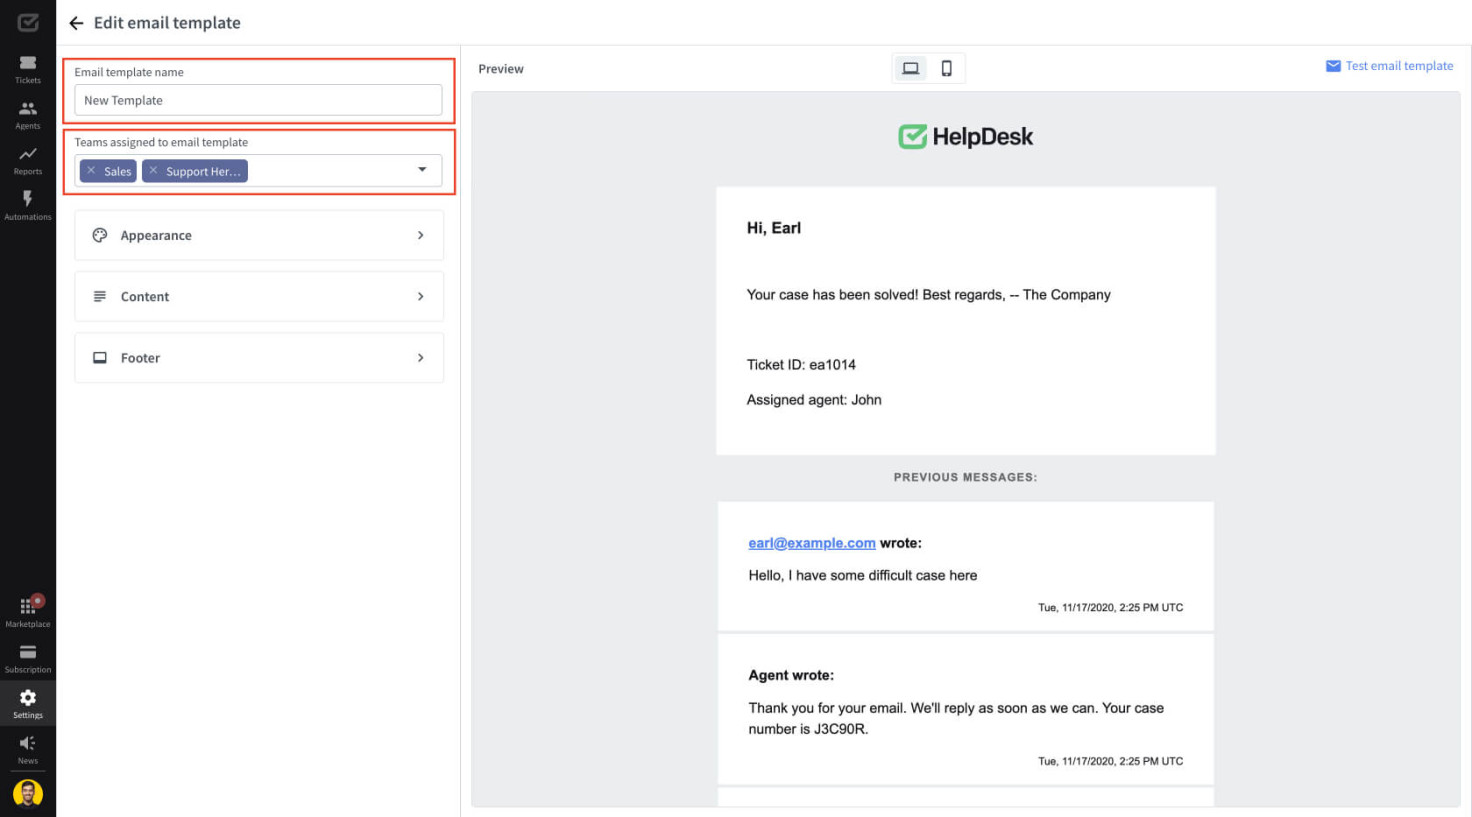
First, name your email template, for example, general topics, first-line support, second-line support, invoices, sales pitches, and so on.
Next, use the drop-down menu to select the teams that will use this email template during the replying process.
Then, go to the “Appearance” settings to use the color picker and choose your:
-
Background color – the color of the background in the email template.
-
Text box color – the color of the box with the text inside the email template.
-
Text color – the color of the text in the email template.
-
Link color – the color of the included links in the email template.

Here, you can also decide whether to show the logo or not and then upload your brand logo by clicking the “Upload file” button.
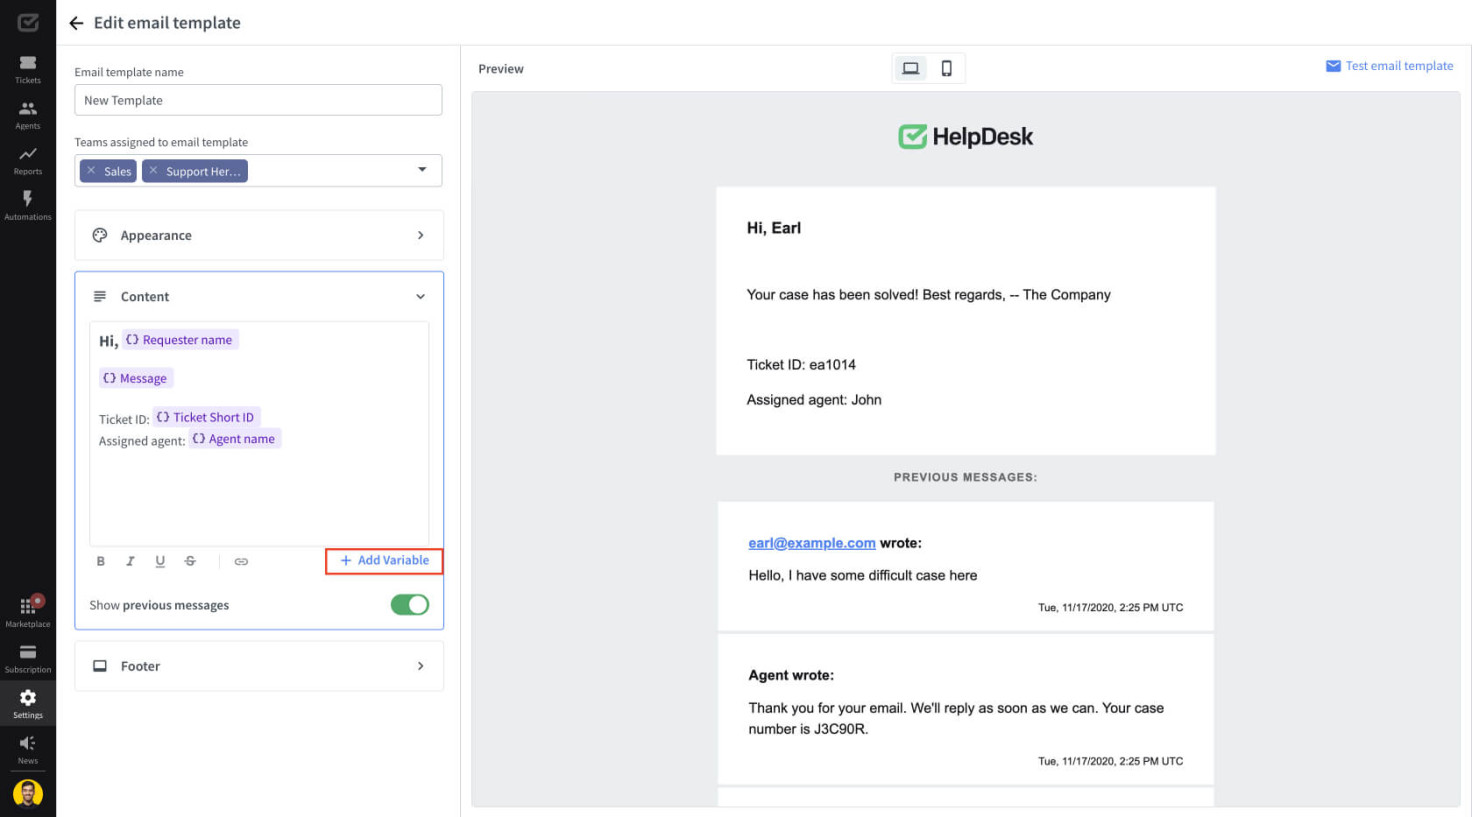
After that, you can go to the “Content” settings to configure the content components of your email template.
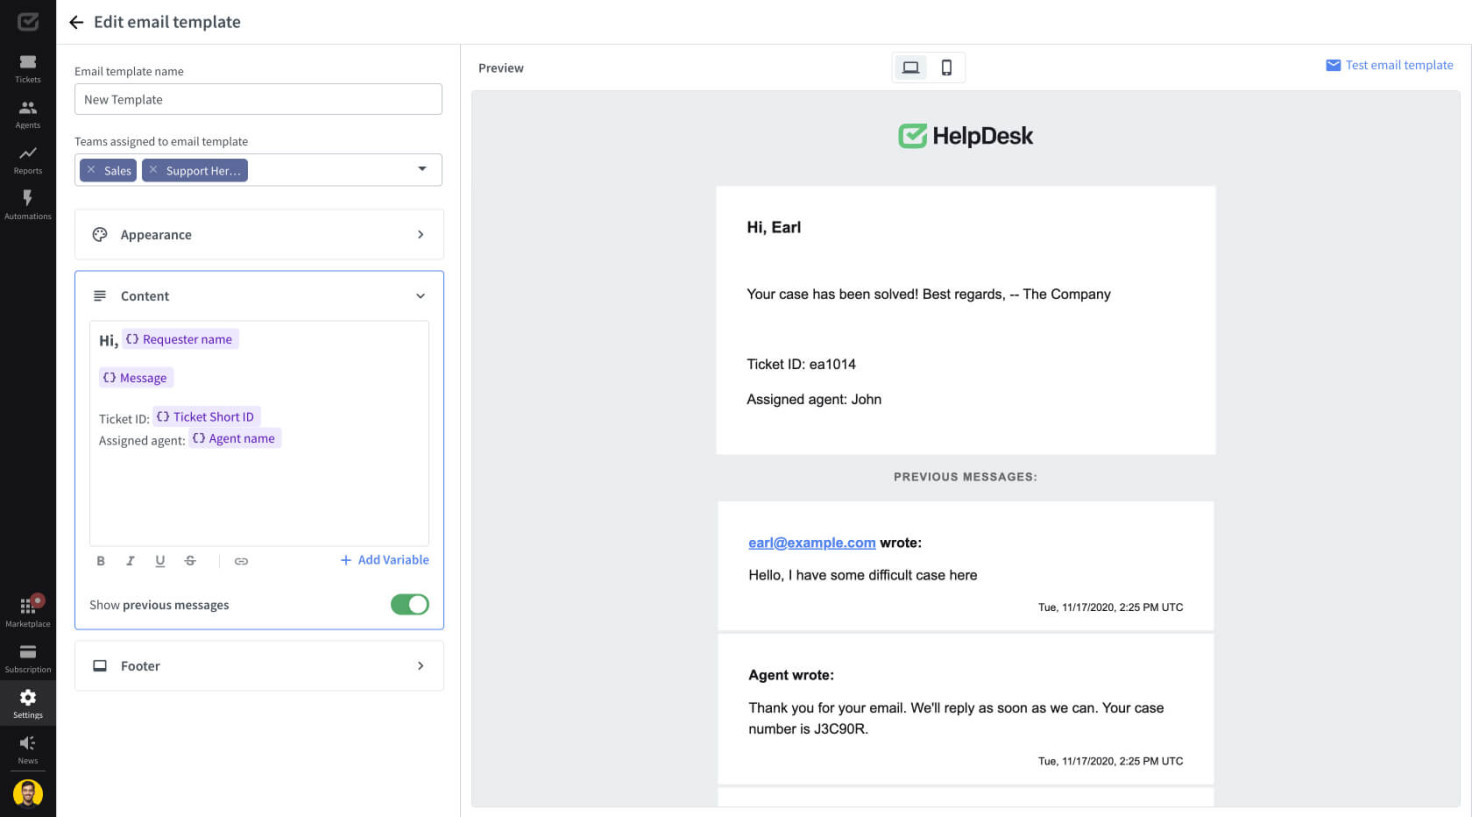
Here, you can choose from several variables to equip your message with the data you collected in the ticket details. Variables are described in more detail a little later in the “Adding variables in the visual builder and HTML editor” section.
You can also enable the “Show previous messages” switch if you want to include previous messages in the email thread when you next exchange messages with a recipient.
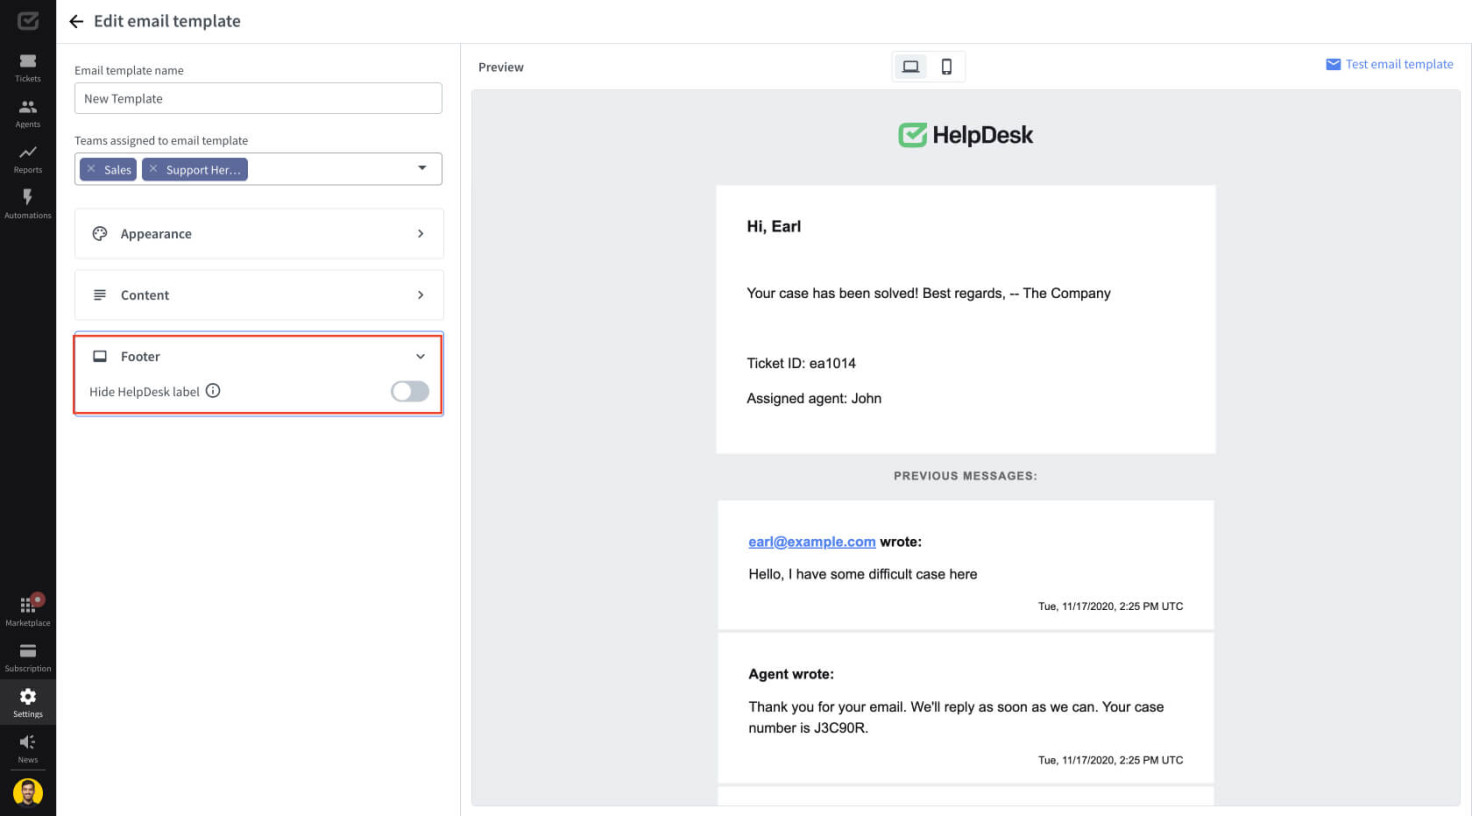
Finally, go to the “Footer” settings. Using the Enterprise solution, you can decide whether you want to send messages with a HelpDesk label.
2. Using the HTML editor
If you choose an HTML editor to create your email template, you’ll see a classic and well-known HTML editor that will allow you to create your own email template on the spot.

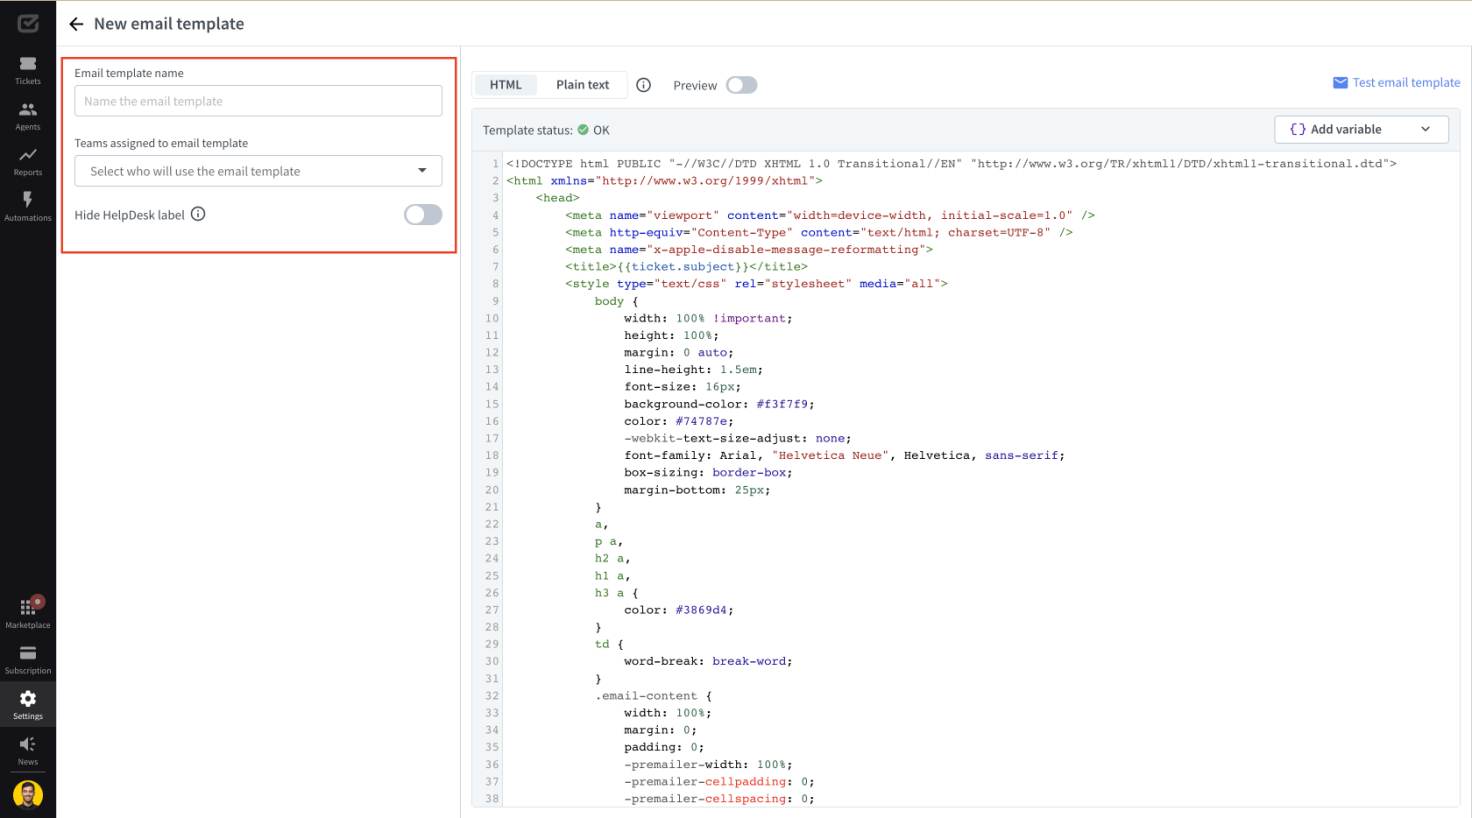
First, name your email template, for example, general topics, first-line support, second-line support, invoices, sales pitches, and so on.
Next, use the drop-down menu to select the teams that will use this email template during the replying process.
Finally, go to the “Footer” settings. Using the Enterprise solution, you can decide whether you want to send messages with a HelpDesk label.

When you’re done with this part, the left side of your editor should be filled with basic information and look like this:
Then, you must prepare the HTML and the plain text versions of your email template.

In the HTML section, edit the code using the built-in editor that can recognize the code syntax. Editing the plain text version is easier and requires only adding the “Message” variable.
Remember to use the required “Message” variable for both the HTML and the plain text version. See more information on the email template variables.
How to prepare an HTML version
The current implementation allows for the freedom to do so, but remember that preparing this type of template, especially in the HTML version, is a task for someone with the right skills. Ask a developer for help. You can try to edit the template provided by HelpDesk, but you’ll want to be aware of the changes being made at this stage.
For your convenience, we’ve prepared an example HTML template below.
Just copy and paste the code into the editor.
<!DOCTYPE html PUBLIC "-//W3C//DTD XHTML 1.0 Transitional//EN" "http://www.w3.org/TR/xhtml1/DTD/xhtml1-transitional.dtd">
<html xmlns="http://www.w3.org/1999/xhtml">
 <head>
   <meta name="viewport" content="width=device-width, initial-scale=1.0" />
   <meta http-equiv="Content-Type" content="text/html; charset=UTF-8" />
   <meta name="x-apple-disable-message-reformatting">
   <title>{{ticket.subject}}</title>
   <style type="text/css" rel="stylesheet" media="all">
   body {
     width: 100% !important;
     height: 100%;
     margin: 0 auto;
     line-height: 1.5em;
     font-size: 16px;
     background-color: #f3f7f9;
     color: #74787e;
     -webkit-text-size-adjust: none;
     font-family: Arial, "Helvetica Neue", Helvetica, sans-serif;
     box-sizing: border-box;
   }
   p a,
   h2 a,
   h1 a,
   h3 a {
     color: #3869d4;
   }
   td {
     word-break: break-word;
   }
   .email-content {
     width: 100%;
     margin: 0;
     padding: 0;
     -premailer-width: 100%;
     -premailer-cellpadding: 0;
     -premailer-cellspacing: 0;
   }
   /* Masthead ----------------------- */
   .email-masthead {
     padding: 25px 25px;
     text-align: center;
     background-color: #f3f7f9;
   }
   .email-masthead_name {
     font-face: Verdana;
     font-size: 22px;
     font-weight: bold;
     color: #000000;
     text-decoration: none;
   }
   /* Body ----------------------- */
   .email-body {
     width: 100%;
     margin: 0;
     padding: 0;
     -premailer-width: 100%;
     -premailer-cellpadding: 0;
     -premailer-cellspacing: 0;
     background-color: #f3f7f9;
   }
   .email-body_inner {
     width: 570px;
     margin: 0 auto;
     padding: 0;
     -premailer-width: 300px;
     -premailer-cellpadding: 0;
     -premailer-cellspacing: 0;
     background-color: #ffffff;
   }
   .email-body_inner table td {
     text-align: center;
     font-size: 14px;
     white-space: nowrap;
   }
   .history-email {
     border-bottom: 1px #ccc solid;
   }
   .agent-email {
     background-color: #eafaf1 !important;
   }
   .header {
     width: 100%;
     margin: 0;
     padding: 1em 0;
   }
   .header p {
     width: 570px;
     -premailer-width: 570px;
     margin: 0 auto;
     text-align: center;
     text-transform: uppercase;
     font-size: 80%;
     font-weight: 700;
     color: #666;
     letter-spacing: 1px;
   }
   .content-cell {
     padding: 35px;
   }
   h1 {
     margin-top: 0;
     color: #000000;
     font-size: 18px;
     font-weight: bold;
     text-align: left;
   }
   h2 {
     margin-top: 0;
     color: #000;
     font-size: 16px;
     font-weight: bold;
     text-align: left;
   }
   h4 {
     font-size: 12px;
     text-transform: uppercase;
     font-weight: 400;
     color: #4d4d4d;
     margin: 0;
   }
   .attachments-list {
     margin: 0;
     padding: 0;
     list-style: none;
   }
   .attachments-list li {
     font-size: 12px;
     padding: 0;
     margin: 0;
   }
   p {
     margin-top: 0;
     color: #000000;
     font-size: 16px;
     line-height: 1.5em;
     text-align: left;
   }
   p.center {
     text-align: center;
   }
   .history-date {
     font-size: 75%;
     margin-bottom: -1.5em;
     text-align: right;
     color: #666;
   }
   @media (max-width: 570px) {
     .email-body_inner {
       width: 300px;
       margin: 0 auto;
       padding: 0;
       -premailer-width: 300px;
       -premailer-cellpadding: 0;
       -premailer-cellspacing: 0;
       background-color: #ffffff;
     }
     .header p {
       width: 300px;
       margin: 0 auto;
       padding: 0;
       -premailer-width: 300px;
       -premailer-cellpadding: 0;
       -premailer-cellspacing: 0;
     }
     p {
       margin-top: 0;
       color: #000000;
       font-size: 14px;
       line-height: 1.5em;
       text-align: left;
     }
     body {
       font-size: 14px;
     }
   }
   </style>
 </head>
 <body>
   <table class="email-wrapper" width="100%" cellpadding="0" cellspacing="0">
     <tr>
       <td align="center">
         <table
           class="email-content"
           width="100%"
           cellpadding="0"
           cellspacing="0"
         >
           <tr>
             <td class="email-masthead">
               <a href="https://helpdesk.com/" class="email-masthead_name">
                 <img
                   src="https://cdn.helpdesk-static.com/mailing/logo.png"
                   width="192"
                   height="30"
                   alt="HelpDesk"
                 />
               </a>
             </td>
           </tr>
           <tr>
             <td
               class="email-body"
               width="100%"
               cellpadding="0"
               cellspacing="0"
             >
               <table
                 class="email-body_inner"
                 align="center"
                 width="570"
                 cellpadding="0"
                 cellspacing="0"
               >
                 <tr>
                   <td class="content-cell">
                     <h1>Hi, {{ticket.requesterName}}!</h1>
                     <p>{{{message.html}}}</p>
                   </td>
                 </tr>
               </table>
             </td>
           </tr>
           {{#events.0}}
           <tr>
             <td class="header">
               <p>Previous messages:</p>
             </td>
           </tr>
           {{/events.0}}
           {{#events}}
           <tr>
             <td class="email-body">
               <table class="email-body_inner {{#author.isAgent}}agent-email{{/author.isAgent}} {{#author.isRule}}agent-email{{/author.isRule}} history-email">
                 <tr>
                   <td class="content-cell">
                     {{#author.isRule}}
                     <h2>Agent wrote:</h2>
                     {{/author.isRule}}
                     {{#author.isAgent}}
                     <h2>{{#author.name}}{{.}}{{/author.name}}{{^author.name}}{{author.email}}{{/author.name}} wrote:</h2>
                     {{/author.isAgent}}
                     {{#author.isClient}}
                     <h2>{{author.email}} wrote:</h2>
                     {{/author.isClient}}
                     <p>{{{message.textBr}}}</p>
                     {{#attachments.0}}
                     <h4>Attachments</h4>
                     <ul class="attachments-list">
                     {{/attachments.0}}
                       {{#attachments}}
                       <li><a href="{{url}}">{{name}}</a></li>
                       {{/attachments}}
                     {{#attachments.0}}
                     </ul>
                     {{/attachments.0}}
                     <p class="history-date">{{date.utcUS}}</p>
                   </td>
                 </tr>
               </table>
             </td>
           </tr>
           {{/events}}
         </table>
       </td>
     </tr>
   </table>
 </body>
</html>
Using this template, your conversation history in the email will look like this:

Adding variables to the email template
There are several variables available to personalize your emails. In addition to the required “Message” variable mentioned above, there are several others.
Click on the “Add variable” drop-down menu to see the list of available variables.


Available email template variables
-
Requester name - displays the name of the requester.
-
Ticket ID - displays the ticket identification code.
-
Agent name - displays the name of the agent assigned to the ticket.
-
Subject - displays the subject of the ticket.
-
Ticket history - displays conversation history in the email.
-
People in the loop - displays the people who are added to the message as recipients.
To paste the variable, select it from the list, and it’ll appear at your cursor position or at the end of the template when the editor isn’t active.
Ticket history variable in the email thread
Use the “Ticket history” variable to keep the history of your conversation in the email thread. Also, this option is useful when adding new people to the loop to see previous messages and get the right context.
You can customize your email template with the ticket history variable to your needs. Differentiate each part related to the recipient, agent, or automated message, and give your email template your style.
Check out how your customers see your messages.
Saving the email template
Saving changes to the template is very important. After confirming the saved changes, they will become active, and the customer will see the new template. To confirm the changes, click “Create email template” on the bar that appears at the bottom of the screen.
Click “Cancel” to discard the changes and return to the previous template.

The “Email template status” function informs us whether the template is complete and checks it on an ongoing basis. When it shows a status other than “OK ✅,” it means that you have to add the appropriate variable to the template.
Currently, the required variable is “Message” for HTML and plain text.

What will your template look like?
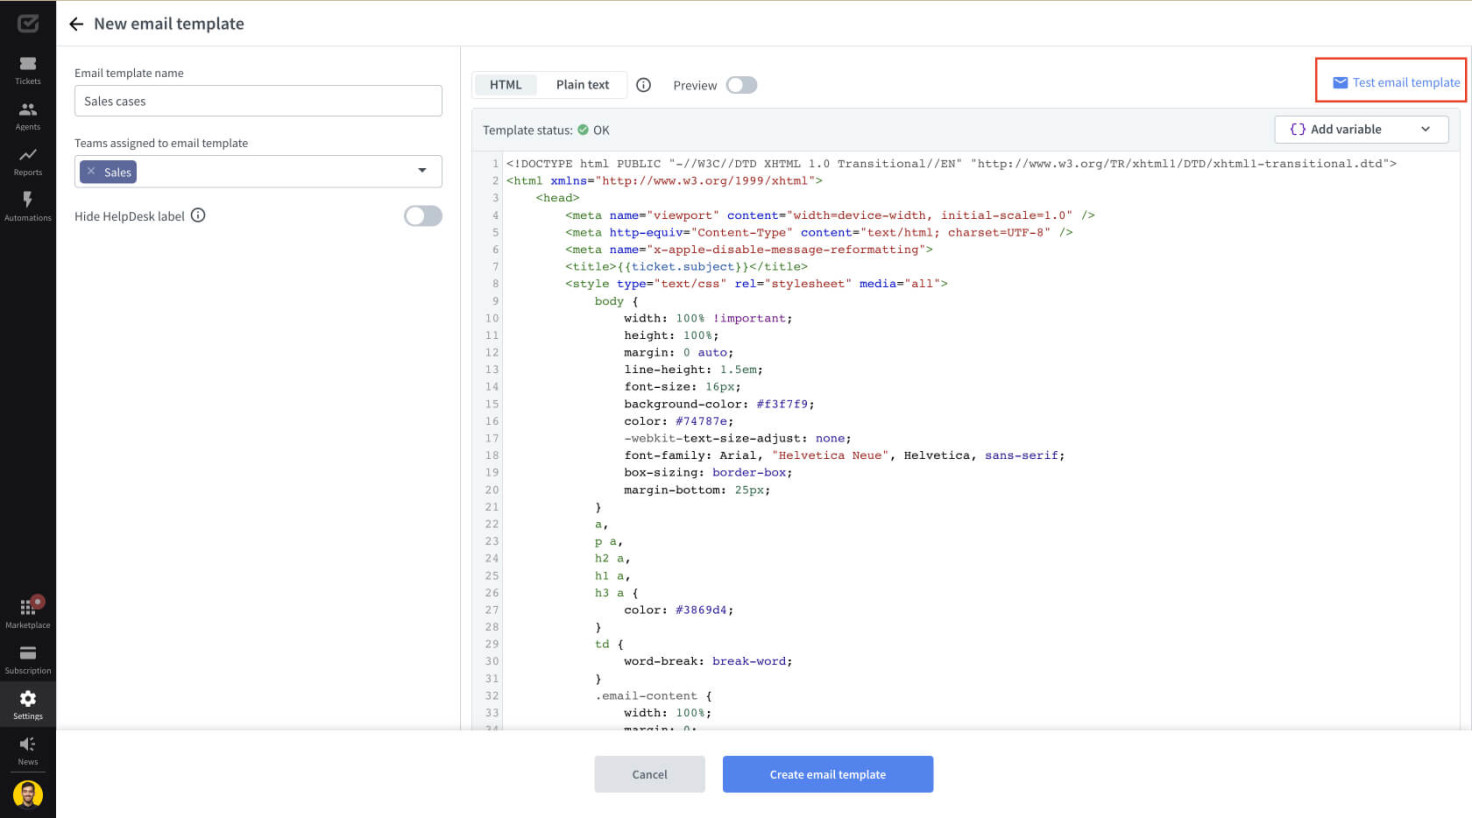
Once you have prepared an HTML and text version of your template, you can test it and see how it looks in two ways:
-
using the email template preview
-
or sending a test email template to a specific email address
Using the email template preview
You can see your changes to the email template in real time on the right side in the preview. Use the switch to see the final email template in the desktop and mobile versions.

Using the email template preview in the HTML editor
Use the “Preview” switch to see the look of the final email template in the desktop and mobile versions. You can also view the HTML version and plain text there.
It’s worth mentioning that browsers may sometimes display the content of this type of template differently. Because of that, it’s worth using the email template testing option.


Sending a test email template
You can also send a test to specific email addresses to see the final look of your email template in the inbox.
To test the template in the mail provider inbox, you need to provide the email addresses to send the test to. The ability to add multiple emails after the comma is an advantage of this test.

Changing the time stamp (time zones) in the ticket history
If you want to send a conversation history with a time zone other than UTC, edit your email template and change the date.utcUS to date.ownerUS. The UTC time zone will change to the time zone of the person who created the HelpDesk license by automatically retrieving this information from their web browser.
If you have questions, use the chat and ask us.
